How to set up a Google Ads campaign: a step-by-step guide 2025
![]() Ina Rudziankova for Academy
Ina Rudziankova for Academy
Step 1: Creating a campaign
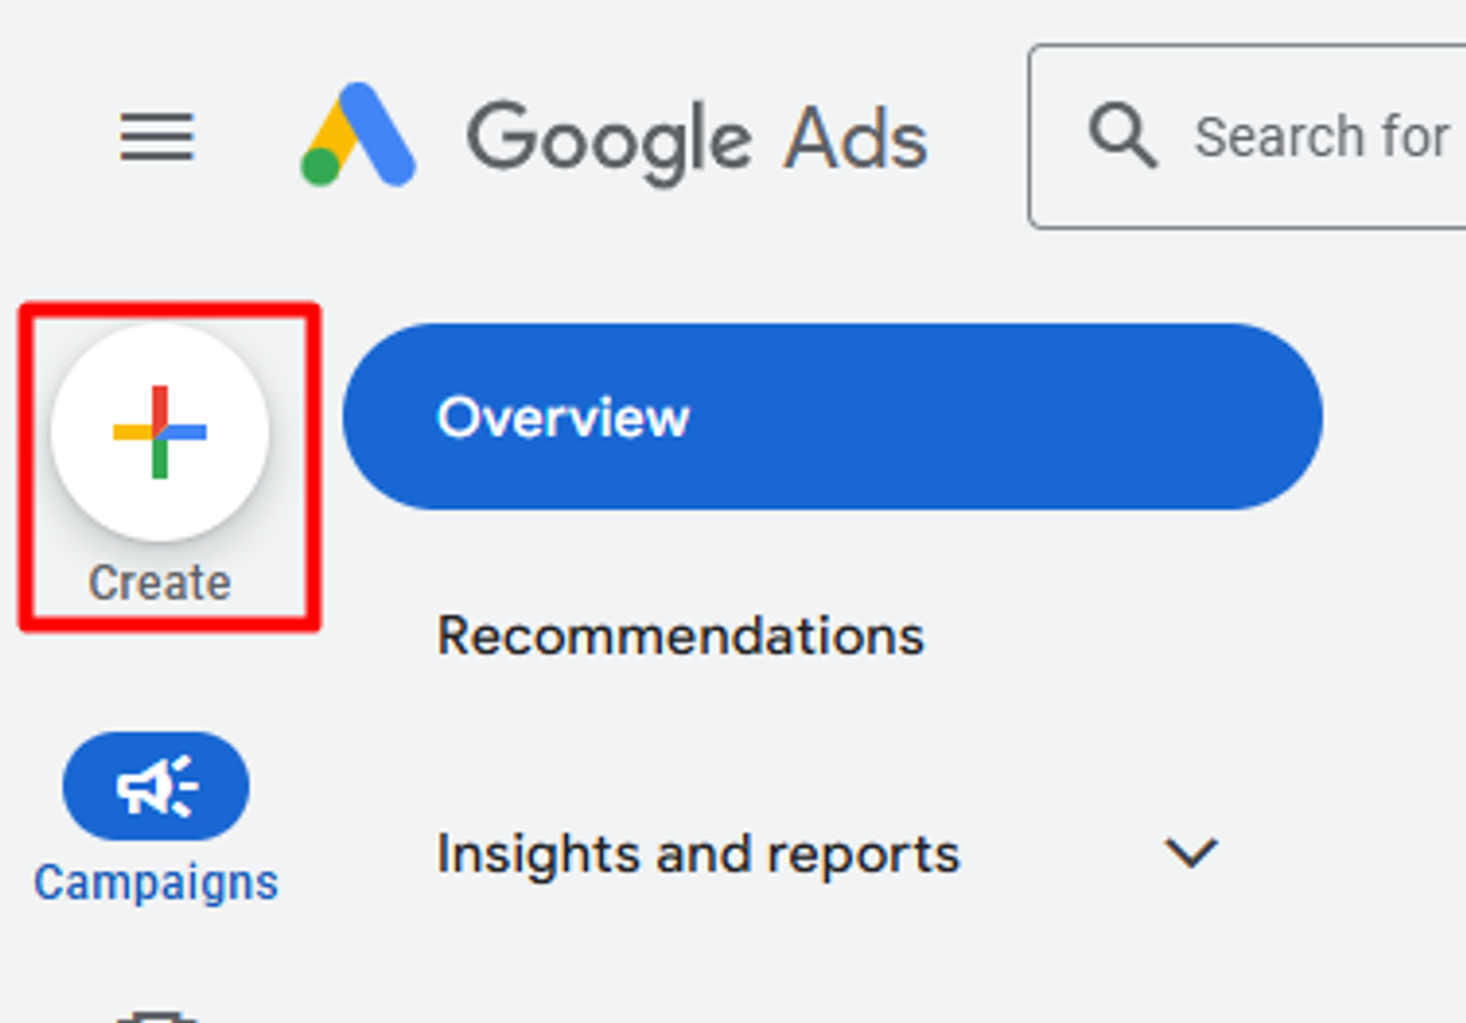
1. Sign in to your Google Ads account.
2. In the left-hand menu, click New Campaign.
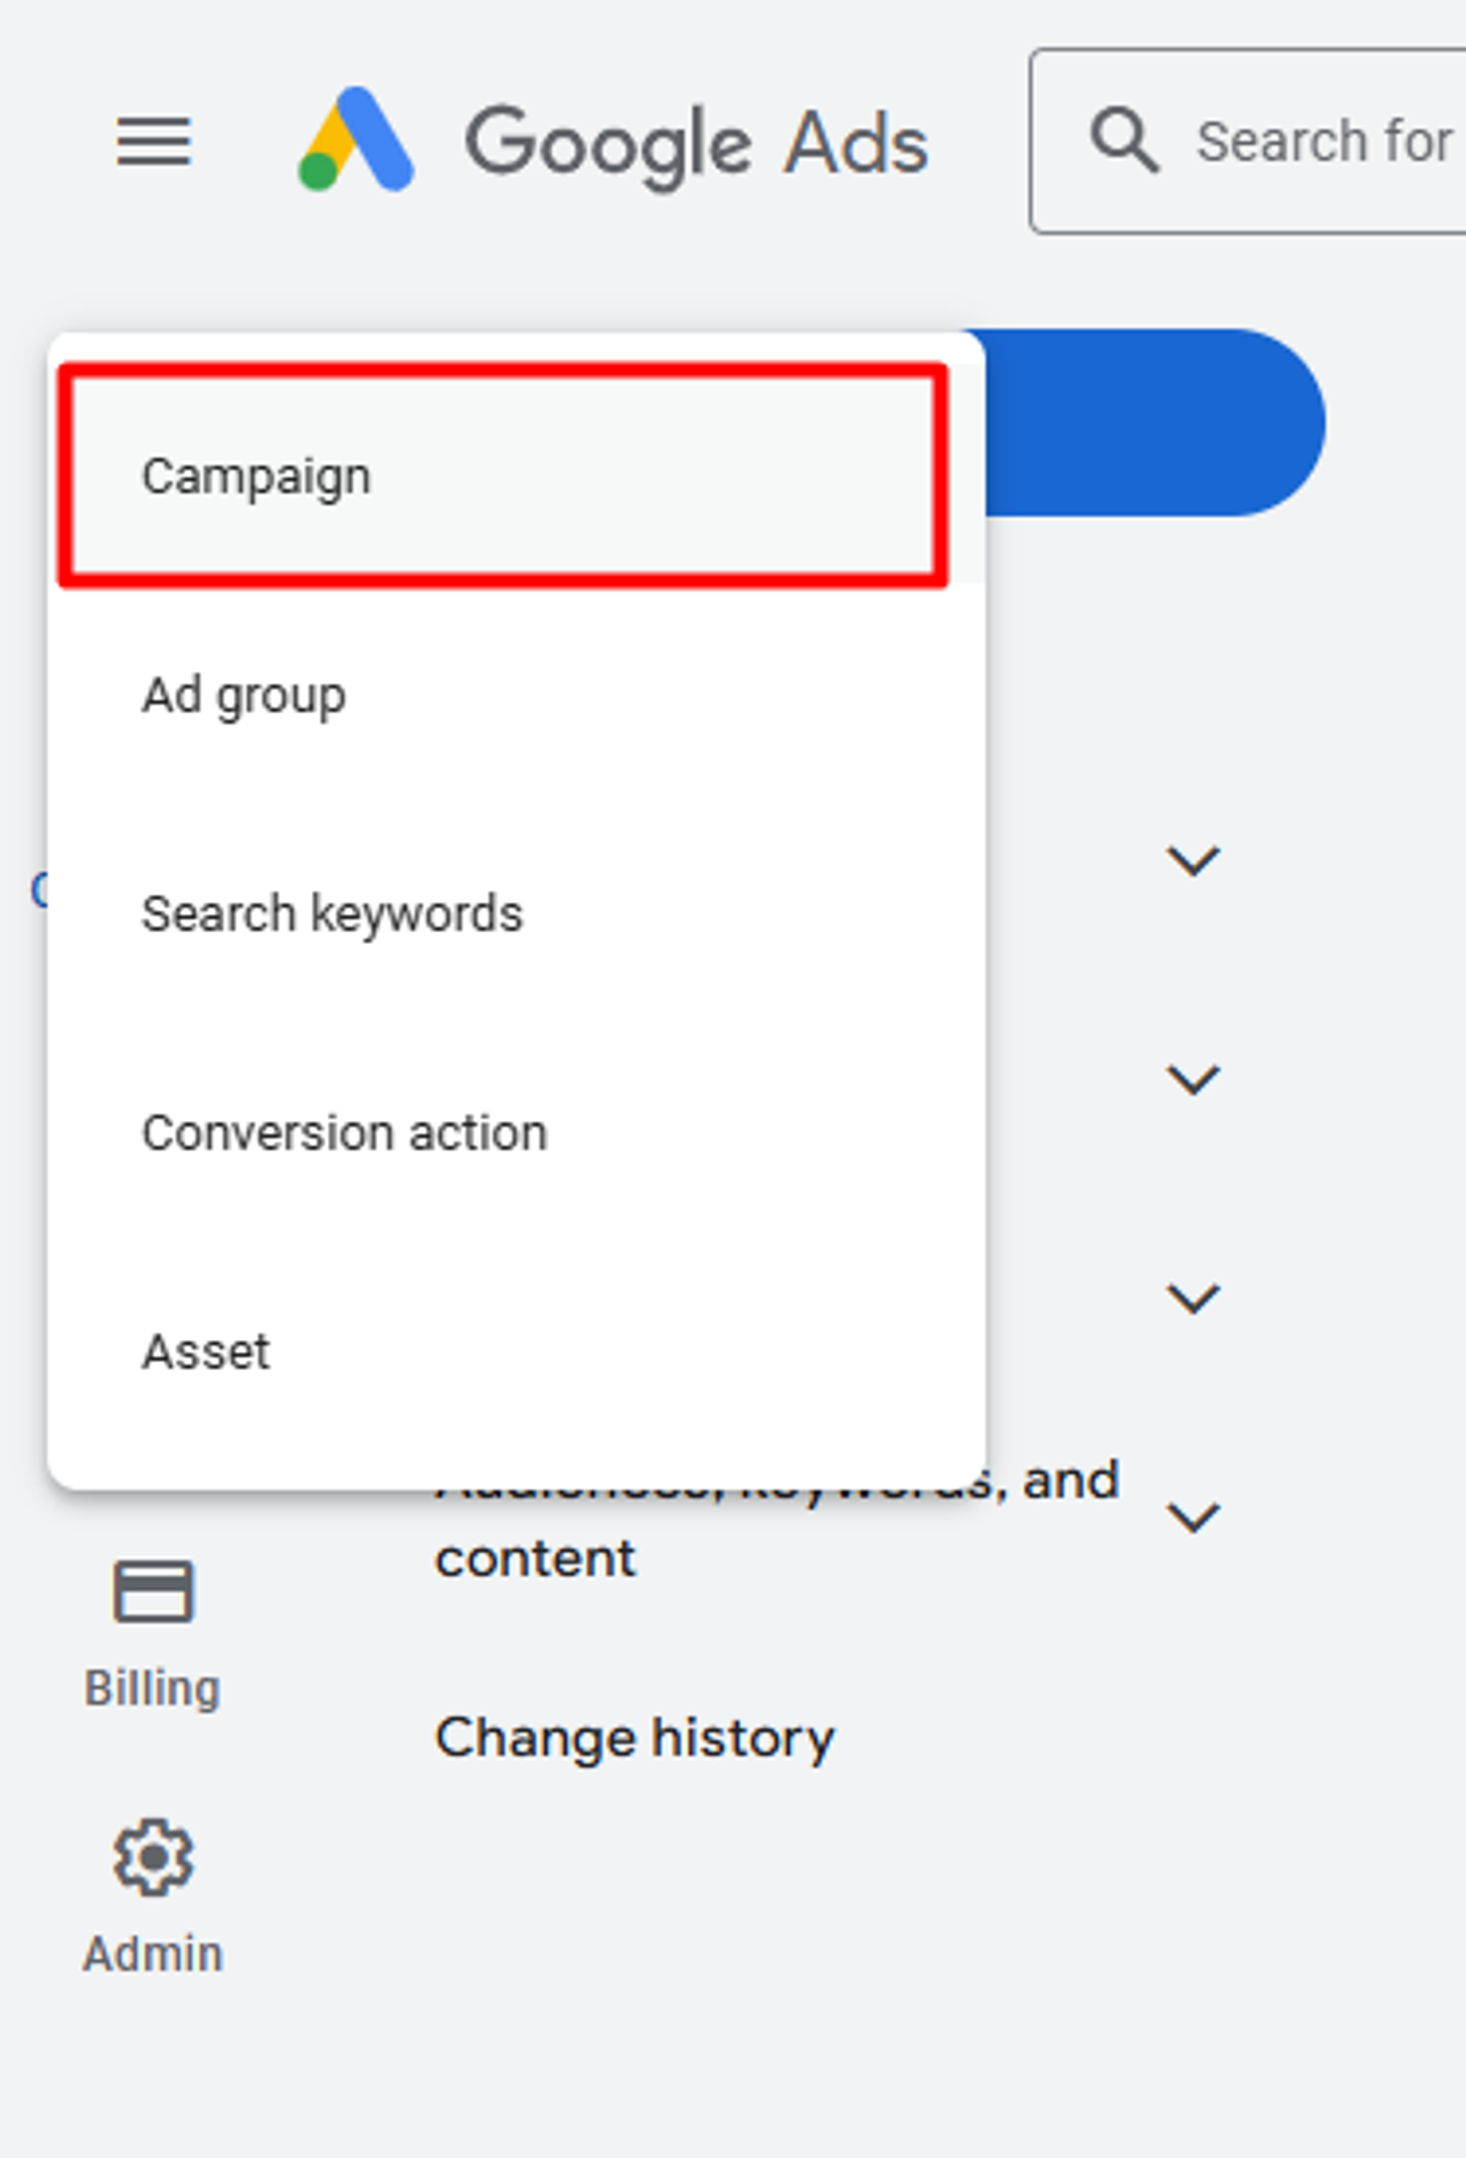
3. A menu will appear, prompting you to choose what you want to create. Select Campaign to begin.
Step 2: Choosing your campaign goal
1. Google Ads will ask you to select a goal that aligns with your business objectives. Here are the available options:
- Sales – drive online, in-app, phone, or in-store sales.
- Leads – generate new potential customers.
- Website traffic – attract more visitors to your website.
- App promotion – increase app downloads and engagement.
- Brand awareness and reach – maximize exposure to a broad audience.
- Store visits and promotions – encourage foot traffic to physical locations.
- Create a campaign without a goal – for a more flexible setup.
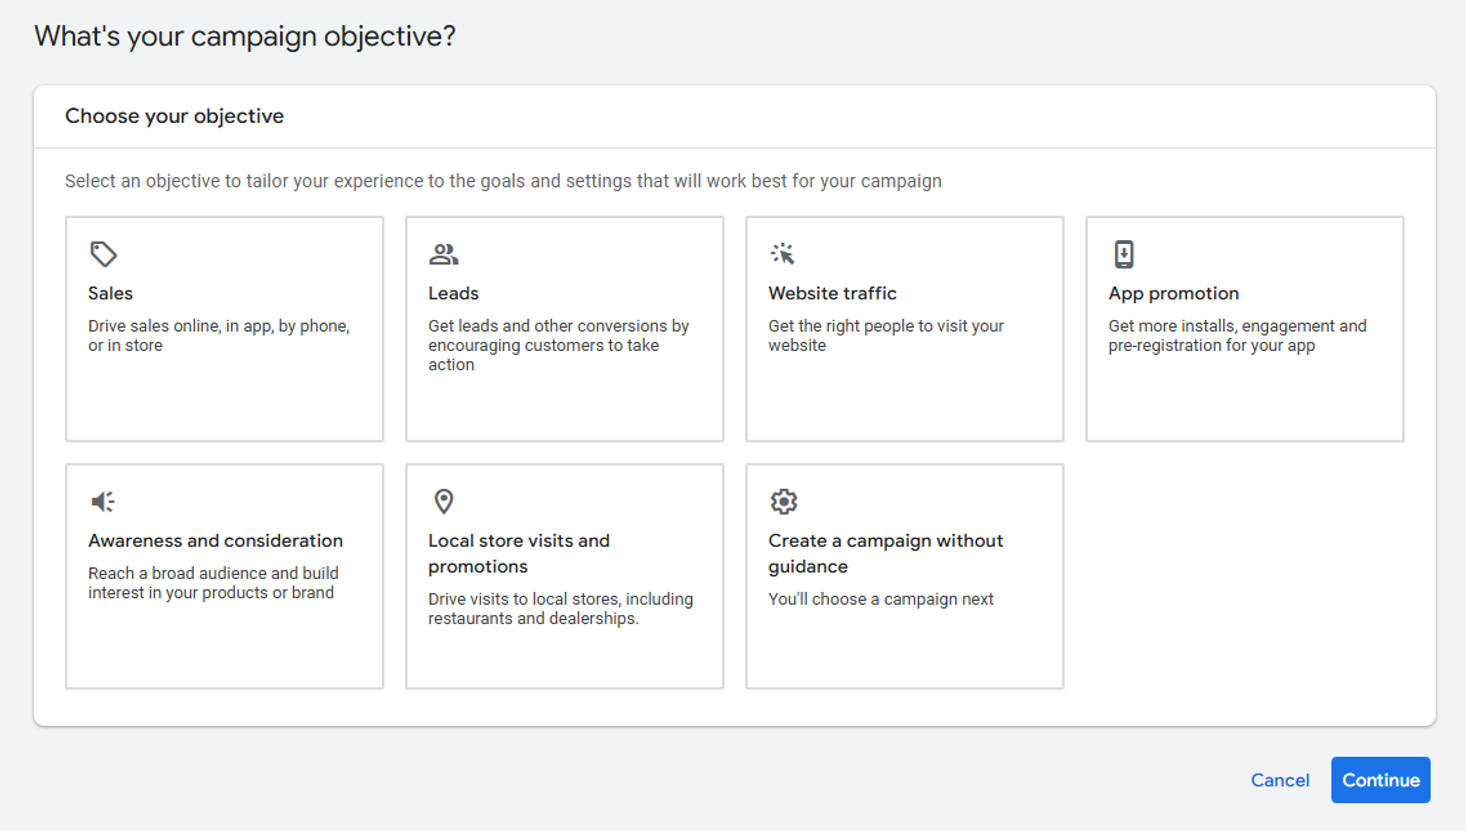
Select the goal that best fits your needs. For example, if you want to drive more visitors to your site, choose Website traffic.
Step 3: Selecting your campaign type
Once you choose your goal, you will need to select a campaign type:
- Search – text ads that appear on Google search results.
- Performance Max – ads that run across all Google platforms, including YouTube, Gmail, and Display Network.
- Display – visual ads shown on Google’s partner websites.
- Shopping – product listings that appear in Google Shopping results.
- Video – video ads displayed on YouTube shorts.
- Demand Gen – visually engaging ads designed to generate interest.
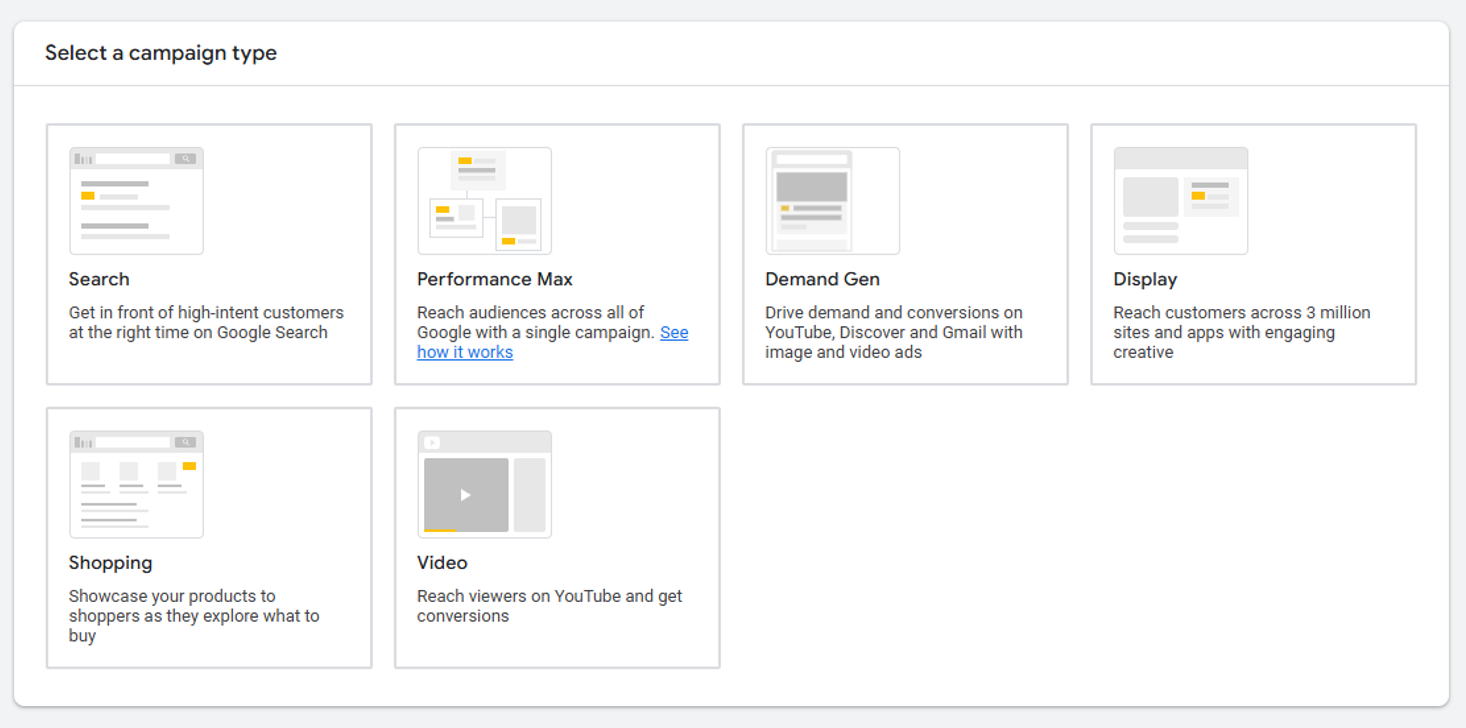
For a campaign focused on Website traffic, the best choice is typically Search ads.
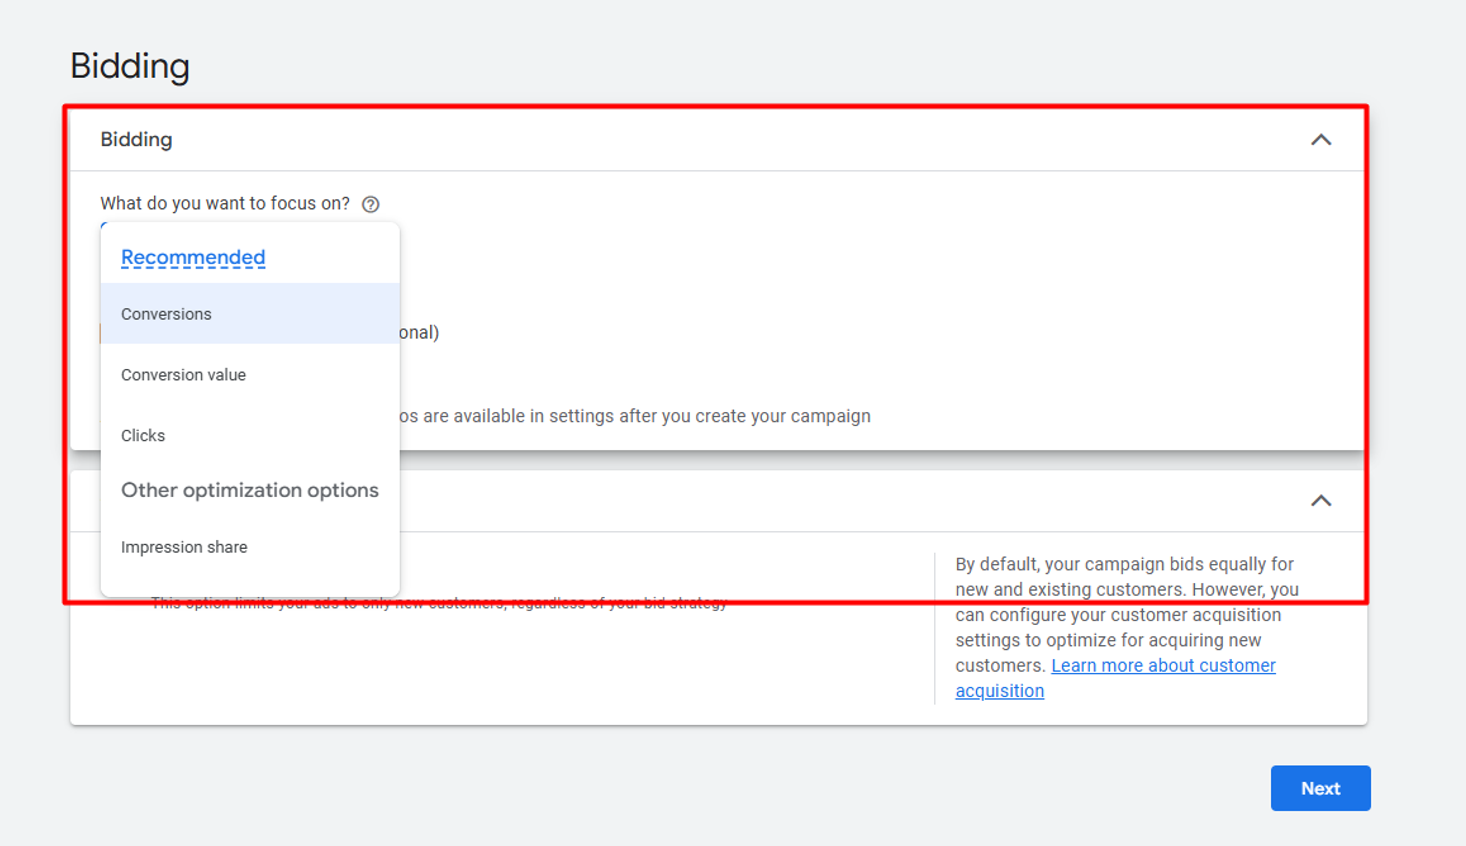
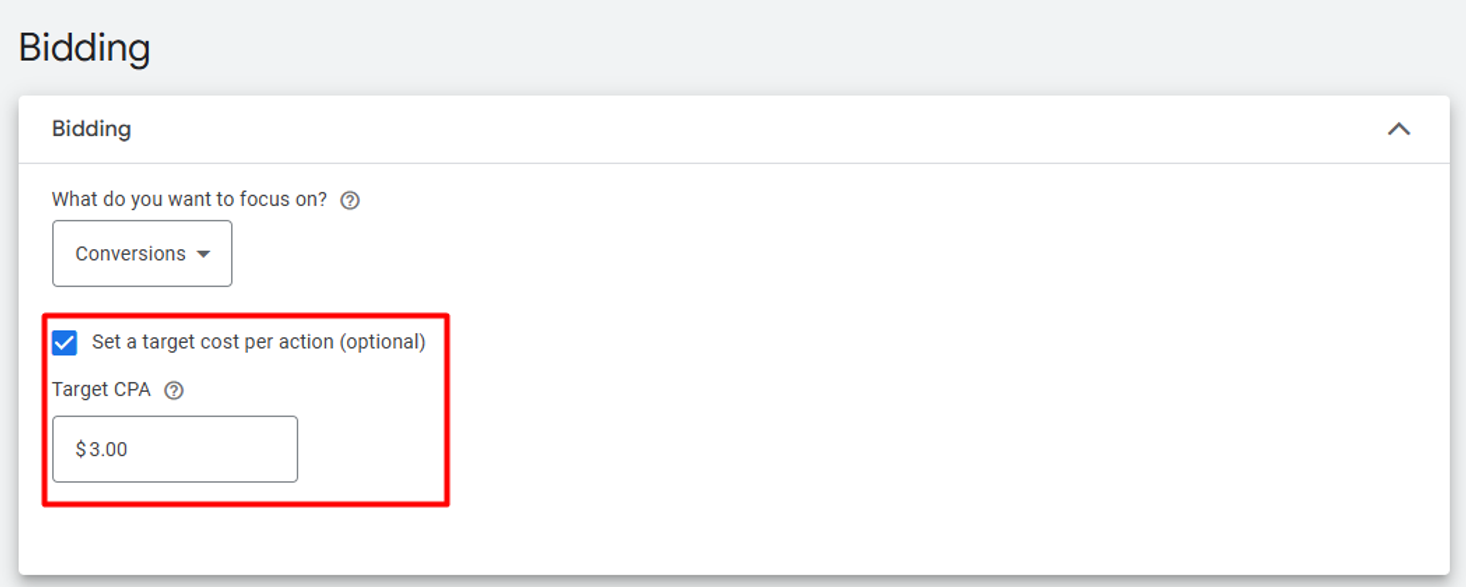
Step 4: Setting your bidding strategy and budget
1. In the Bidding section, choose how you want to pay for your ads. The main options are:
- Conversions – bid for actions like purchases or sign-ups.
- Clicks – pay when someone clicks on your ad.
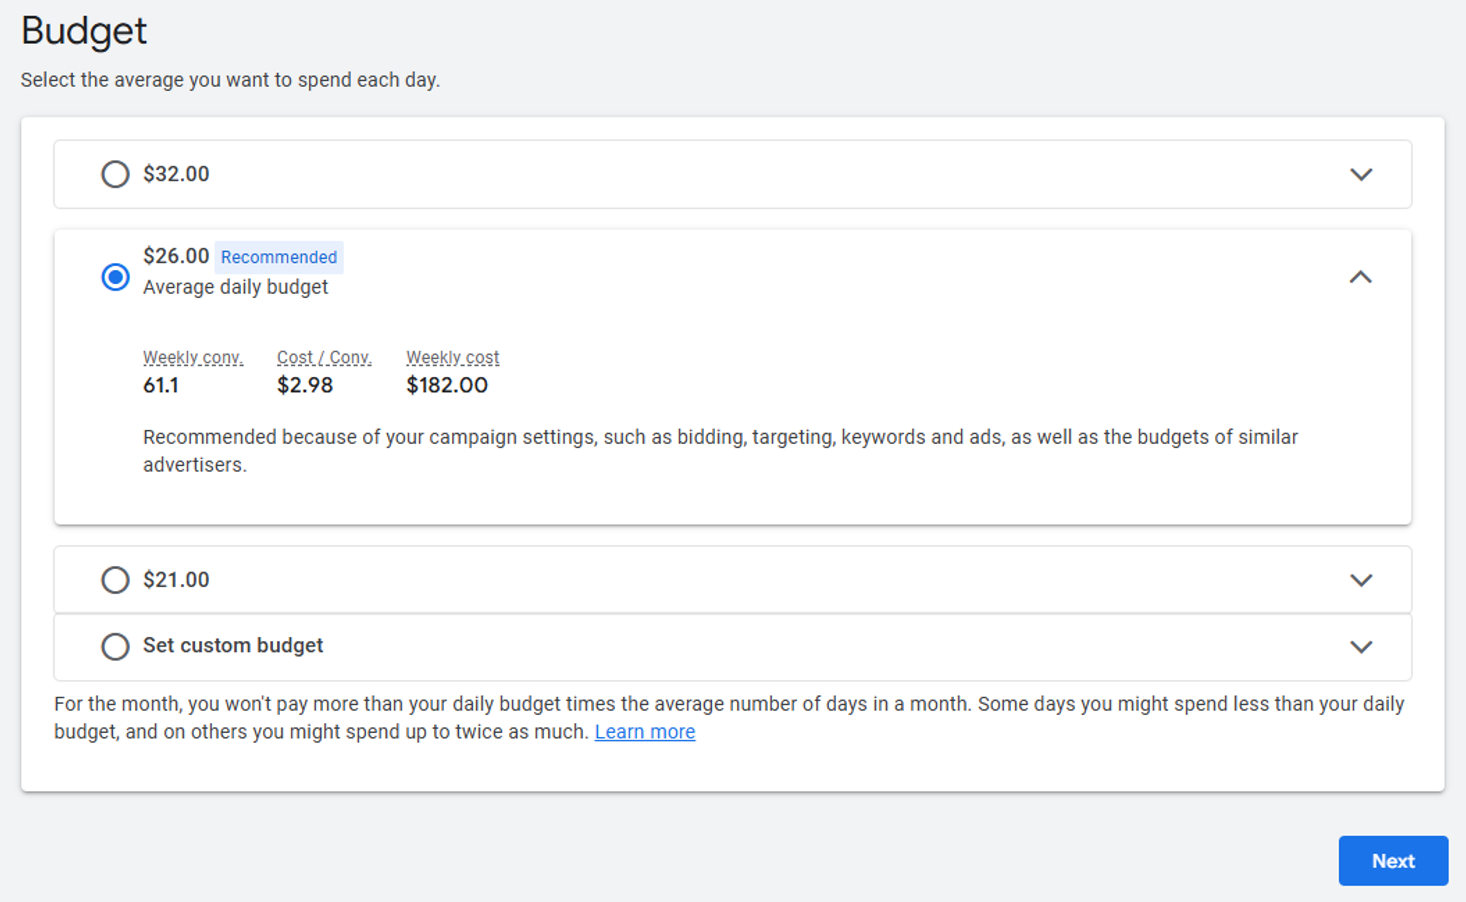
2. Set your average daily budget – this is the amount you’re willing to spend each day on your campaign. Google will suggest a budget, but you can also enter a custom amount.
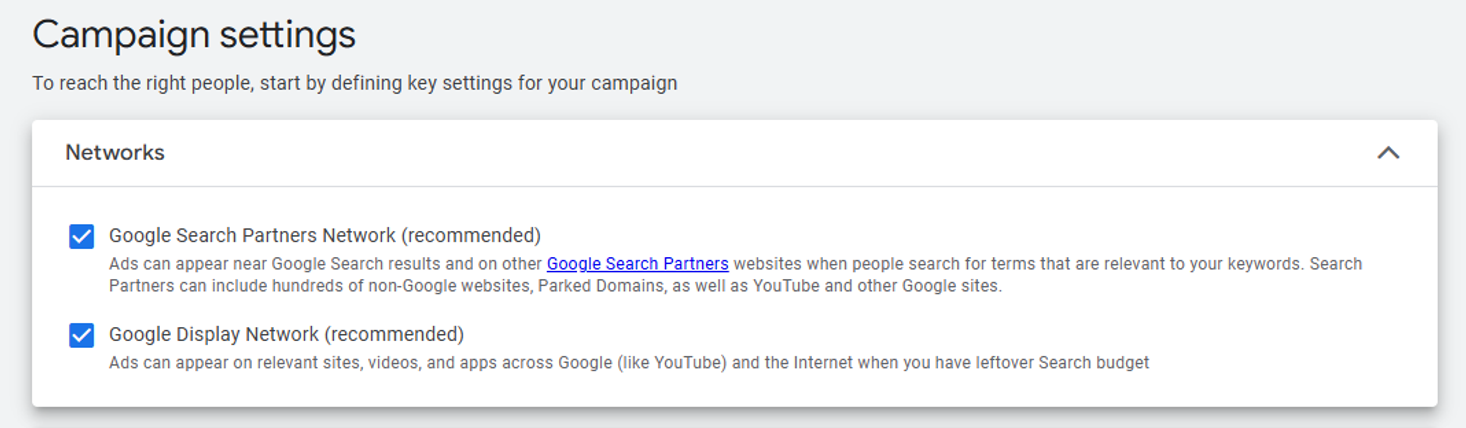
Step 5: Choosing networks, locations, and languages
1. Networks – decide where your ads will appear:
- Google Search Network – ads appear in Google search results.
- Google Display Network – extends your ads to partner websites.
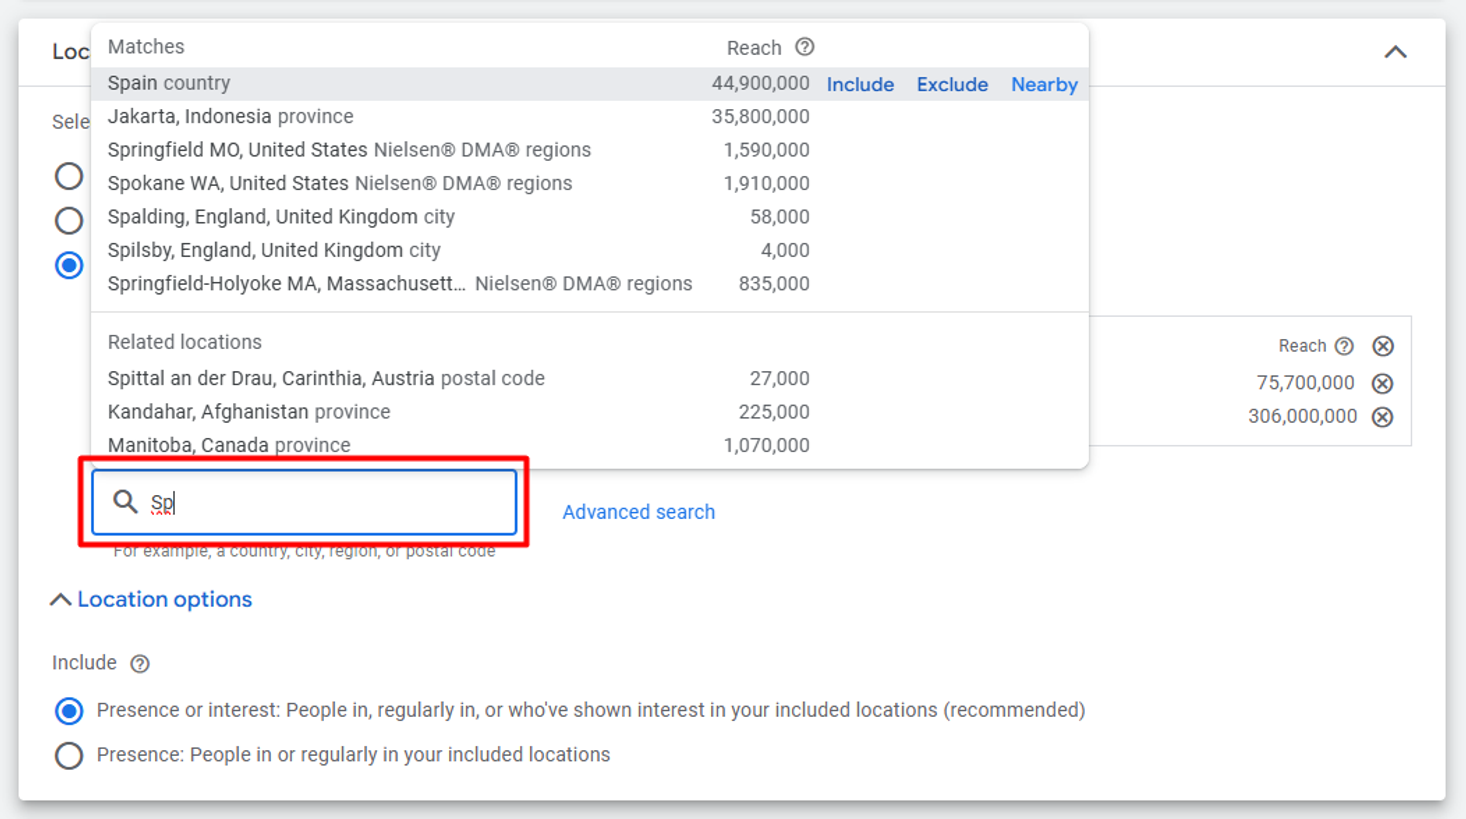
2. Locations – select where your ads will be shown:
- Target all countries, specific regions, or individual cities.
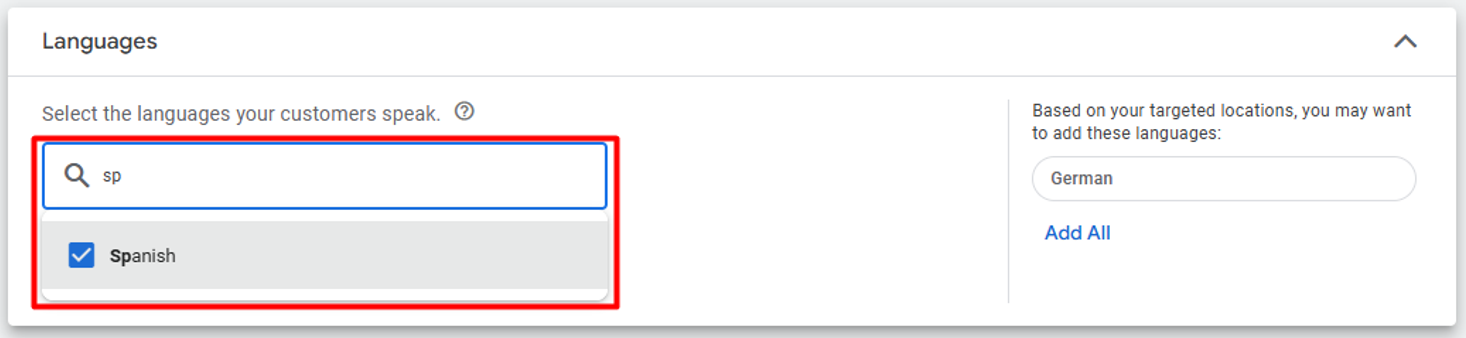
3. Languages – choose the languages your target audience speaks.
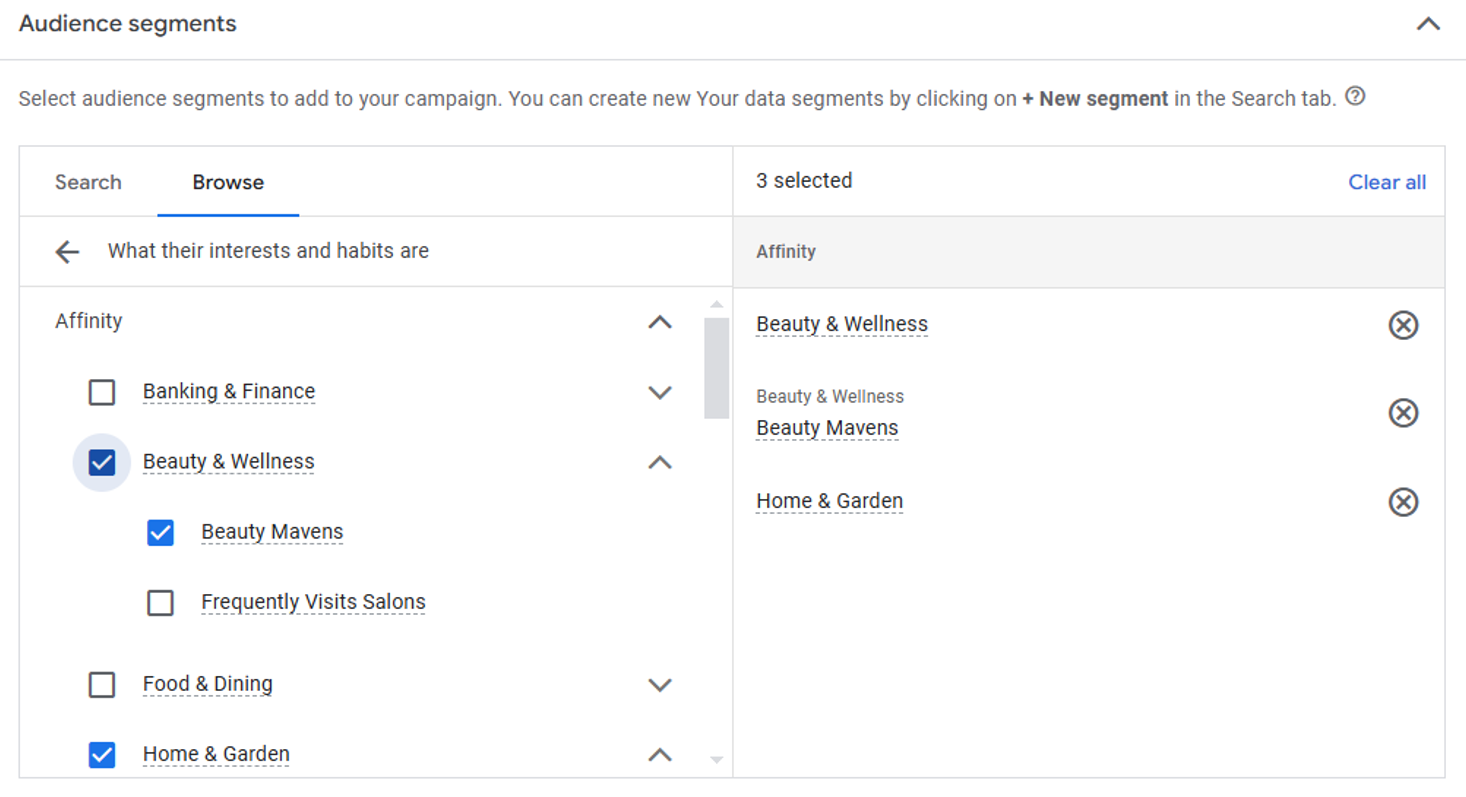
Step 6: Defining audience segments
Audience segments help target the right users for your ads. In Google Ads, you can refine your audience based on interests, behaviors, demographics, and past interactions with your business.
1. Choosing audience segments
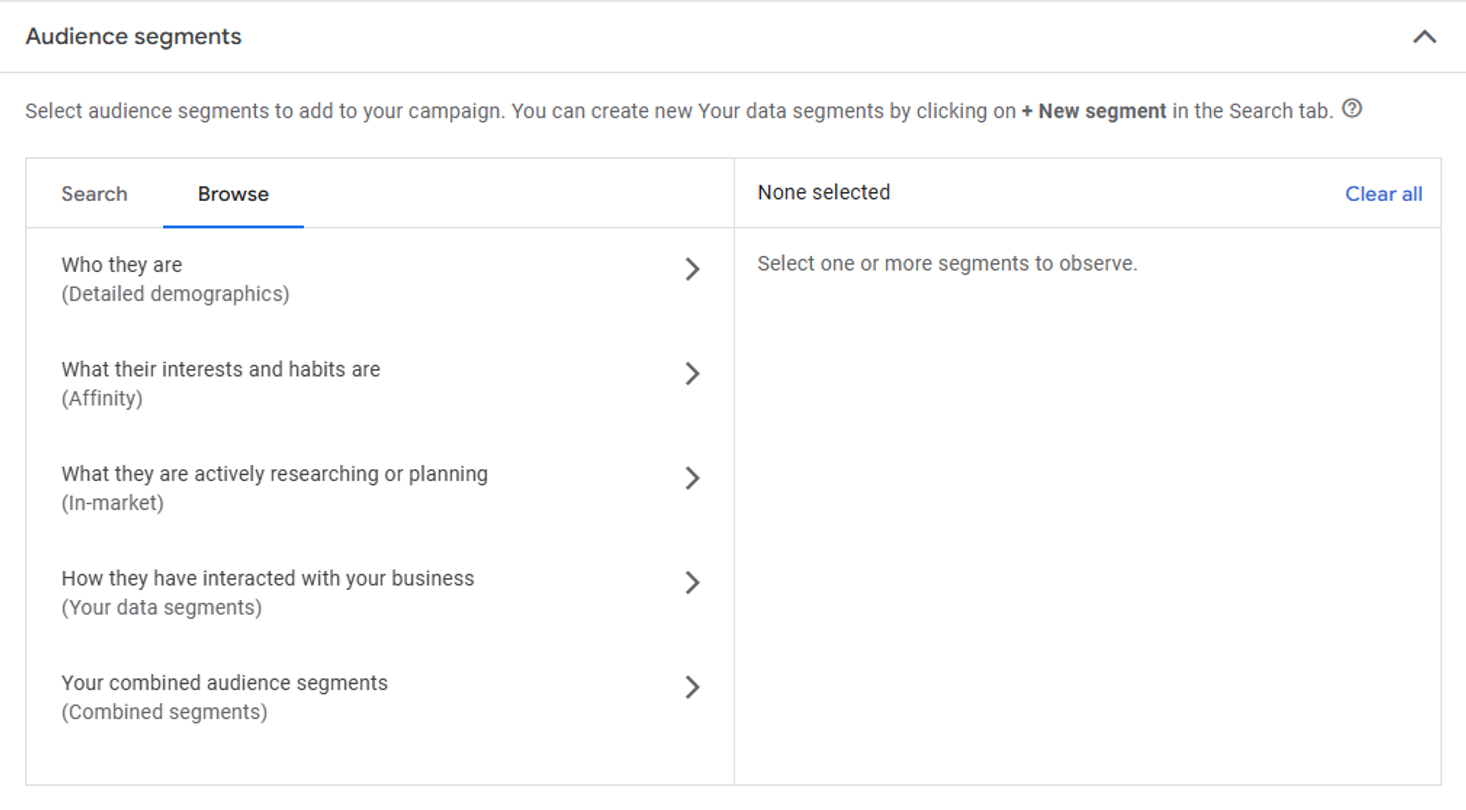
During campaign setup, click Audiences to define who will see your ads. You can:
- Search for specific audiences based on keywords or interests.
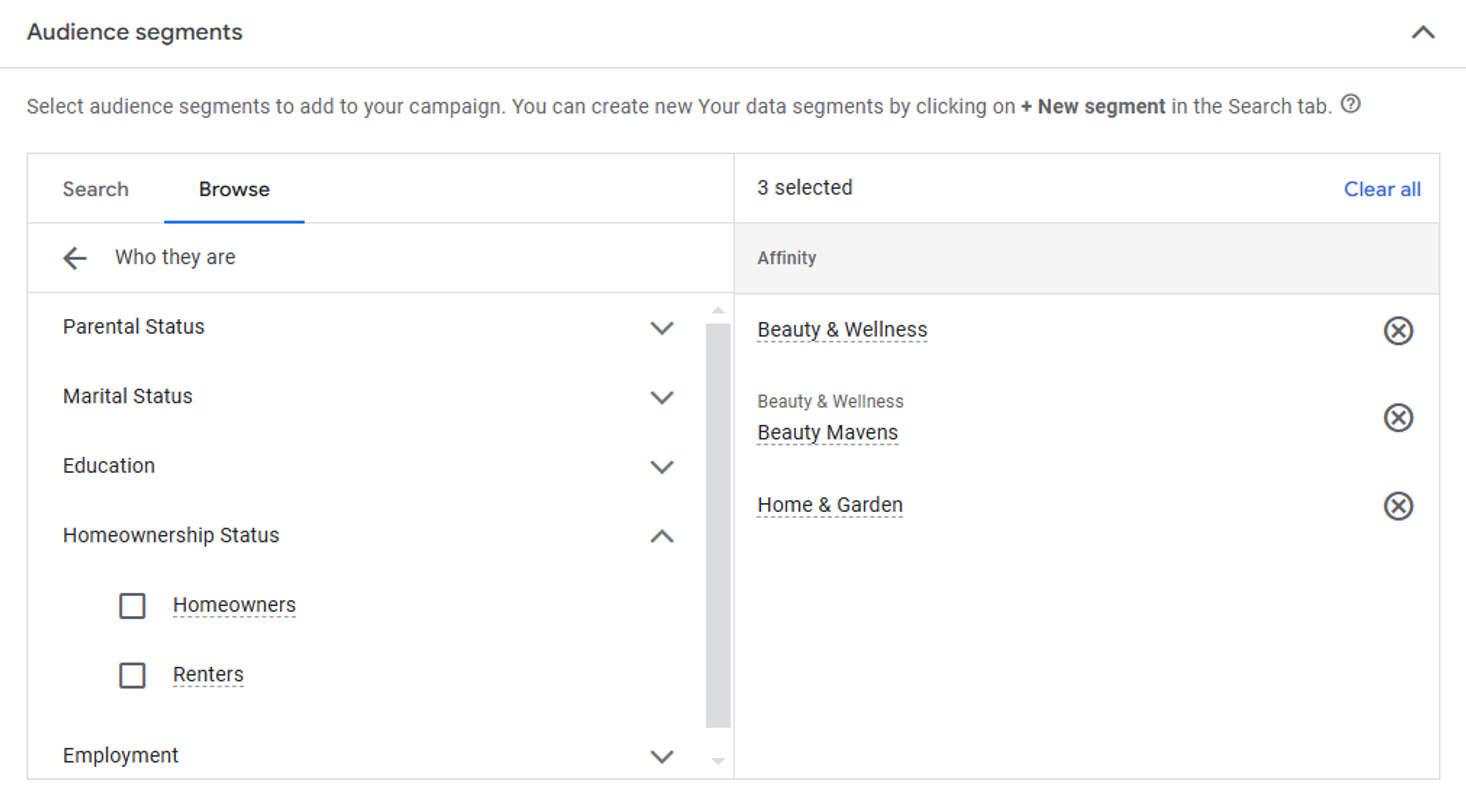
- Browse predefined categories, including:
- Who they are – demographic details like marital status, parental status, education, and employment.
- Their interests and habits – lifestyle categories such as finance, home & garden, food & beverages, or beauty & wellness.
- What they are actively researching or planning to buy – segments for users interested in specific products or services.
- How they have interacted with your business – includes website visitors, app users, or past customers.
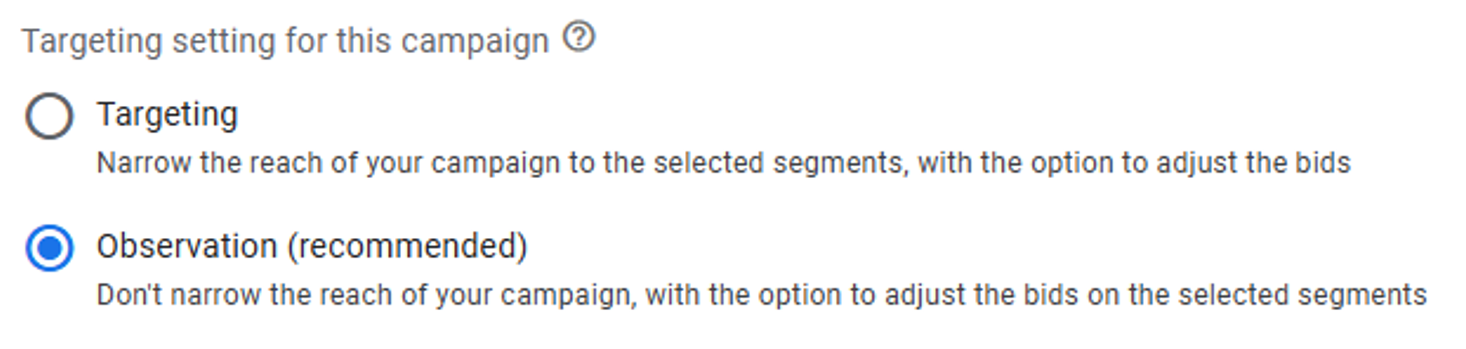
2. Selecting targeting or observation mode
Once you've chosen your audience, select how to apply it:
- Targeting – limits your campaign to the selected audience only. This ensures ads are shown only to users matching your criteria.
- Observation (recommended) – keeps the campaign broad but lets you track how different audience segments respond, allowing for bid adjustments.
3. Targeting interests and habits
You can refine your audience based on interests. For example, if your business is in the finance sector, select Banking & Financial Services. Other popular categories include Home & Garden, Beauty & Wellness, and Shopping Enthusiasts
4. Demographic targeting
If your campaign is aimed at a specific demographic, select relevant filters, such as:
- Parental status
- Marital status
- Education level
- Household income
- Employment status
This helps narrow your audience and improve conversion rates.
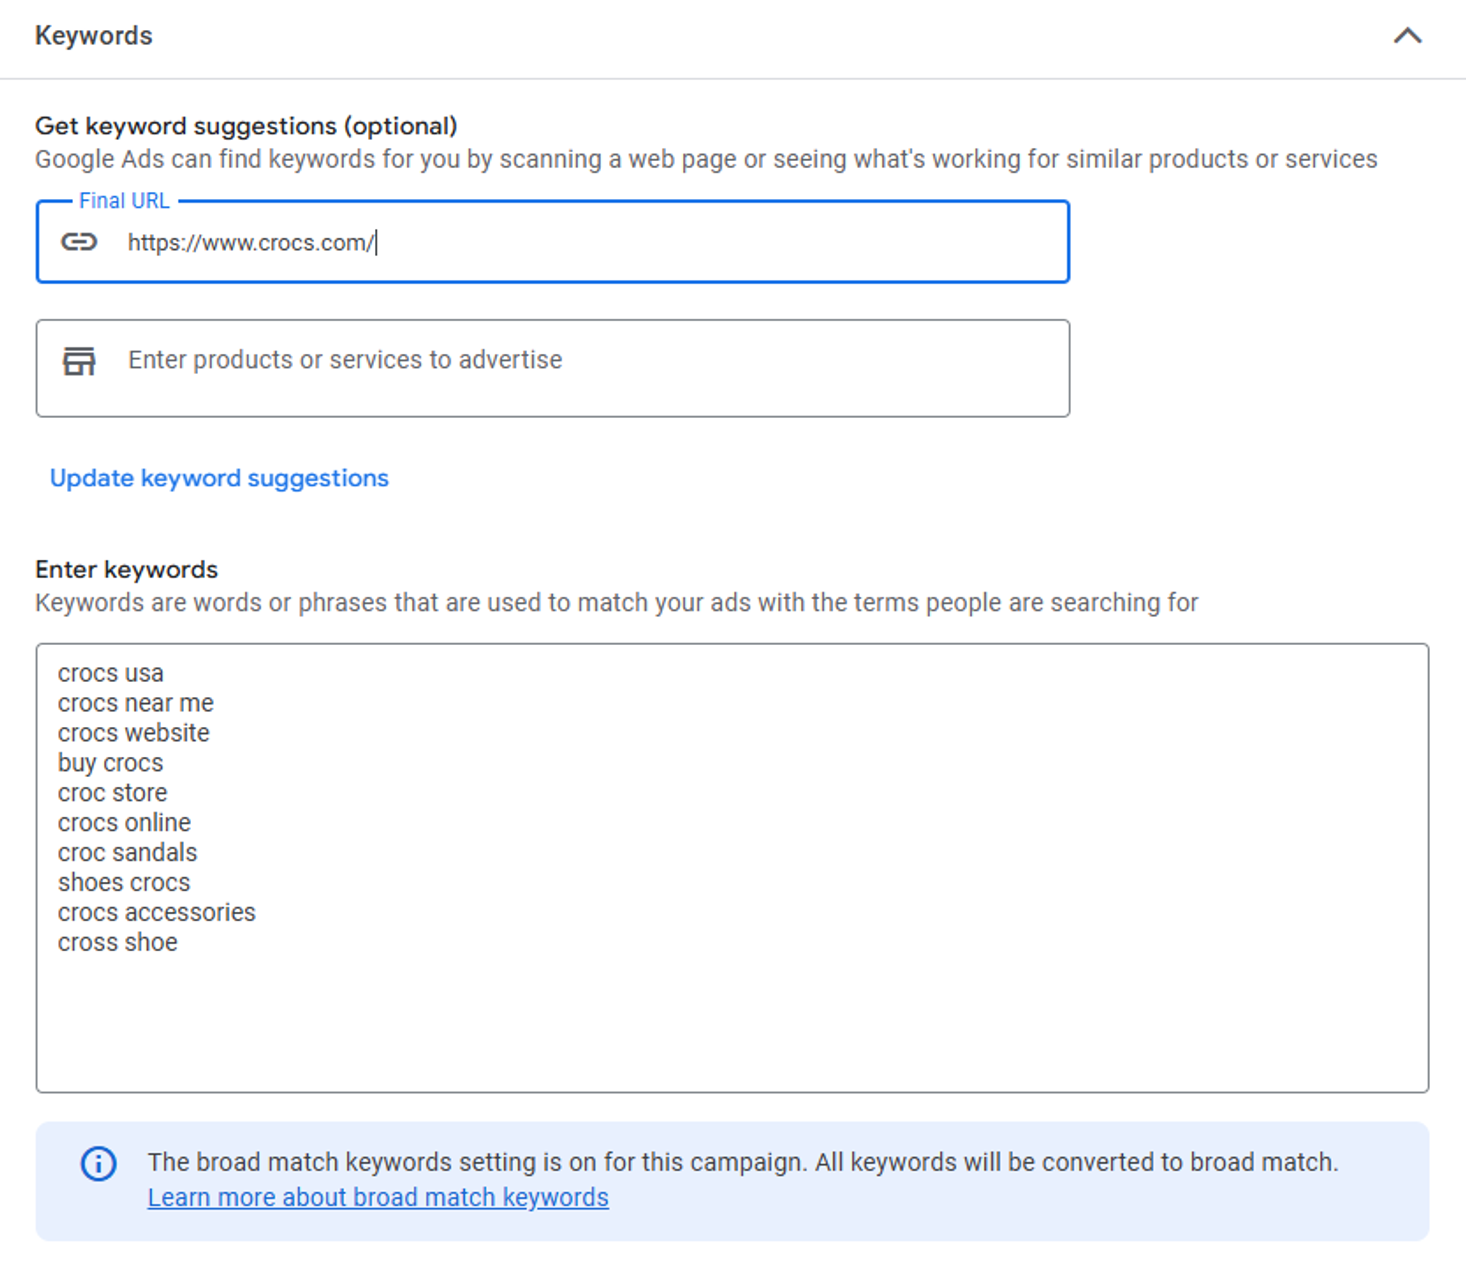
Step 7: Adding keywords
Keywords determine when your ads appear in search results.
1. Using broad match keywords
To maximize reach, start with broad match keywords. These allow Google to show your ads for related searches, including synonyms and variations.

2. Getting keyword suggestions
Google Ads can suggest relevant keywords based on your website or products. Enter your site URL or describe your business to generate recommendations.
How it works:
- Website URL – Google scans your page and suggests relevant keywords.
- Products or services – enter a list of what you offer, and Google will generate keyword ideas.
Click Refresh keyword suggestions to update the list.
3. Entering keywords manually
If you prefer, you can manually add specific keywords that match your business offerings.
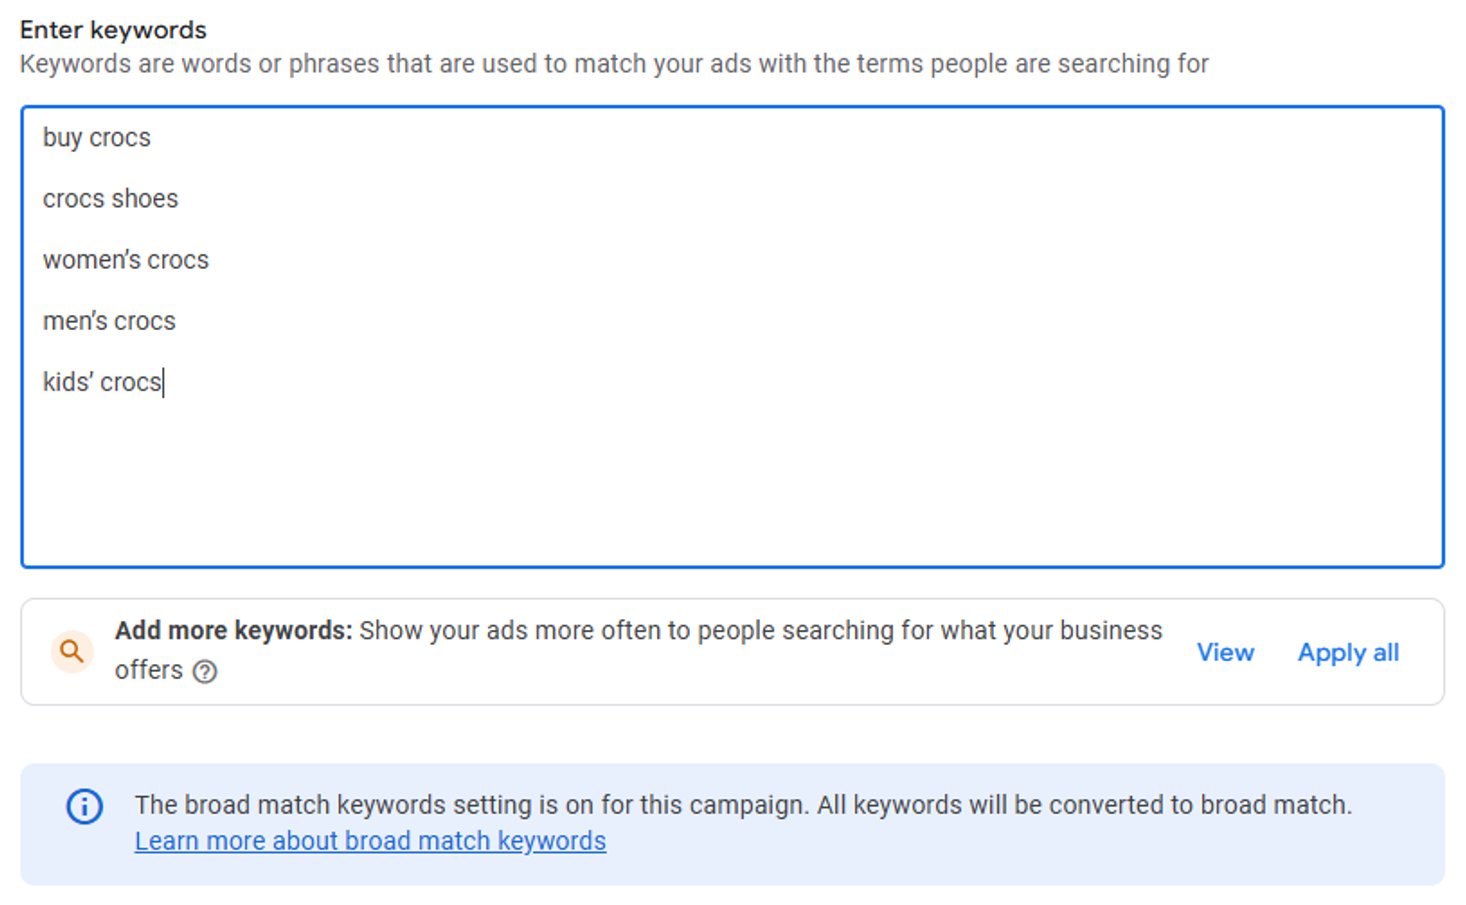
Examples:
- buy crocs
- crocs shoes
- women’s crocs
- men’s crocs
- kids’ crocs
These keywords help Google show your ads to users searching for relevant products.
4. Choosing keyword match types
Google Ads offers different match types that control how closely a user’s search must match your keyword:
Broad match (default)
- Ads appear for related searches, synonyms, and variations.
- Example: The keyword "create a free website" may trigger searches like "how to make a free website" or "free website builder".
- How to enter: create a free website
Phrase match
- Ads show only when the exact phrase is included in the search.
- Example: The keyword "create a website" could trigger "how to create a website" or "create a website for business", but not "free website creation".
- How to enter: "create a website"
Exact match
- Ads show only when the exact keyword is used in a search.
- Example: The keyword [create a website] will show ads only for "create a website", not "how to create a website".
- How to enter: [create a website]
5. Adding and adjusting keywords
Click Apply all to add Google’s keyword suggestions to your campaign. You can also review each keyword manually before applying.
Proper keyword selection improves campaign performance, and you can adjust keywords over time based on performance data.

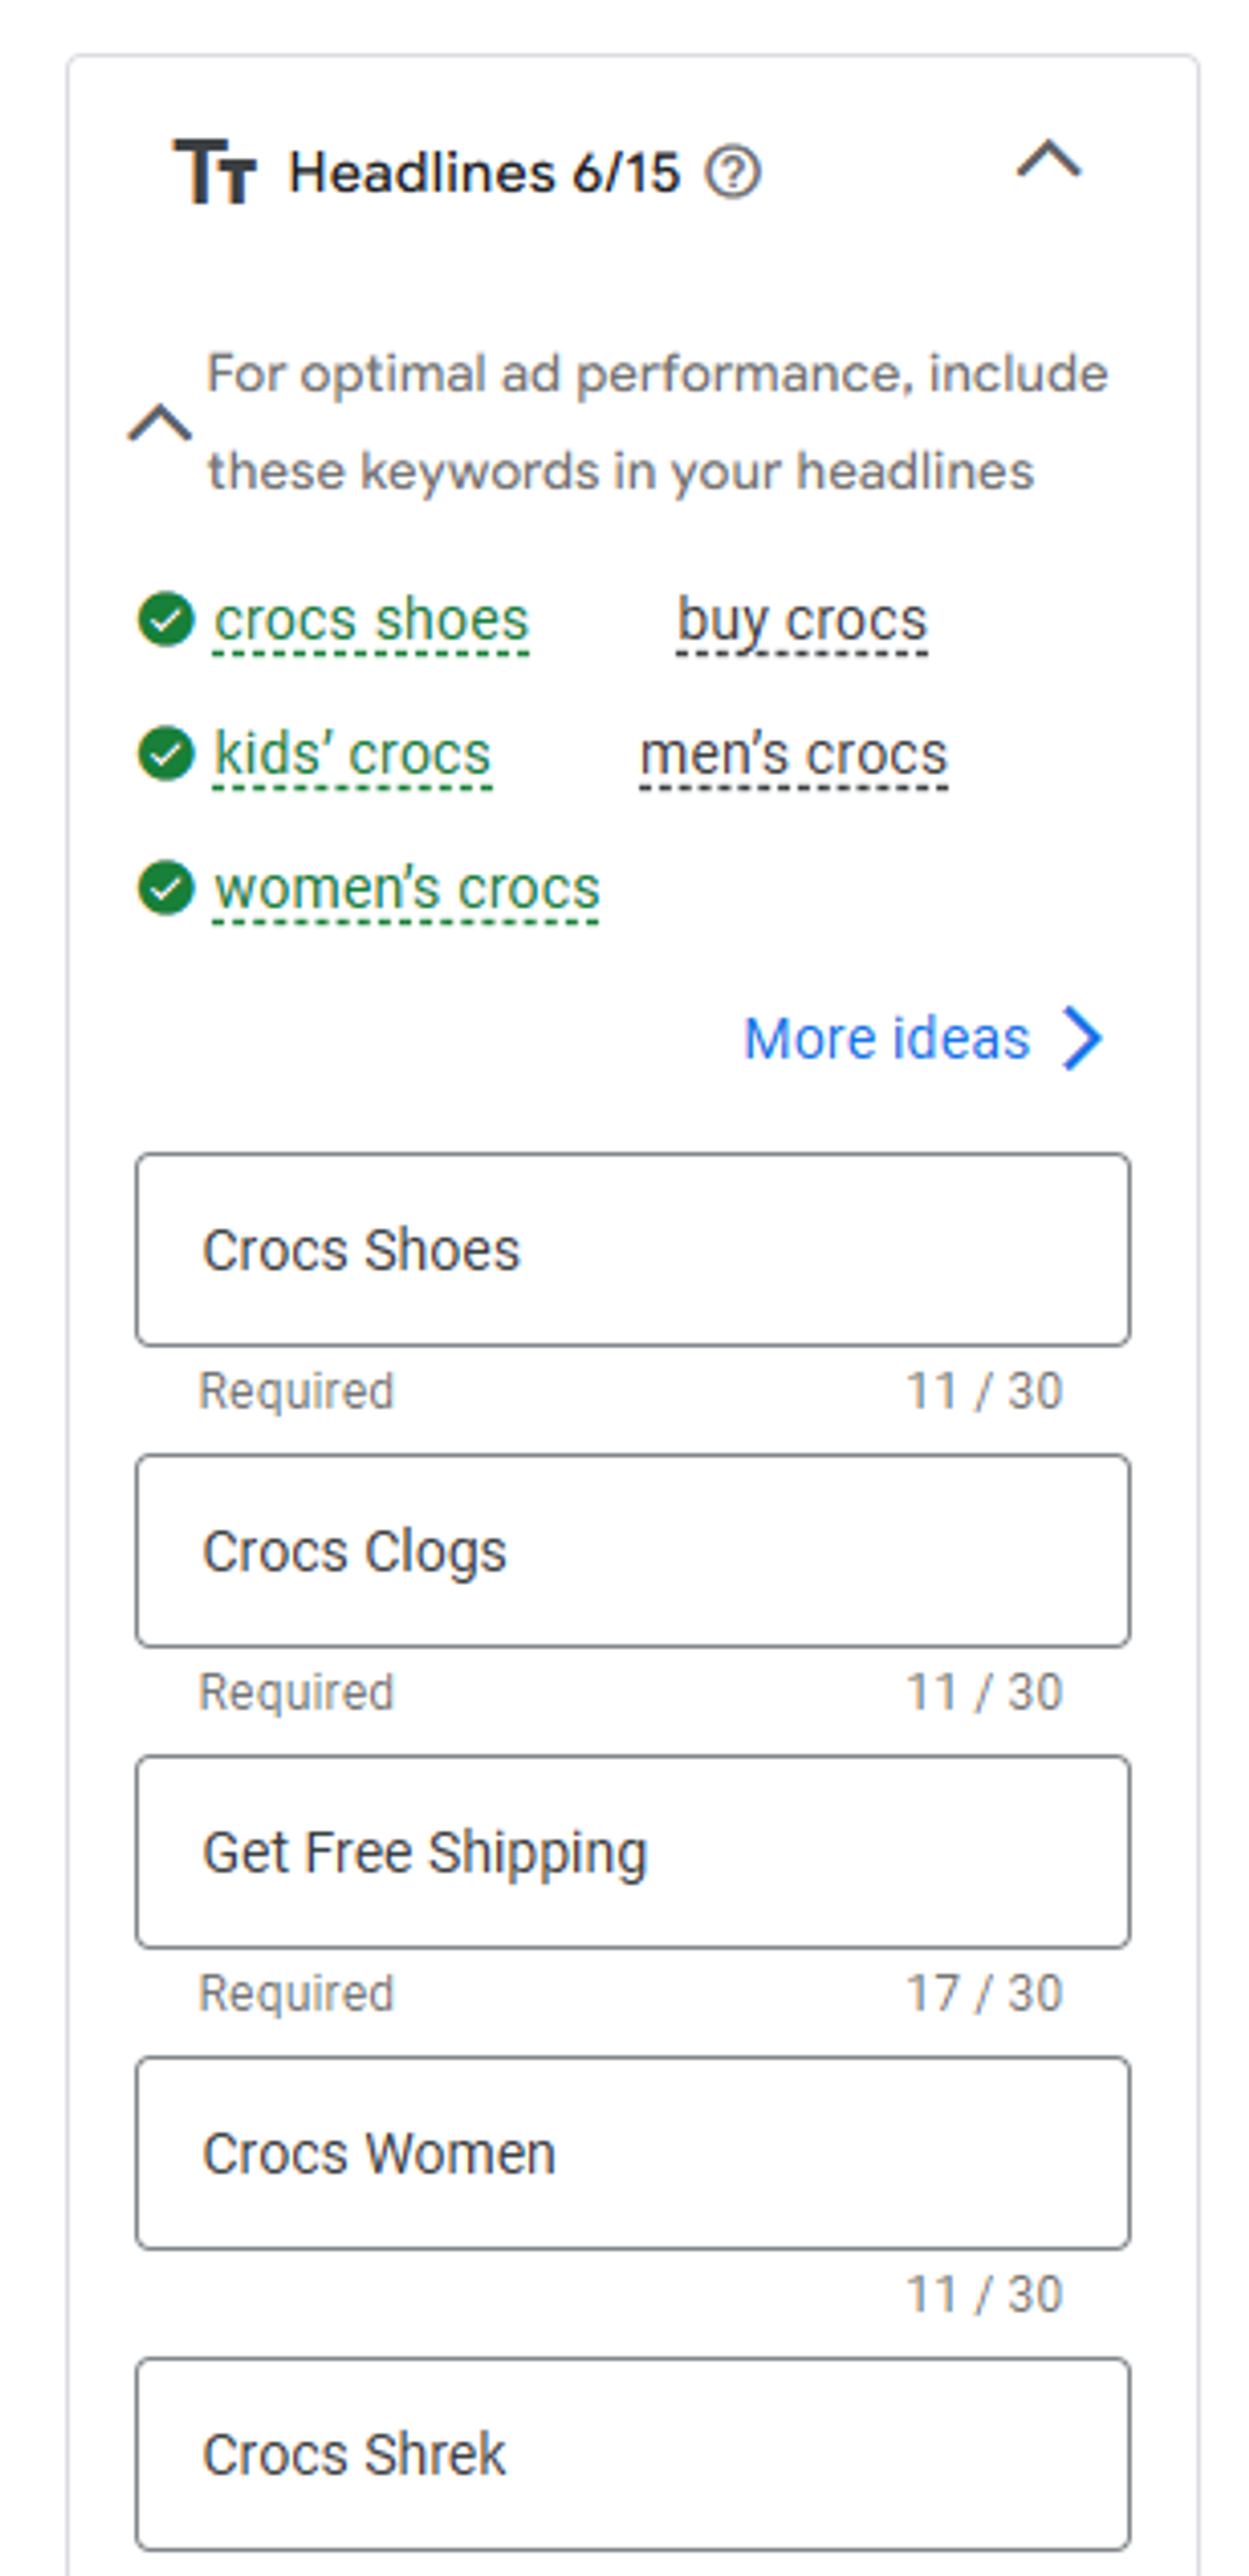
Step 8: Creating ads
Headlines – add at least 5 headlines. Keep them short (max 30 characters) and include keywords.
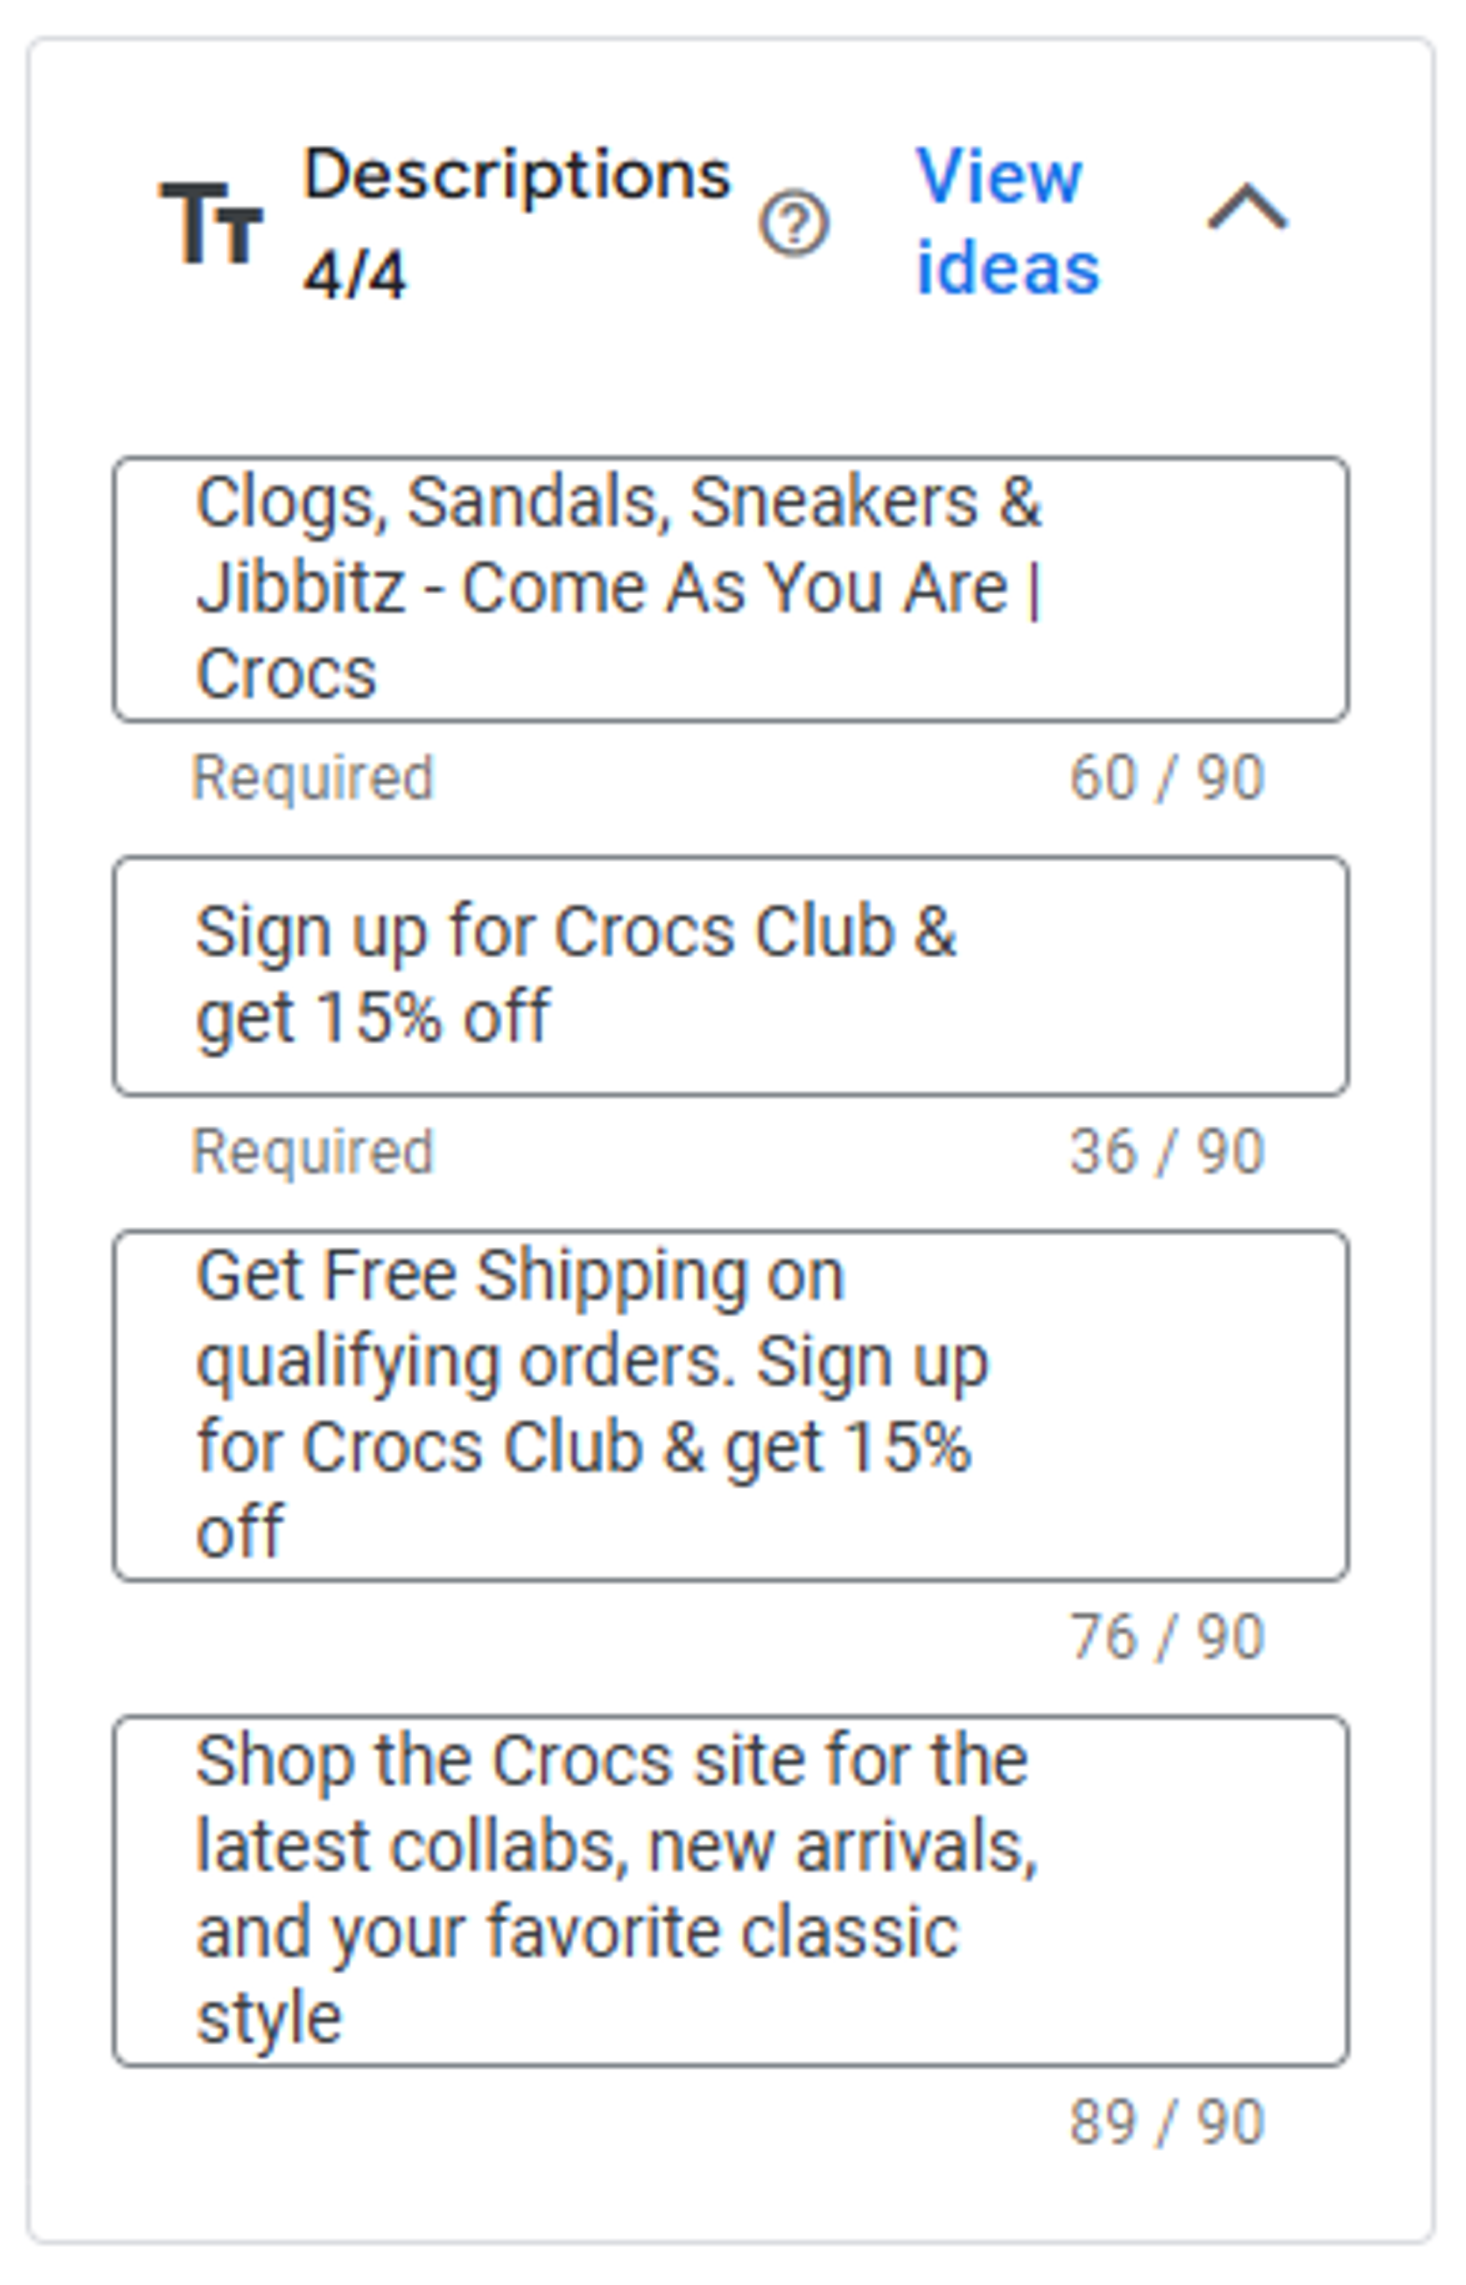
Descriptions – add up to 4 descriptions (max 90 characters each) highlighting your offers or benefits.
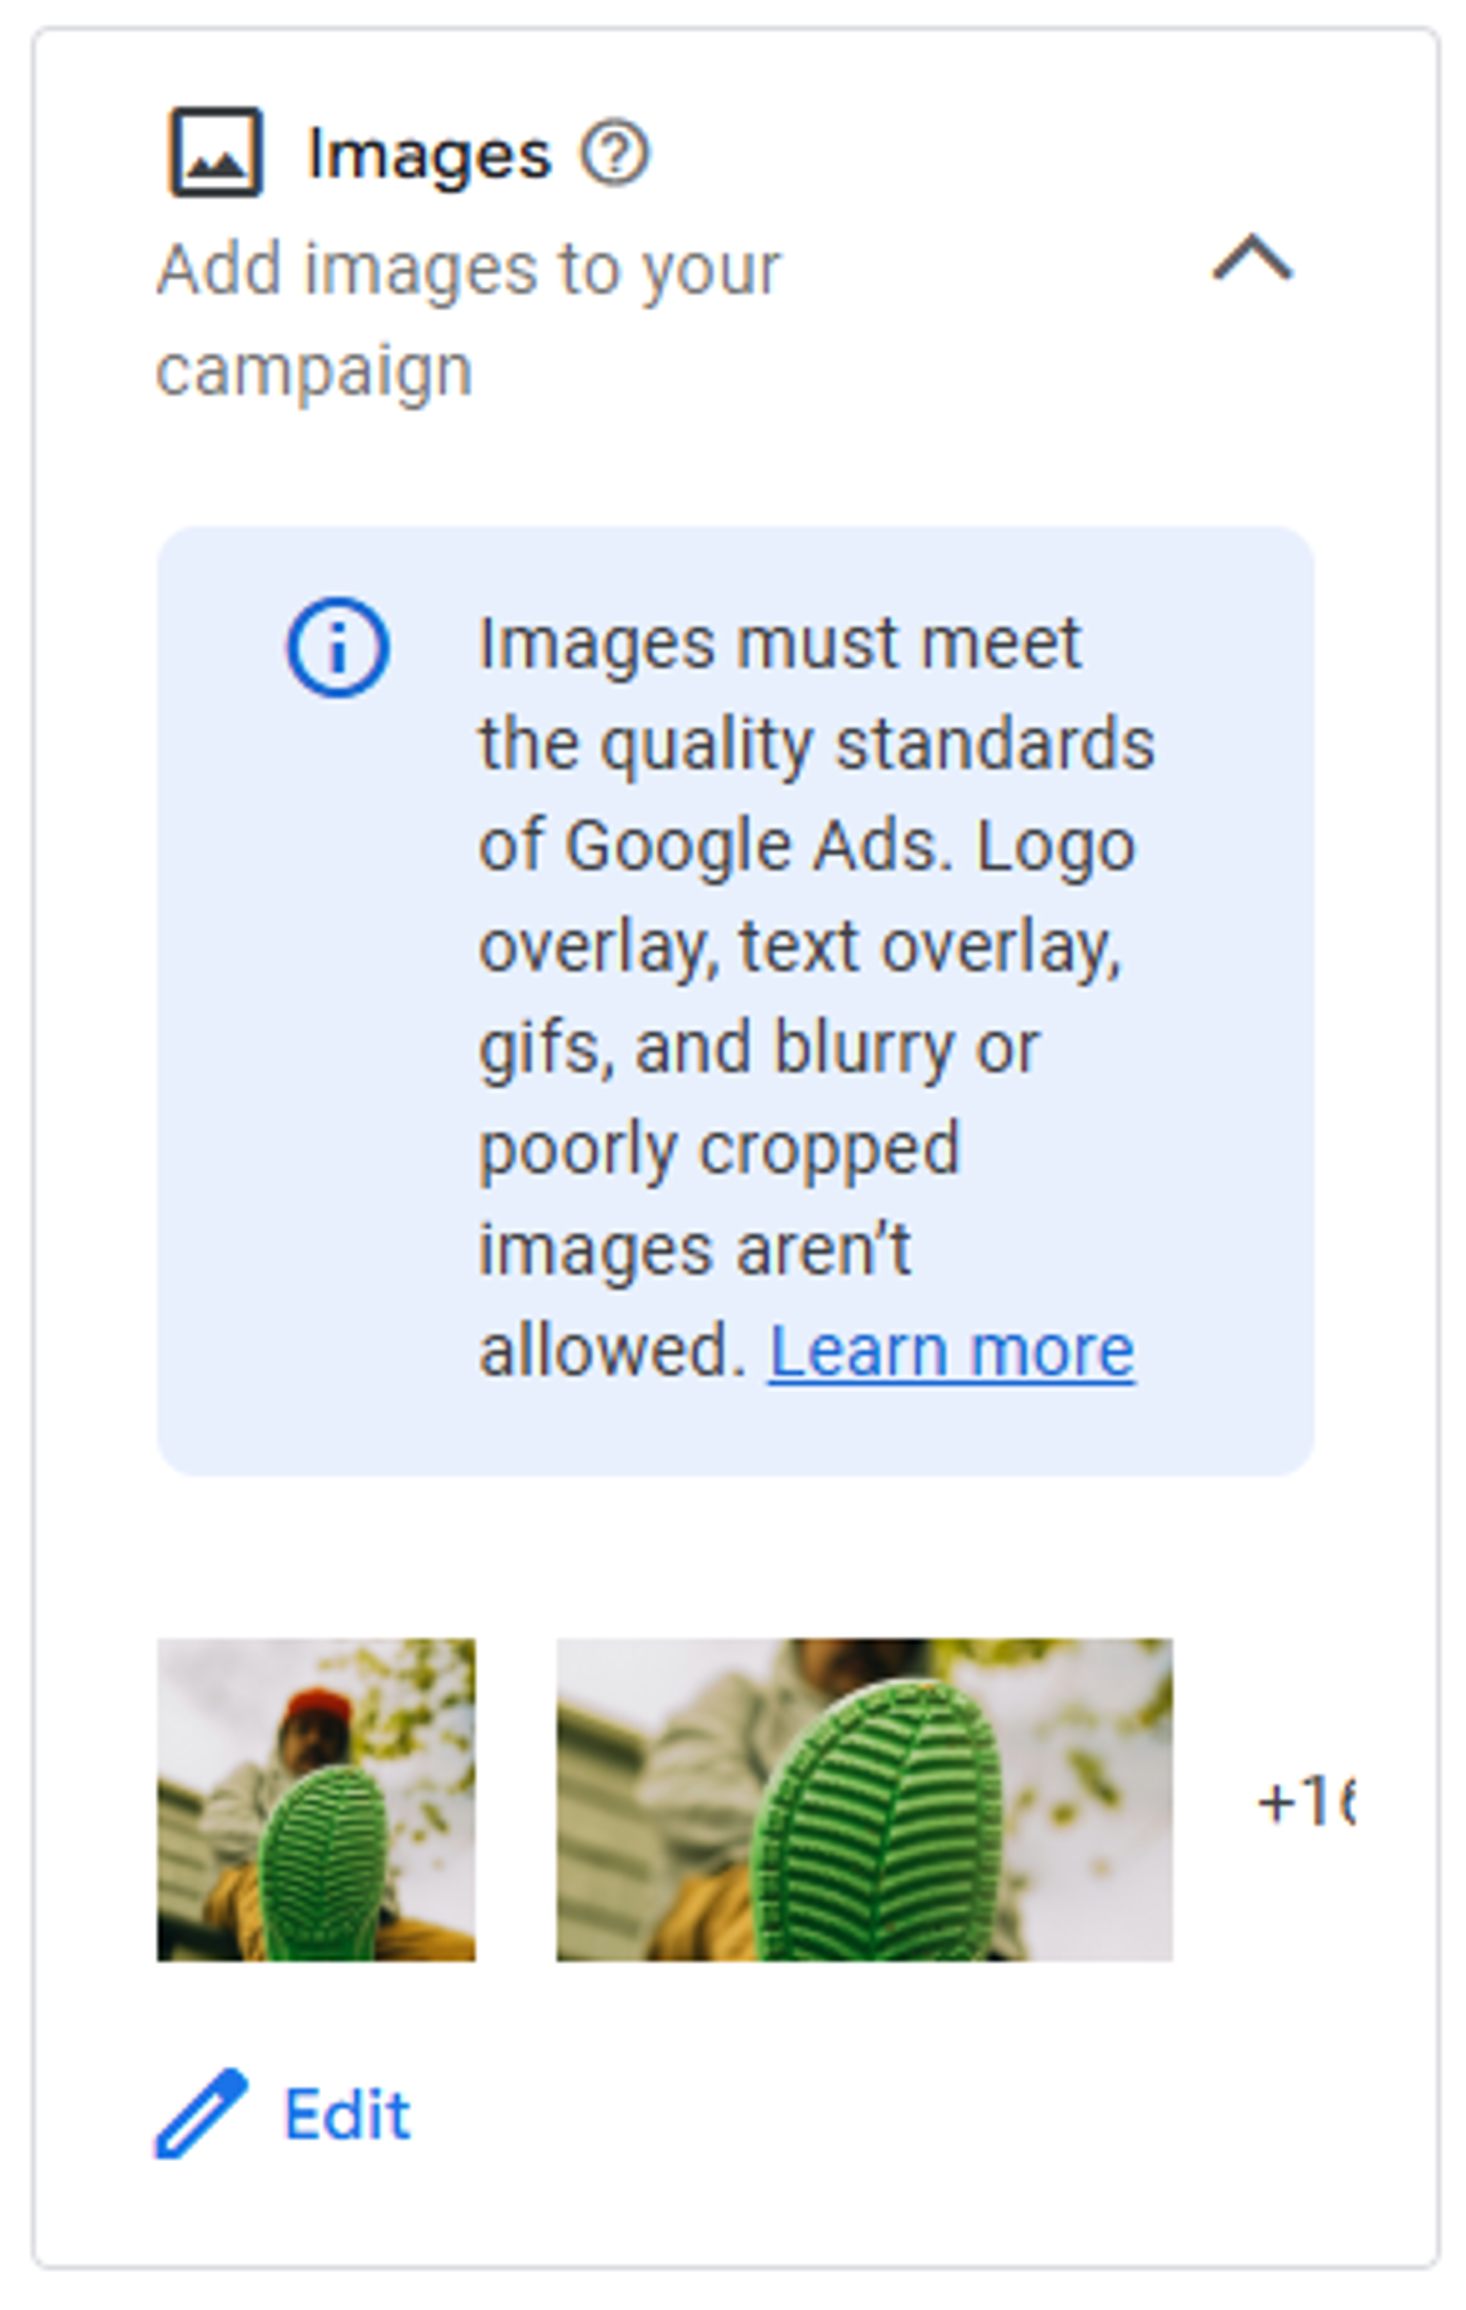
Images – upload images (minimum 450x450 pixels, max 10MB) that meet Google’s ad standards.
Step 9: Additional settings
You can enhance your ad with:
- Company logo – appears in your ad.
- Sitelinks – quick links to other pages on your site (up to 8).
- Promotions – highlight special offers.
- Pricing – display prices for products or services.
- Phone number – allow users to call directly from the ad.
- Lead forms – collect customer details.
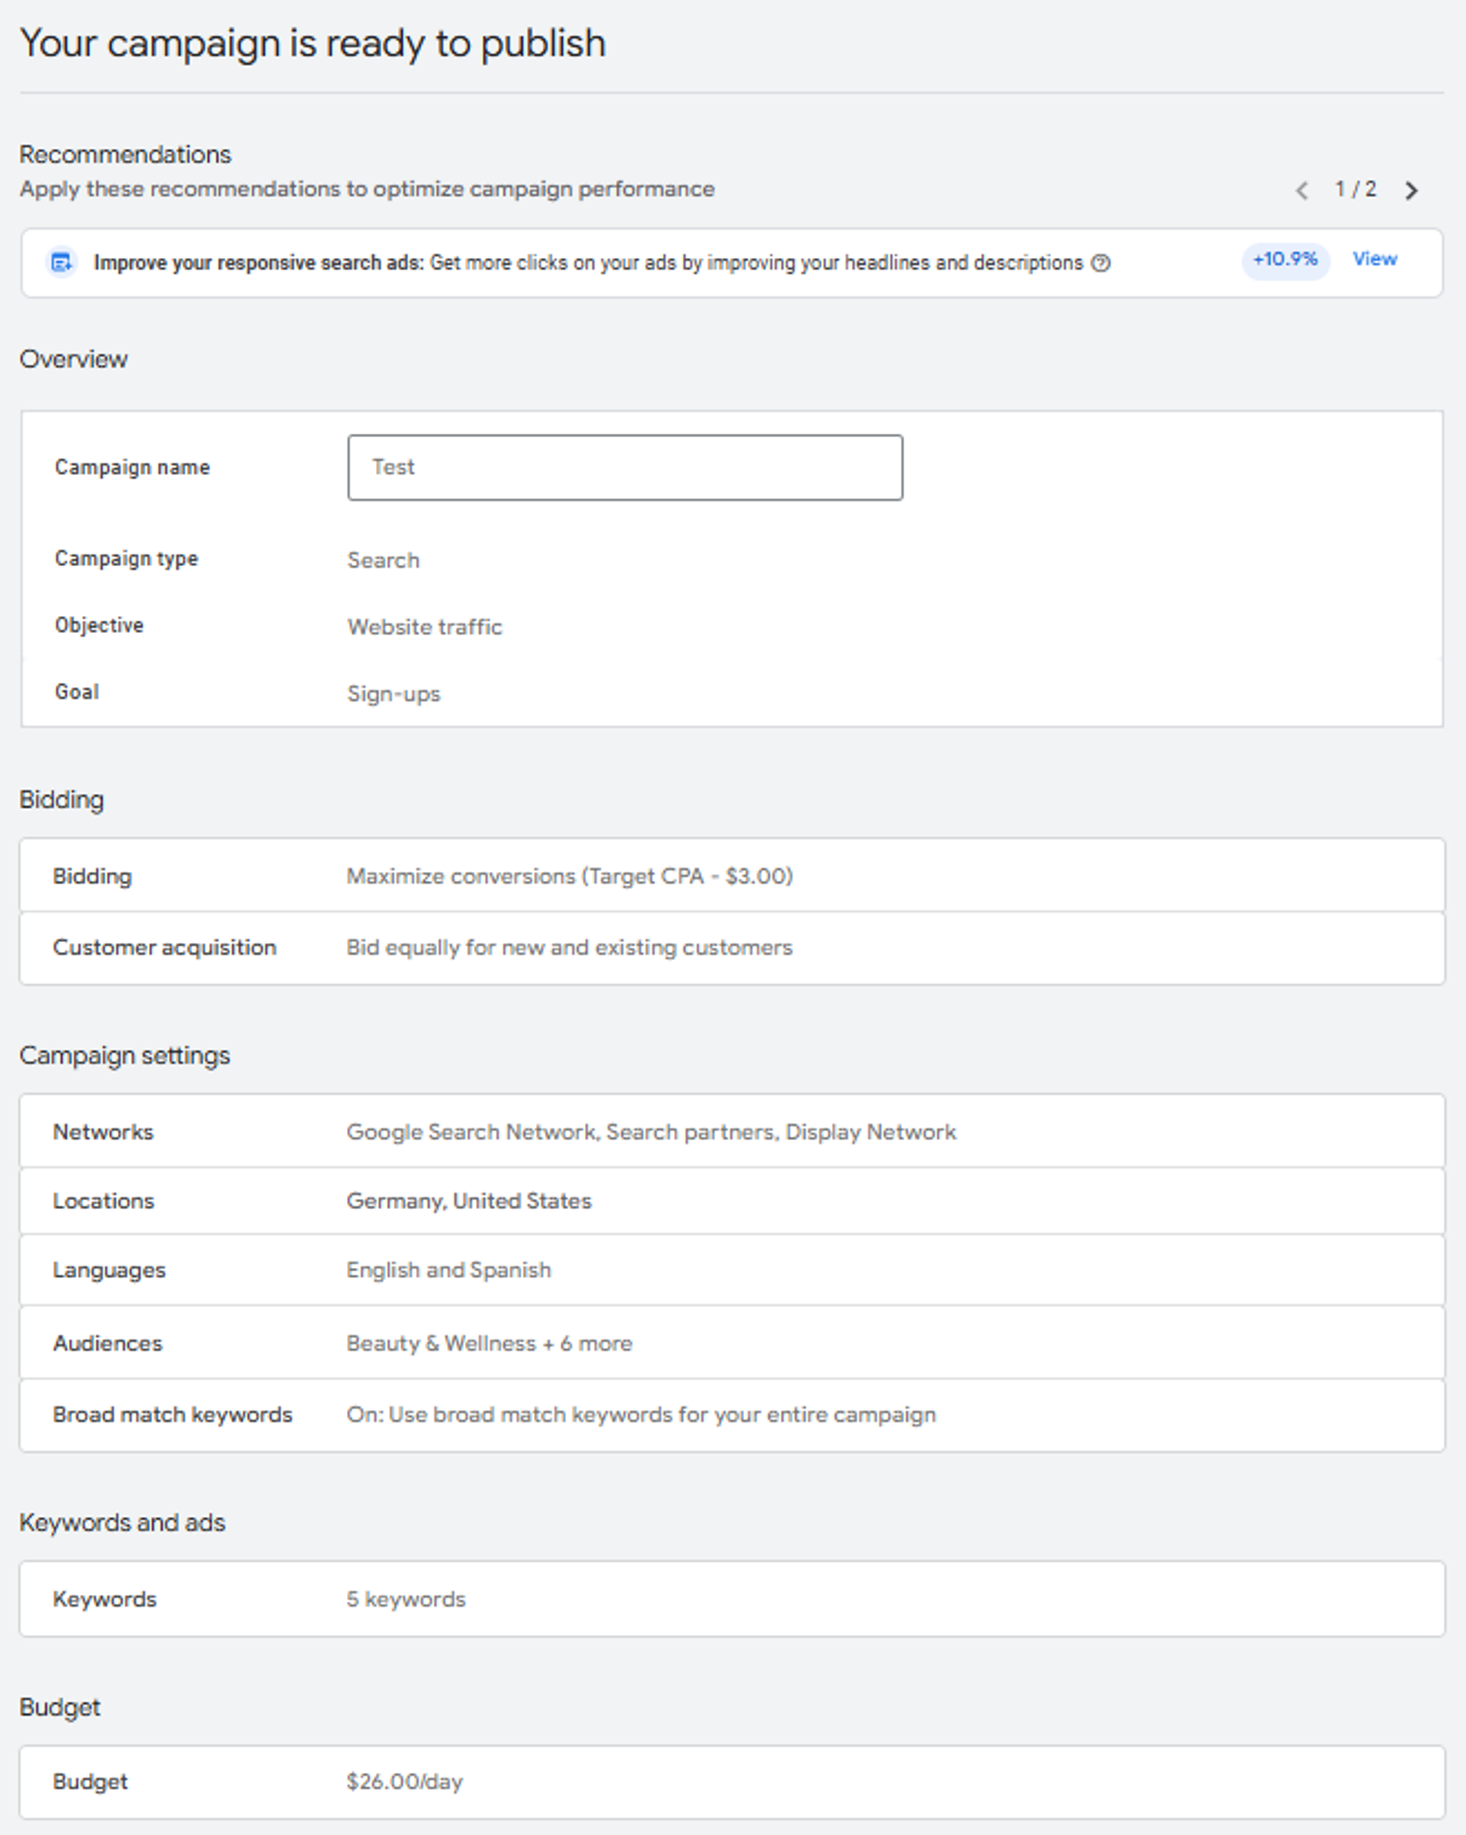
Step 10: Review and publish
1. Google Ads will present a summary of your campaign settings, including headlines, descriptions, and budget.
2. Double-check everything to ensure accuracy.
3. Click Publish Campaign to launch your ad.
Your campaign is now live, and you can track performance through the Google Ads dashboard.

Ina Rudziankova
Product Marketing Manager. Loves parrots and cats.
Are you ready?
Explore 🌱kvitly with no limits within the trial period of 14 days. No commitment, no credit card required.
Let’s try!