Knowledge base
How to add Bitrix24 chat to 🌱kvitly website
To add a Bitrix24 chat, you need to have an account in Bitrix24 system. Once you have an account and login there, follow the steps bellow to connect the chat to your website.
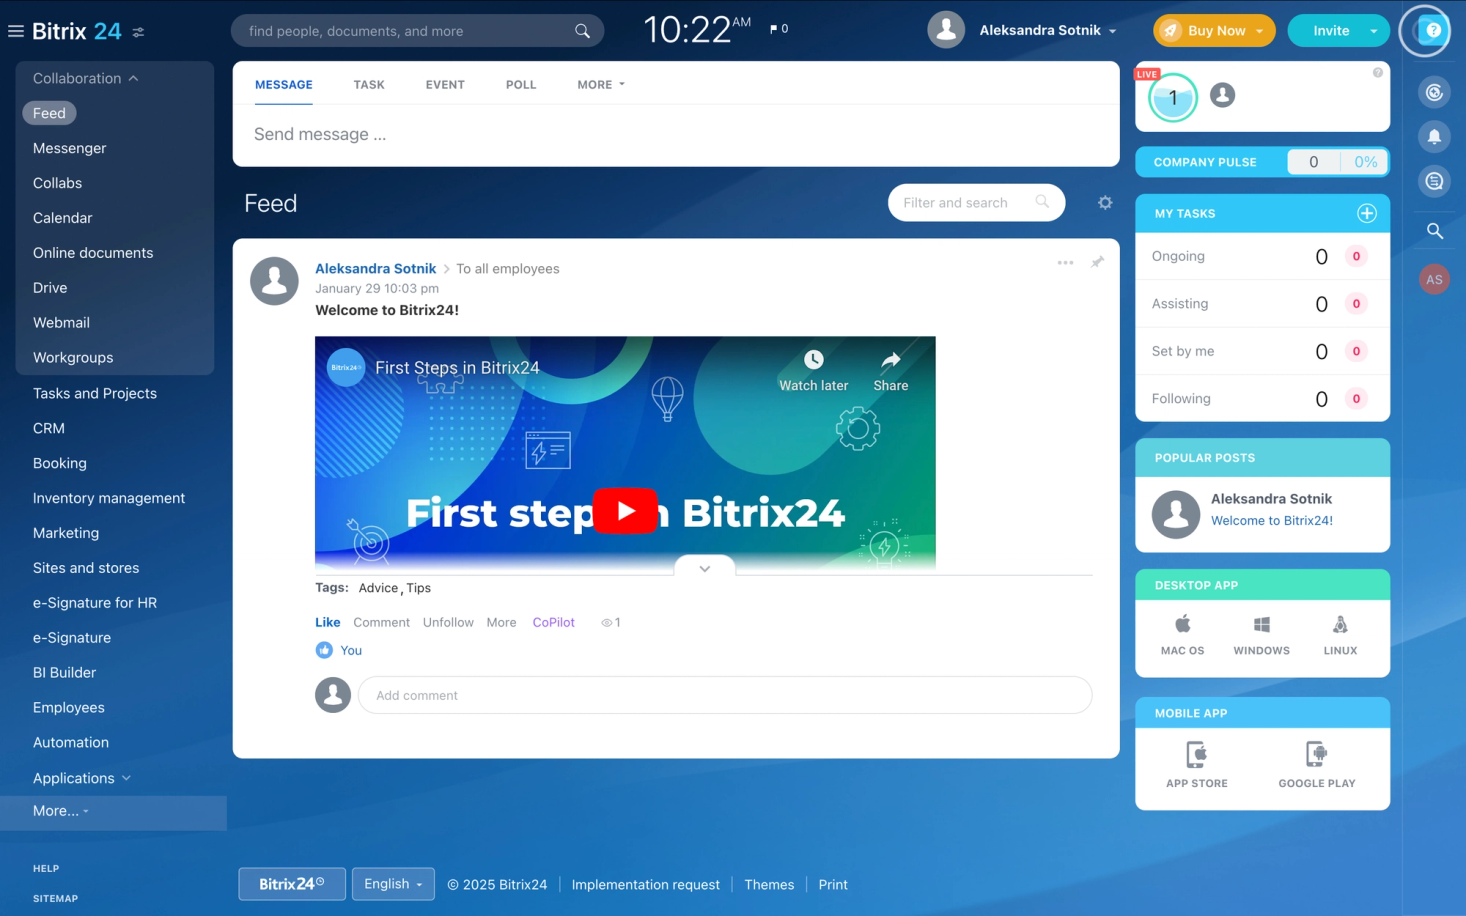
1. Within the Bitrix24 system search for Contact center in the search field on top of the screen, to the right from the time.
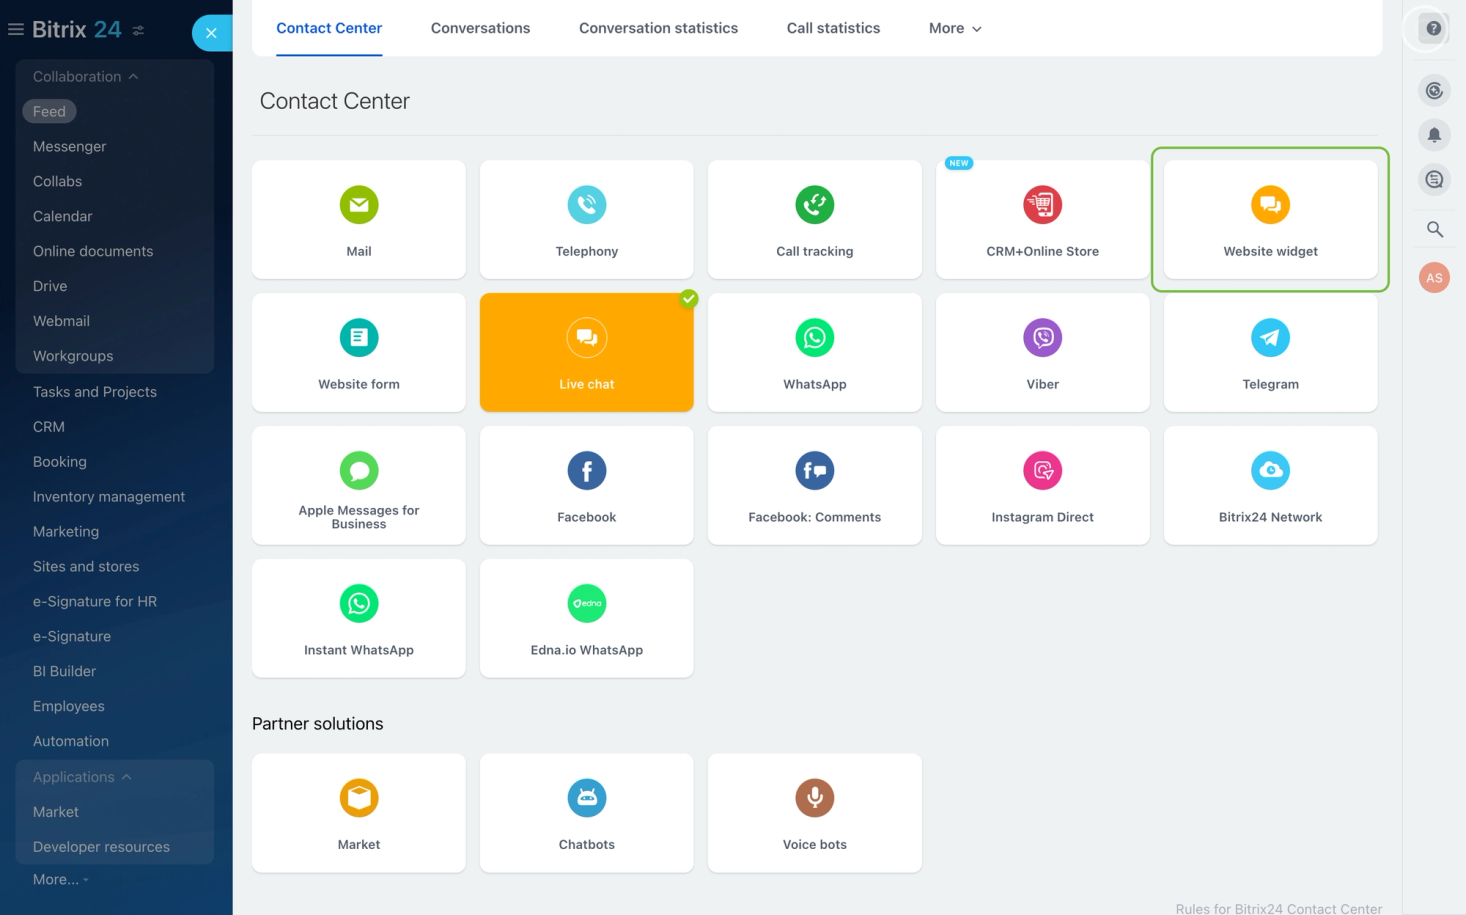
2. Once the search results show up, select Website widget
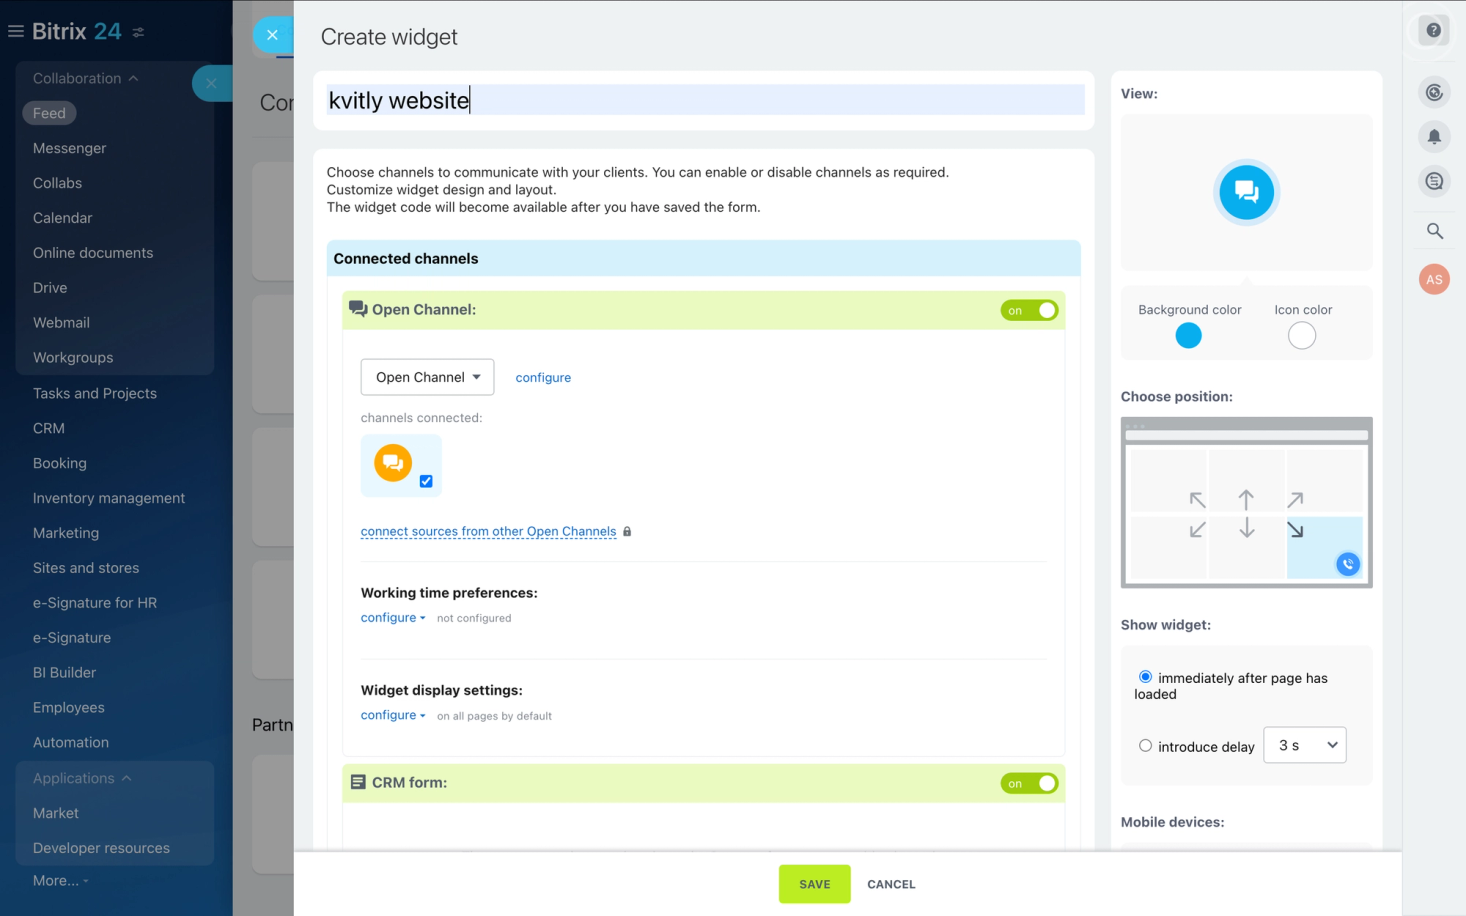
3. In the widget configuration, add the widget name and configure it per your needs. Save your configuration.
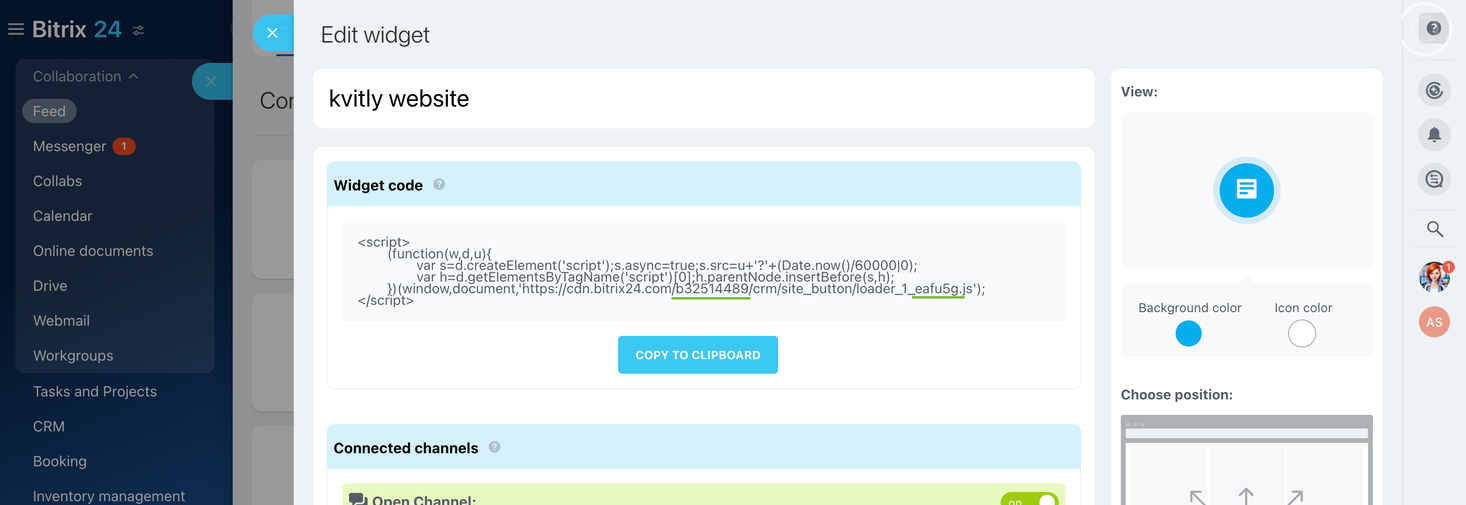
4. Once you save, the configuration window will close. Now click on the website widget tile again and select the widget you’ve just added. On top of the configuration window you’ll see the Widget code.
5. From this code you will need to parameters: Company identifier (it’s located in the URL and looks like /bXXXXXX/) and Line identifier (symbols between loader_number_ and .js).
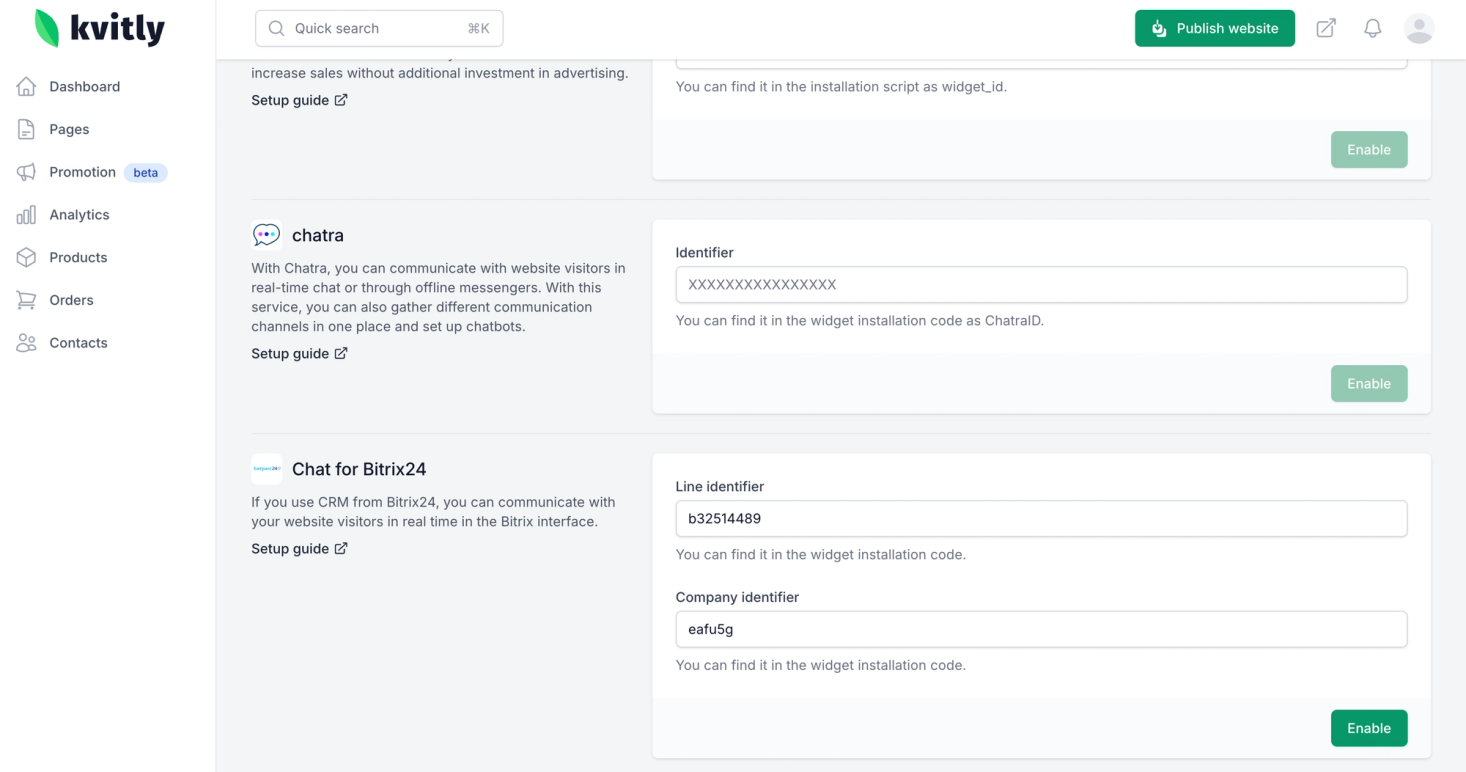
6. Go to your 🌱kvitly Dashboard → Integrations → Live chat.
7. Scroll to integration Chat for Bitrix24 , add the params you copied from the installation code and click on Enable.
8. Publish your website.
Now, the Bitrix24 chat will appear on your 🌱kvitly website, allowing visitors to contact you in real time.
Still have questions?
Feel free to contact us via chat on our website. We’re online weekdays from 10 AM to 6 PM CET.
Wanna talk to a person?