Knowledge base
How to set up automated emails for clients
This guide will walk you through setting up automated emails for your customers. You can use this feature to send confirmation emails, thank-you messages, or provide access to digital products (e.g., webinars, checklists, instructions, recipe books, fitness journals, etc.) after a successful order or payment.
Step by step instructions to set up automated emails after orders:
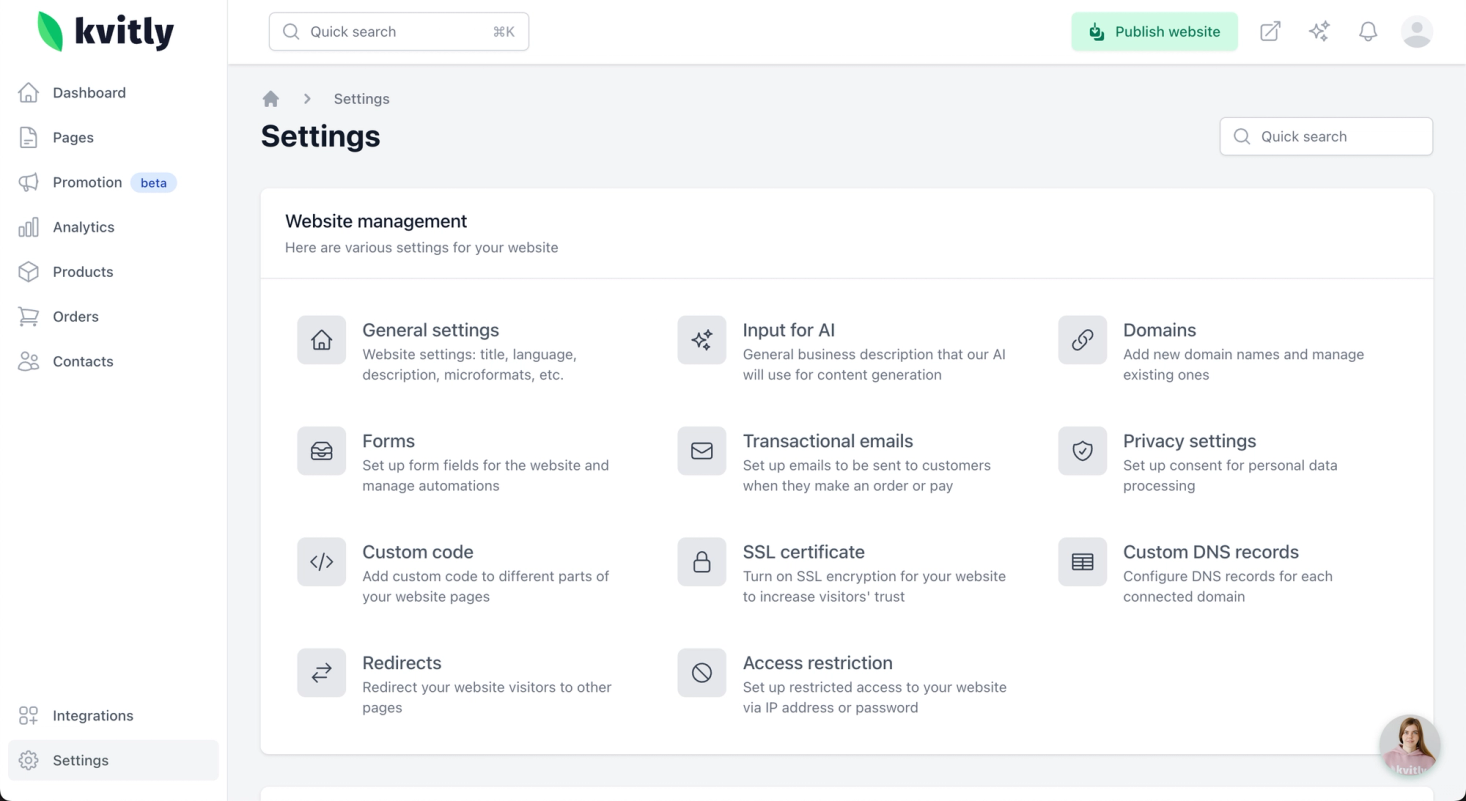
1. In your 🌱kvitly Dashboard navigate to Settings and select Transactional emails.
2. Click the Add new email button.
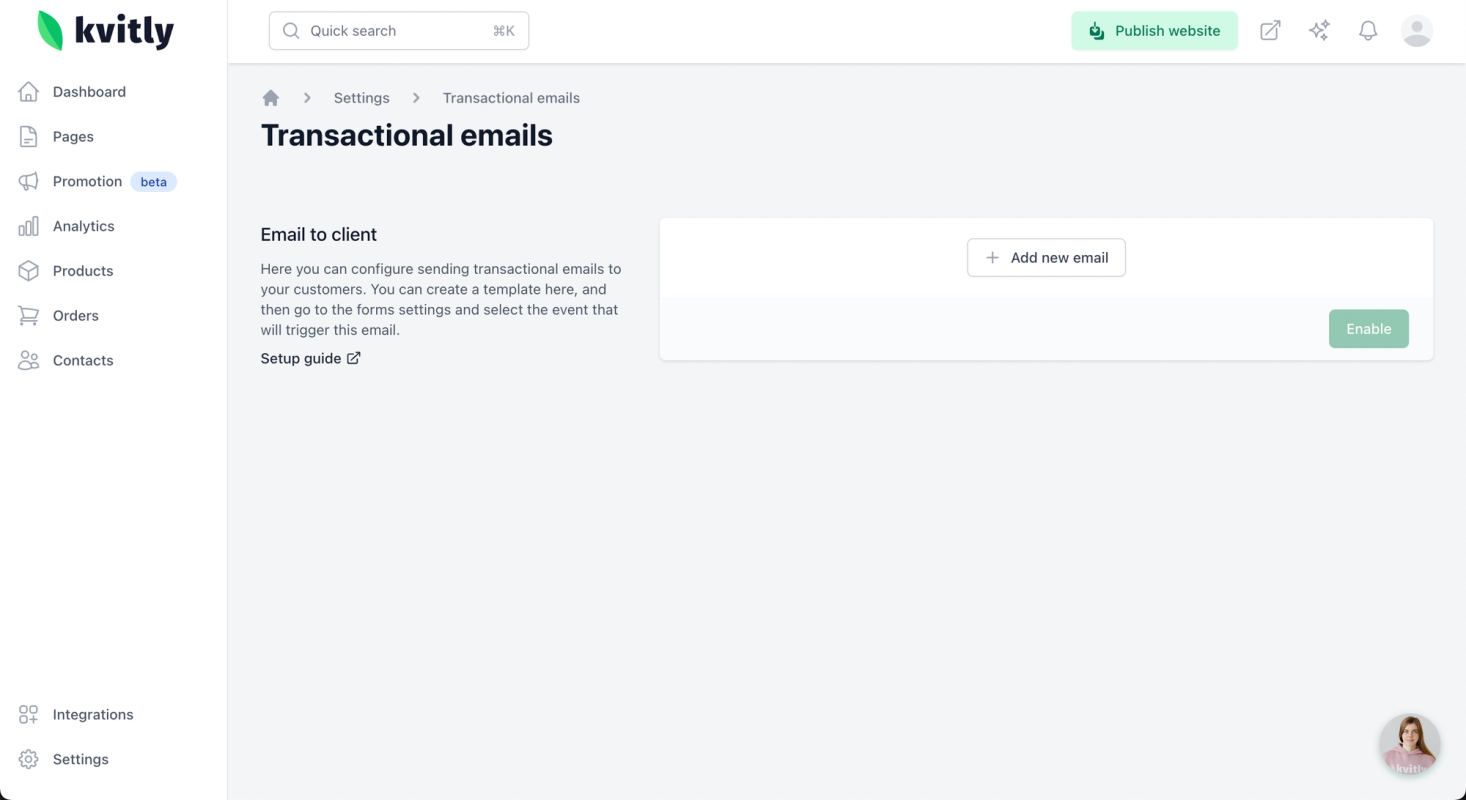
3. Unfold the line with the new email that shows up after and fill in the needed fields:
- From — it’s what your clients will see as Sender name.
- Email for replies — it’s the email where the responses will go if customers would respond with questions or feedback.
- Email subject — it’s the subject line of your letter
- Email text — what will be in your email.
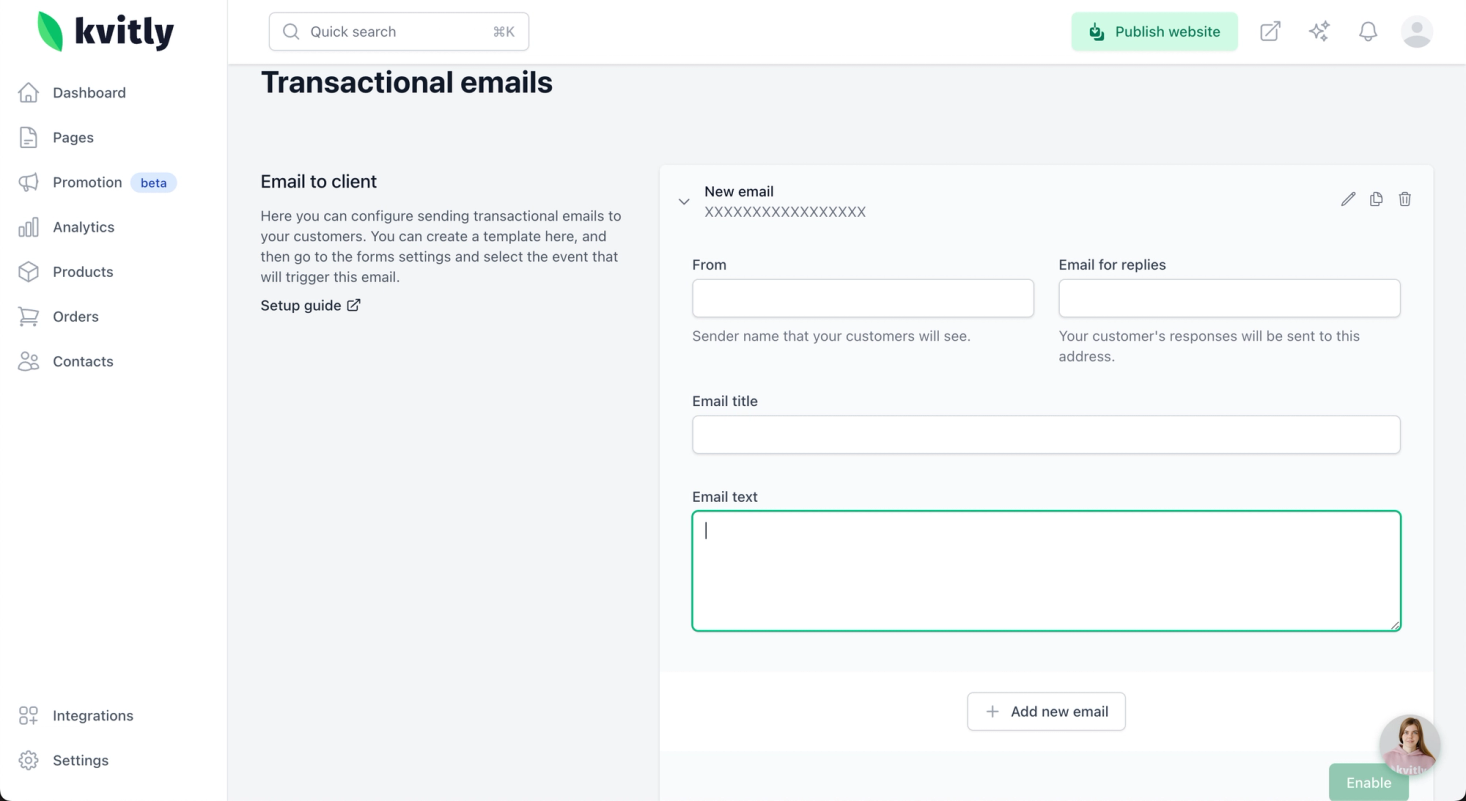
4. Once you’re ready, click on Enable button (or Save, if you had some configuration there before).
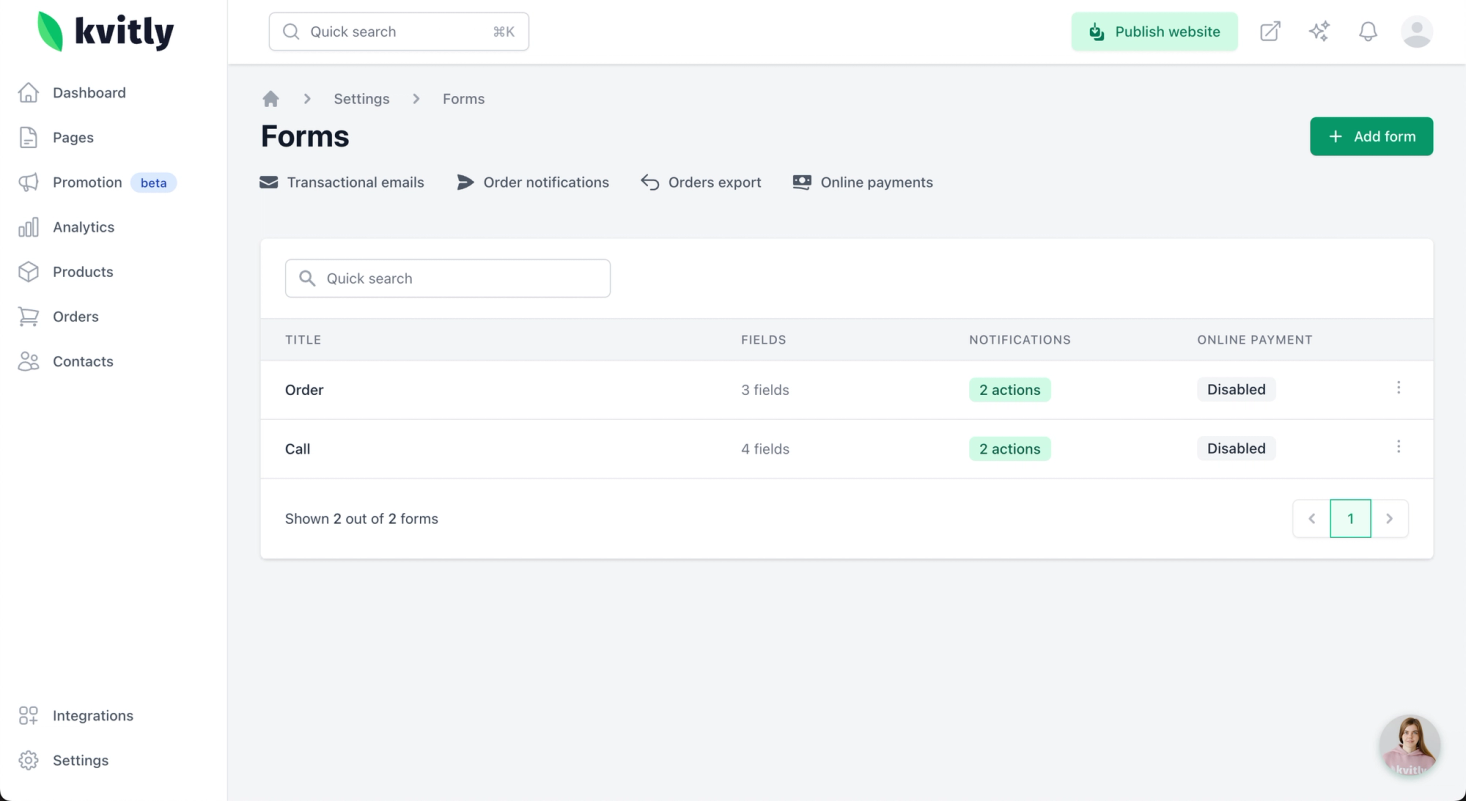
5. For these notifications to work, you now must enable them in the relevant order forms. In your 🌱kvitly Dashboard navigate to the Settings → Forms section and select the form where you want to enabled them or create new form.
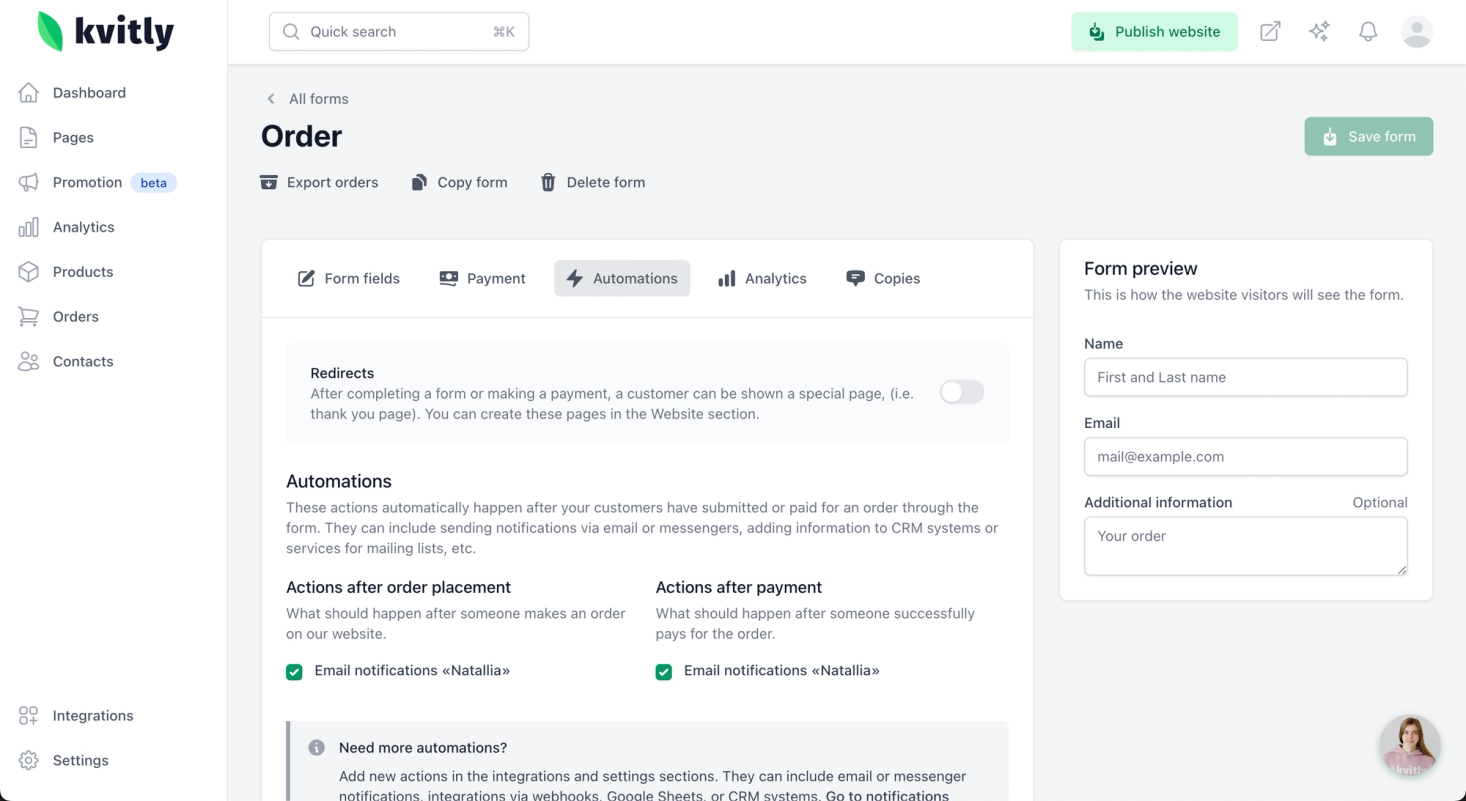
5. Switch to the Automations tab and configure notifications as needed. You can enable notifications (click on the corresponding checkboxes) for actions like After order placement or After payment.
6. After setting everything up, don’t forget to publish your website to apply the changes.
Done! Now, after a successful payment or order placement, your customer will receive an email that you set up for them.
Still have questions?
Feel free to contact us via chat on our website. We’re online weekdays from 10 AM to 6 PM CET.
Wanna talk to a person?