Knowledge base
Online booking for your website with Setmore
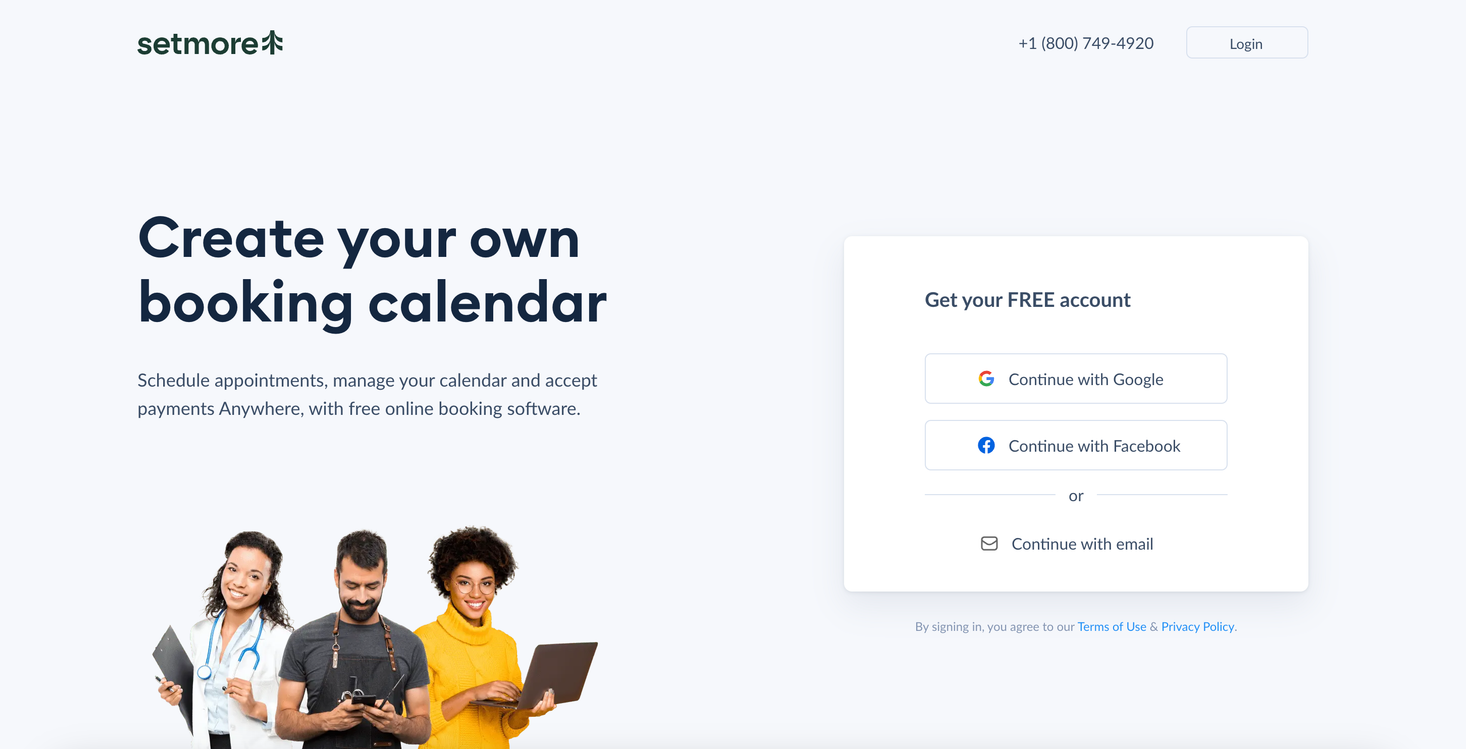
To get started with the platform, visit the Setmore website and sign up to create account in their system. You can create an account with Google, Facebook or traditionally with the email. You can configure your calendars and other settings within the Setmore system.
Follow these steps to install Setmore widget on your 🌱kvitly website:
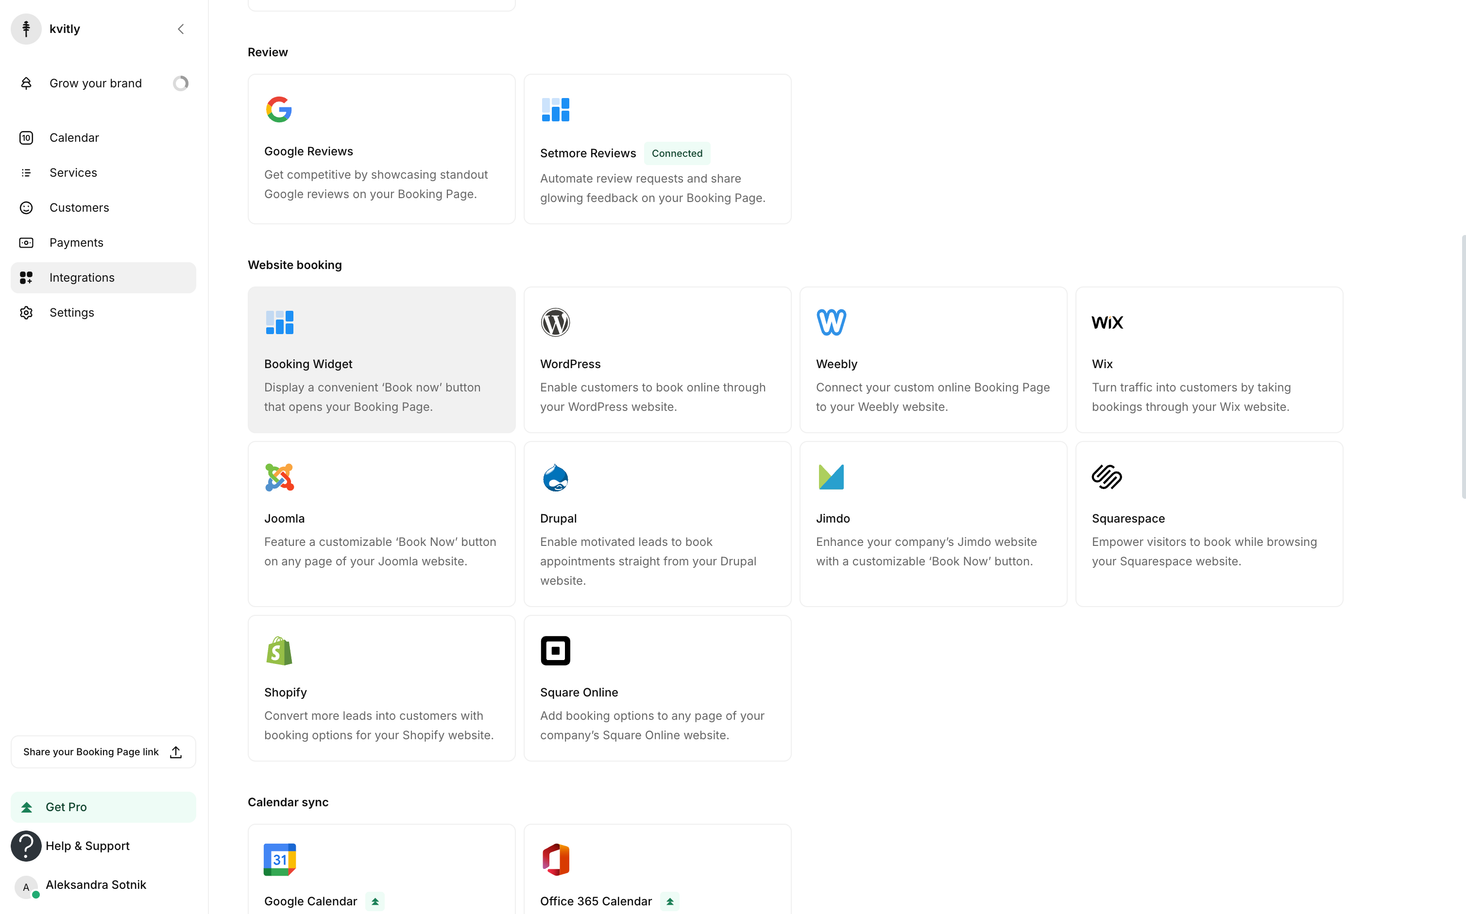
1. In Setmore system navigate to Integrations in the left-side menu and find the section Website booking. You will need Booking Widget there.
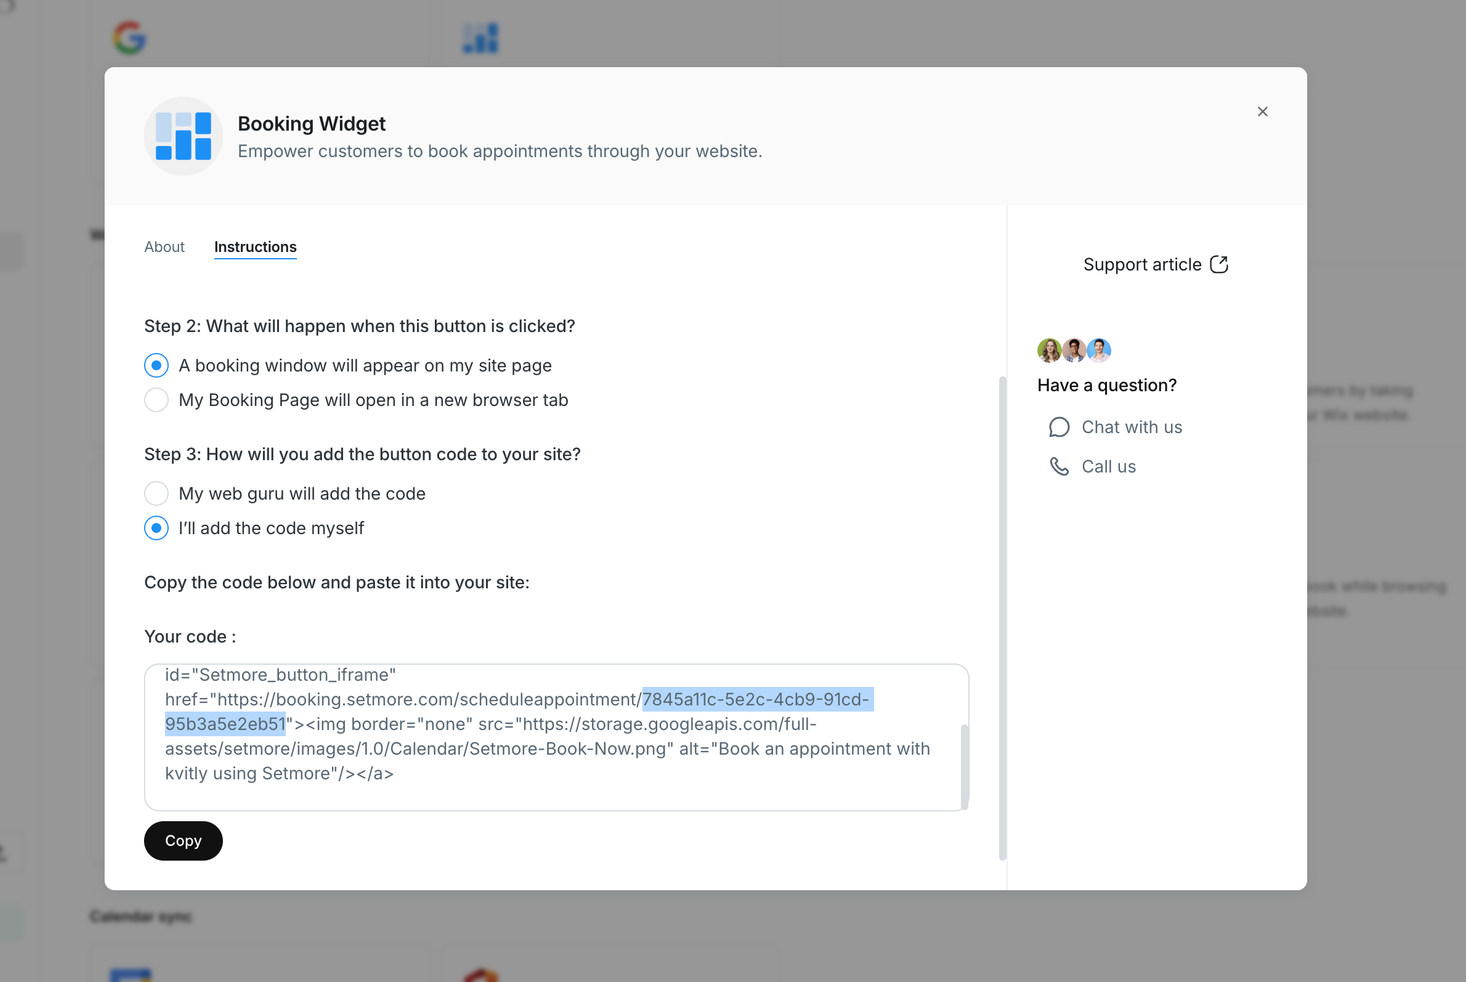
2. In the popup switch to Instructions tab. Fill in Steps 1 and 2 as you wish, and on the Step 3 select I’ll add the code myself.
3. In the installation code that you see find the widget ID and copy it. You can find it between ...scheduleappointment/ and "><img border… (it’s highlighted on the screenshot below).
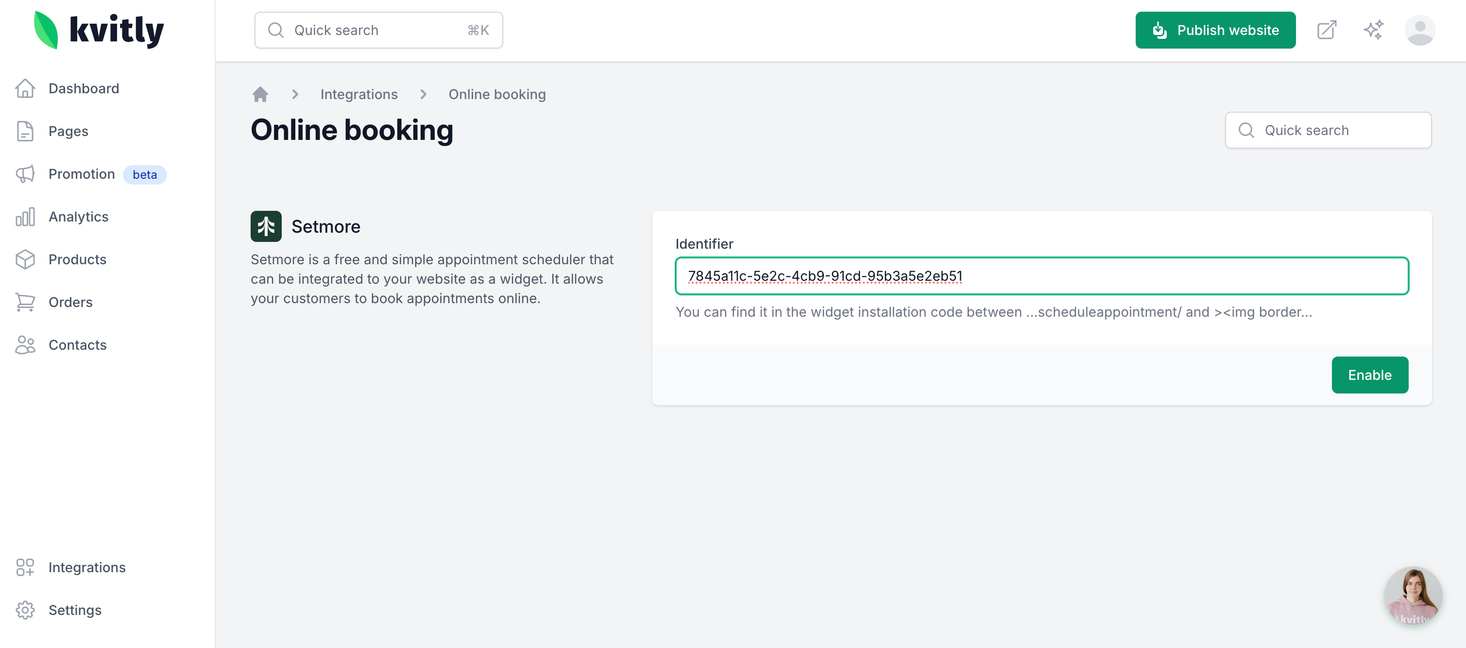
4. Go to your 🌱kvitly Dashboard and navigate to Integrations → Online booking.
5. Find there Setmore integration, add the Identifier you copied from the installation code and click Enable.
6. Publish your website to apply the changes.
Once enabled, you will see the prompt for online booking on your website. You can configure the widget appearance and behavior within the Setmore system.
Still have questions?
Feel free to contact us via chat on our website. We’re online weekdays from 10 AM to 6 PM CET.
Wanna talk to a person?