Knowledge base
Stripe: how to enable online payments on your website
Stripe allows you to accept credit and debit card payments, set up recurring subscriptions, and use the Buy Now Pay Later business model with Klarna. Stripe also supports Google and Apple Pay, so customers can checkout with one tap in your store.
Stripe is available in 46 countries including the USA, Canada, UK, Australia, Japan, and others. You can add various payment options popular in the EU to your store, such as SEPA, iDEAL, Klarna, Alipay.
Stripe charges a processing fee for each transaction through their system. It’s 2.9% + 30¢ fee for a transaction in the US. Different countries have different fees, so be careful about that when you set up Stripe account.
To enable integration with Stripe for your 🌱kvitly website, you need to have an account in Stripe. Once you register there, follow the instructions on the Stripe site to complete the setup. We need to find 2 keys in Stripe admin panel and copy them over to your 🌱kvitly website.
Follow these steps to configure the integration:
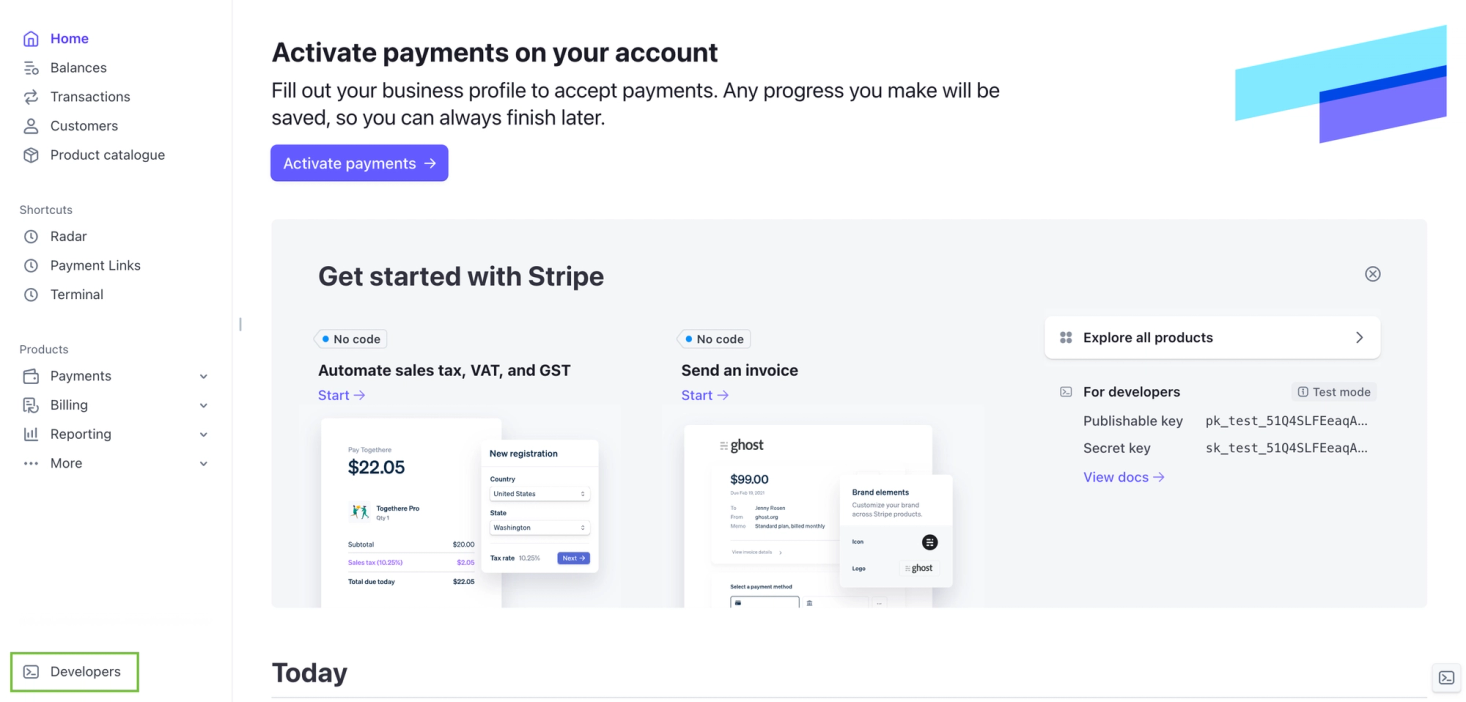
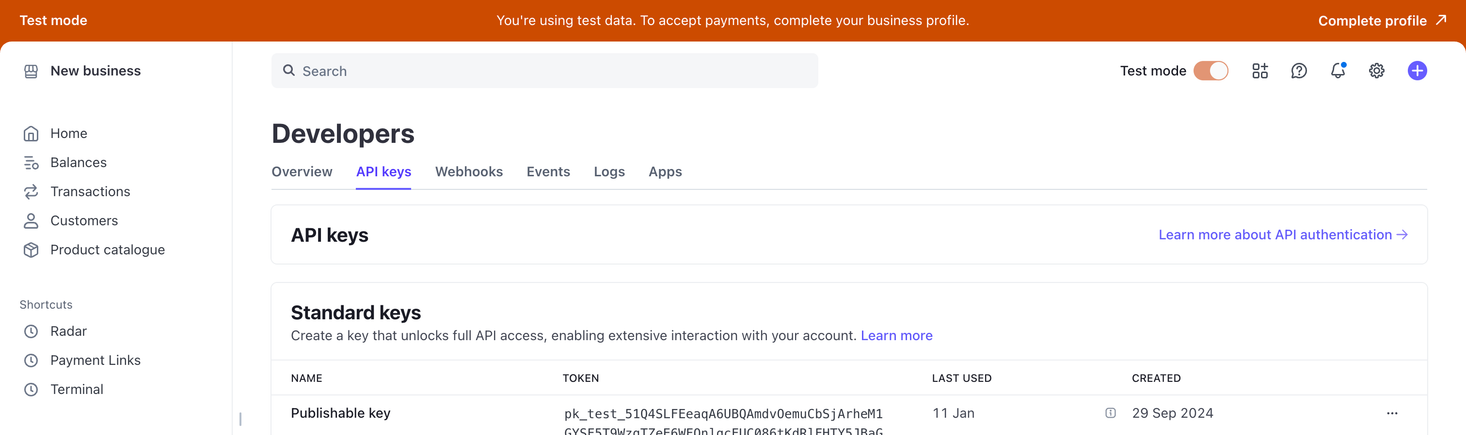
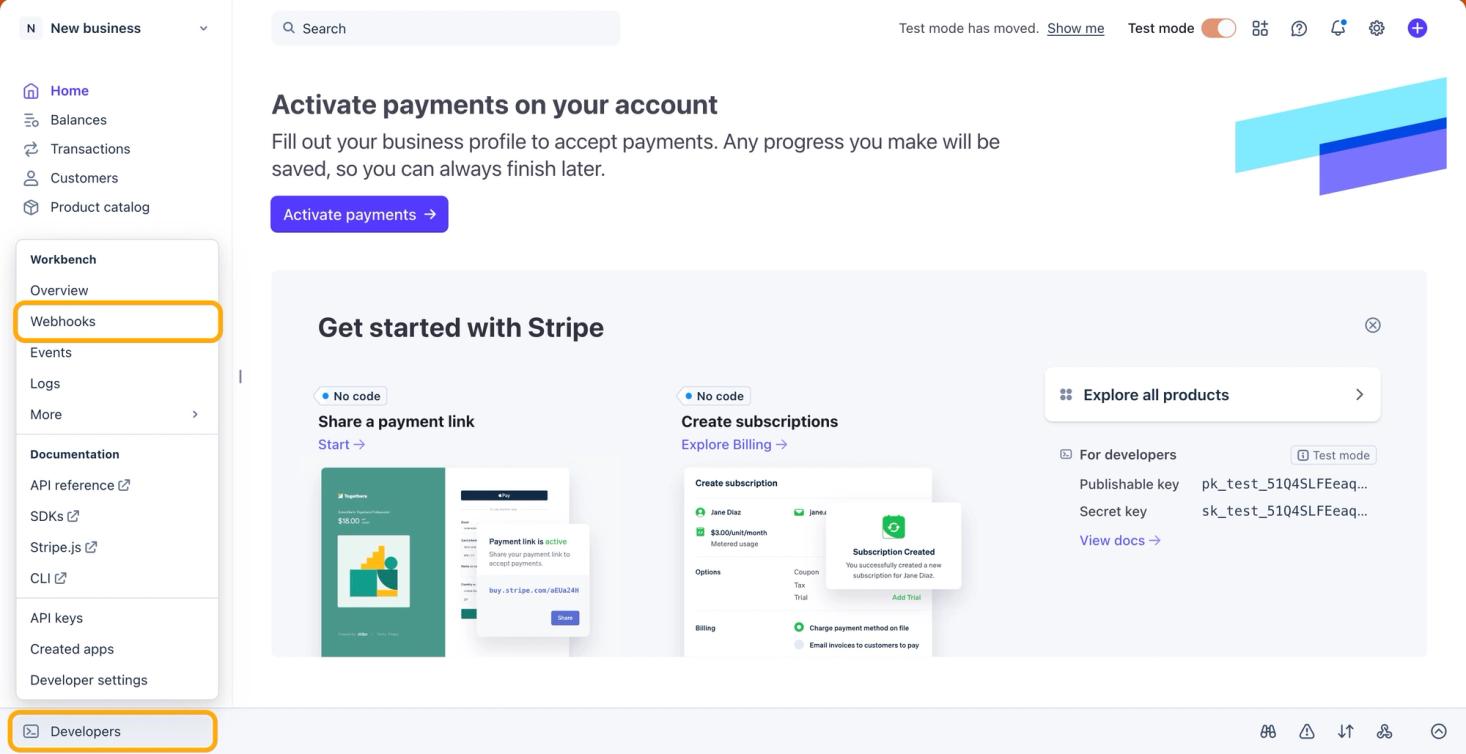
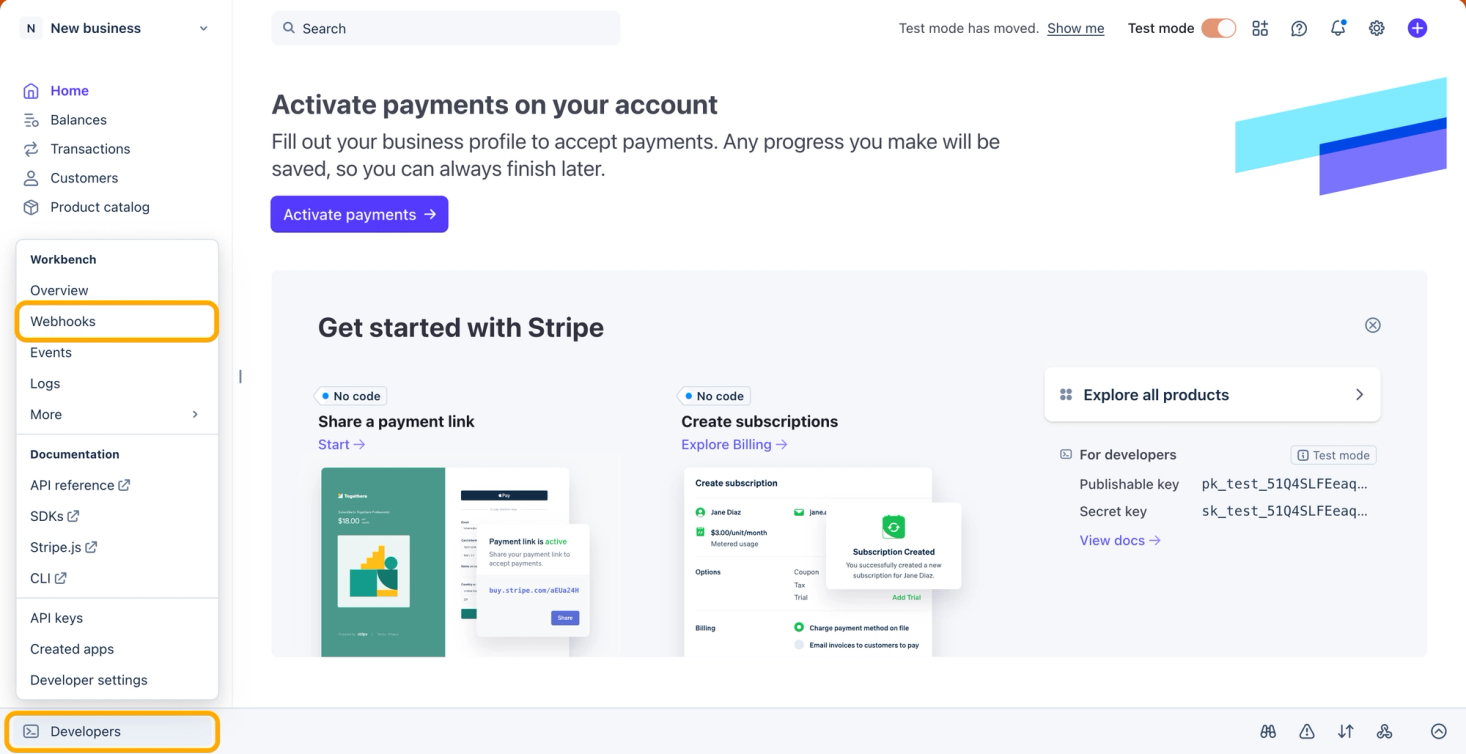
1. In your Stripe admin panel, navigate to the Developers section in the bottom left corner of the screen.
2. There, navigate to the API keys tab. You will see Publishable key and Secret key there.
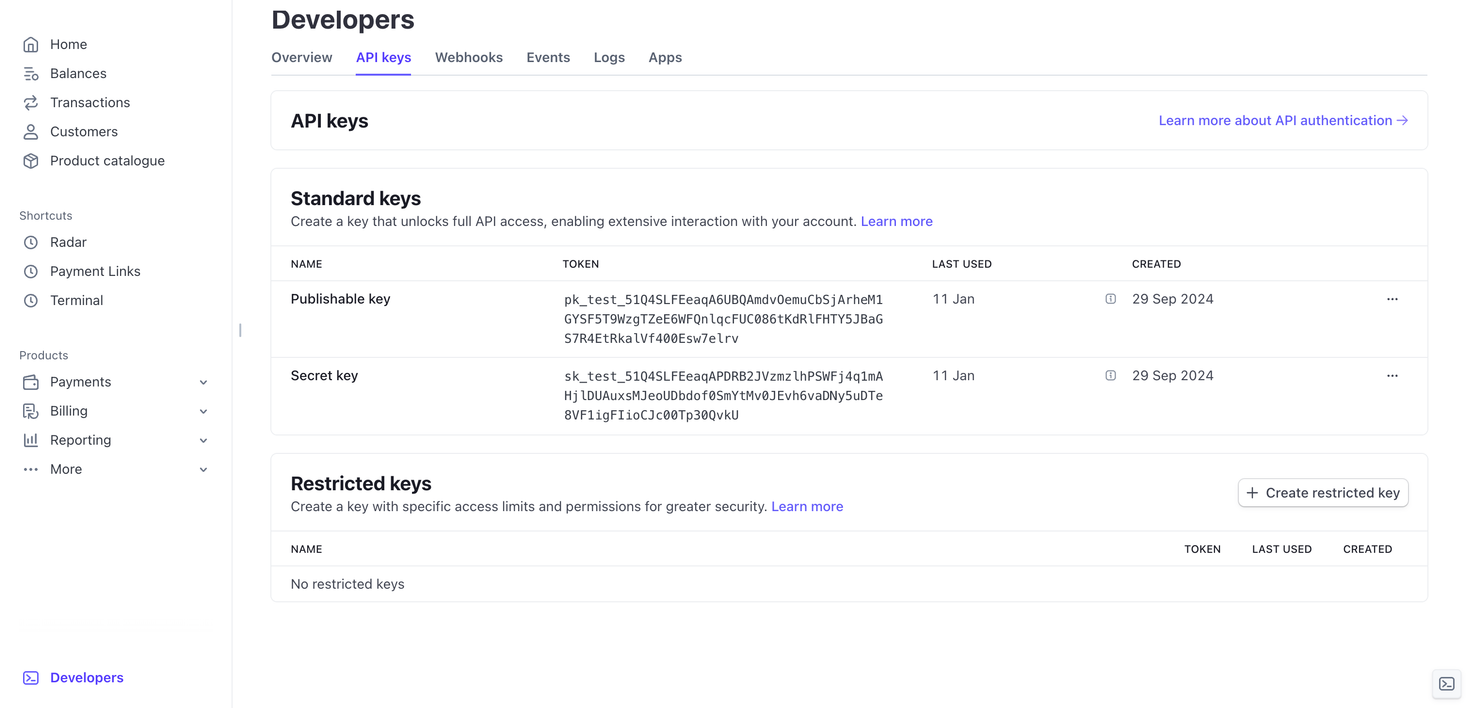
3. Copy the Secret key.
4. In your 🌱kvitly Dashboard navigate to Integrations → Online payments.
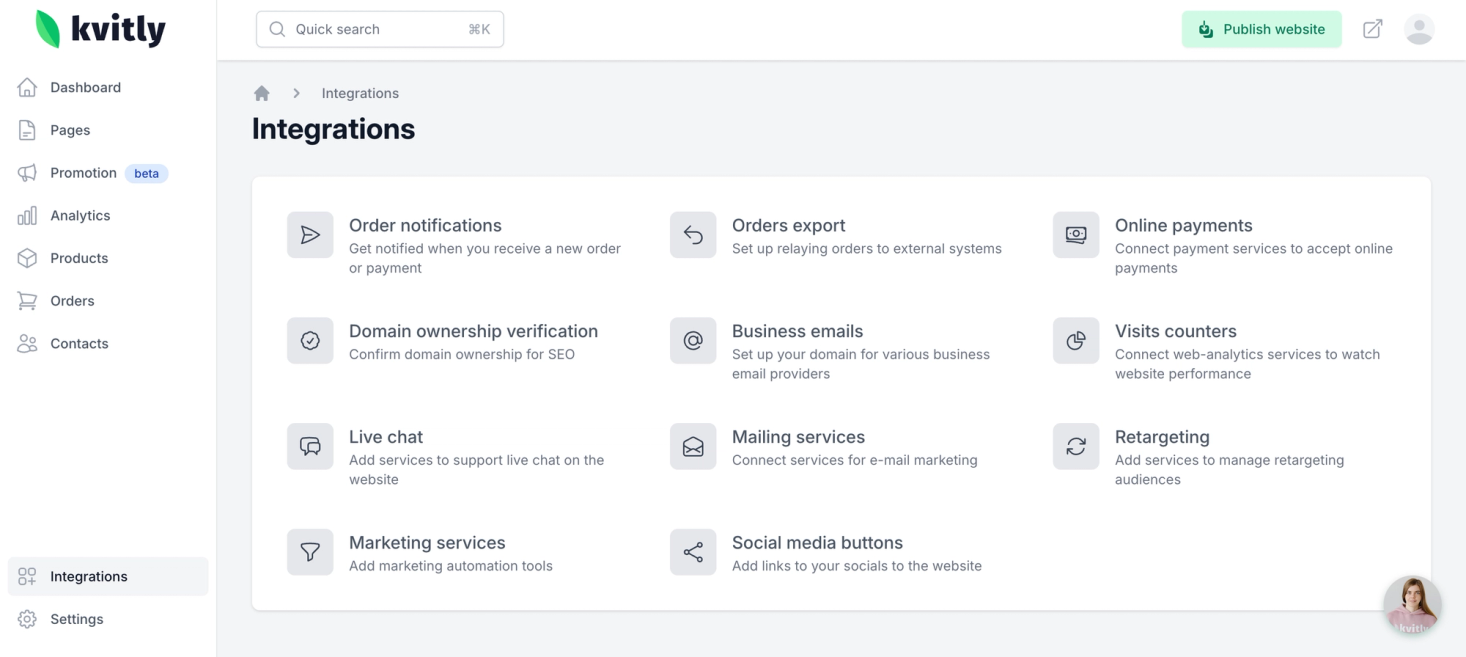
5. Find the Stripe integration there and paste your Secret key to the Secret key field.
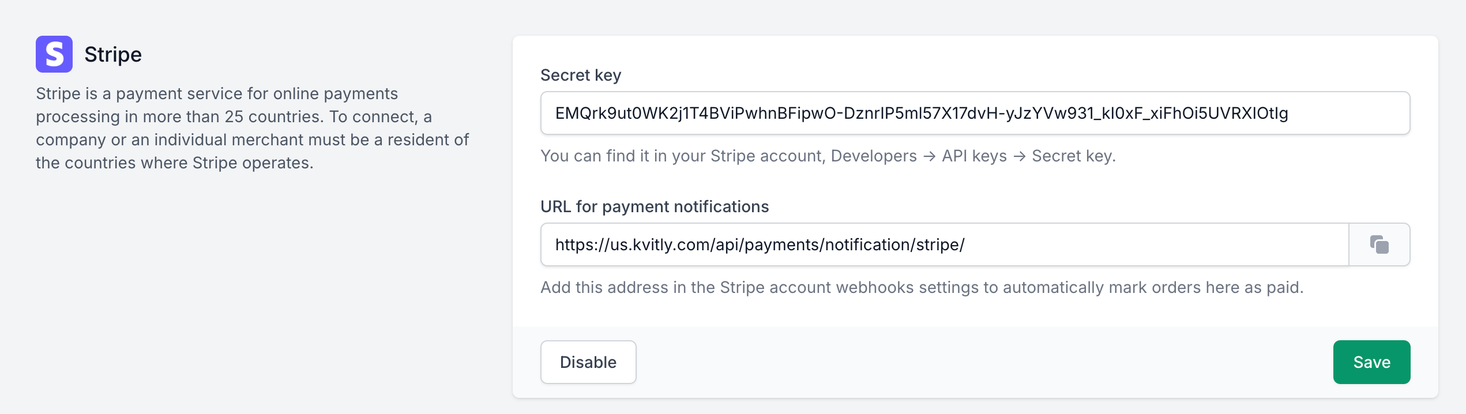
6. Click on Enable button.
Stripe has different credentials for Production and Test modes. If you are in test mode, you will see it in your Stripe admin panel. Once you copy the secret key from the test mode, you will be go through the puchase flow on your website yourself using the test card with the number 4242 4242 4242 4242 as your payment card. Once you go through the verification process in Stripe and disable the Test mode, copy the production Secret key and update it in your 🌱kvitly settings.
To complete the setup, we need to configure the webhooks. This is how Stripe system will let 🌱kvitly know that the order was paid. To do this, follow these steps:
1. In your Stripe admin panel, navigate to the Developers section in the bottom left corner of the screen and select Webhooks there.
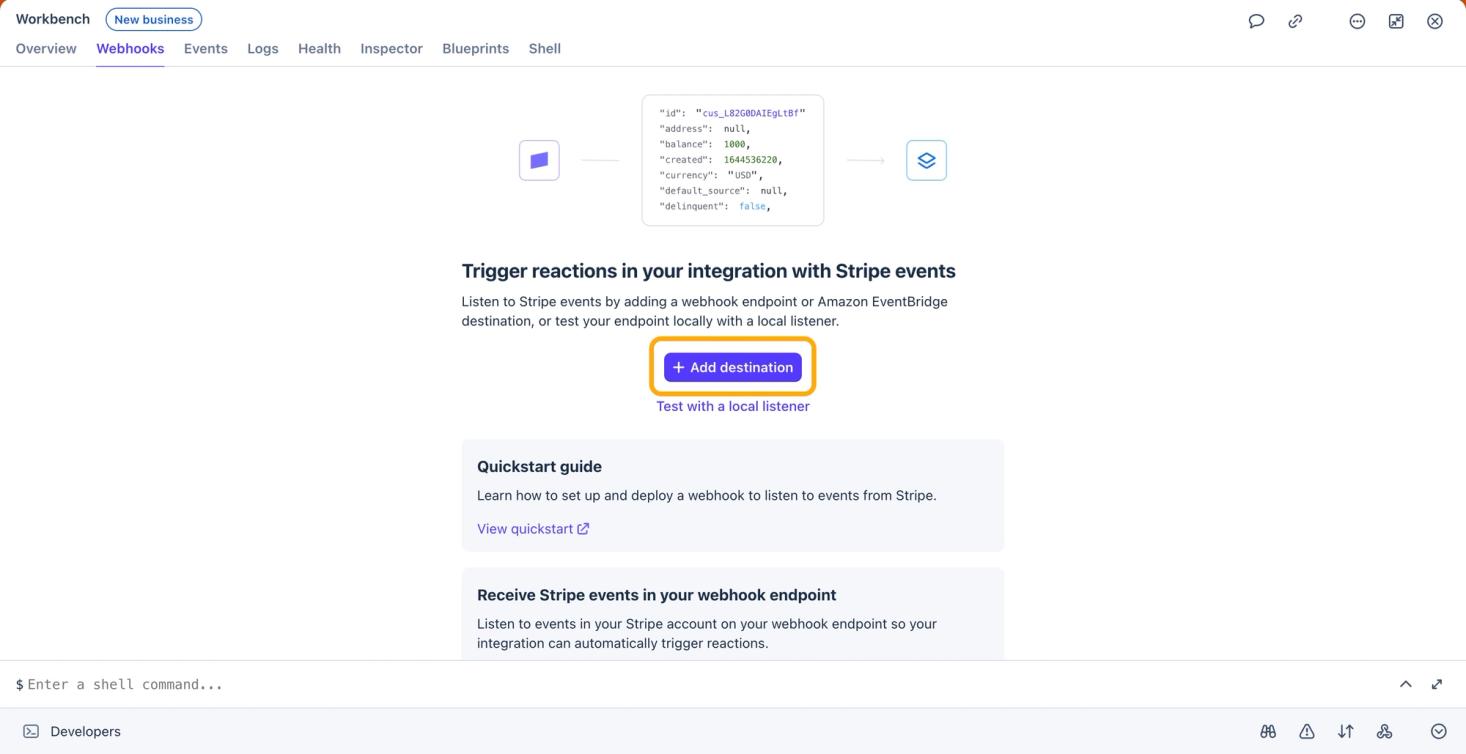
2. Click on Add destination button
3. Leave Your account selected

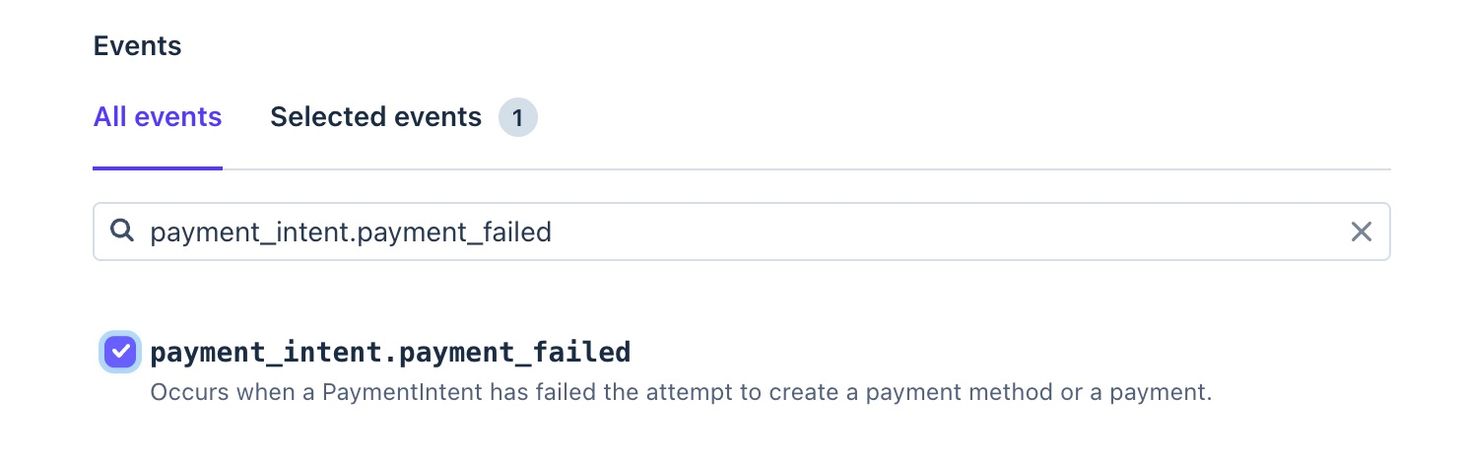
4. In the search bar, find and check events payment_intent.payment_failed and payment_intent.succeeded
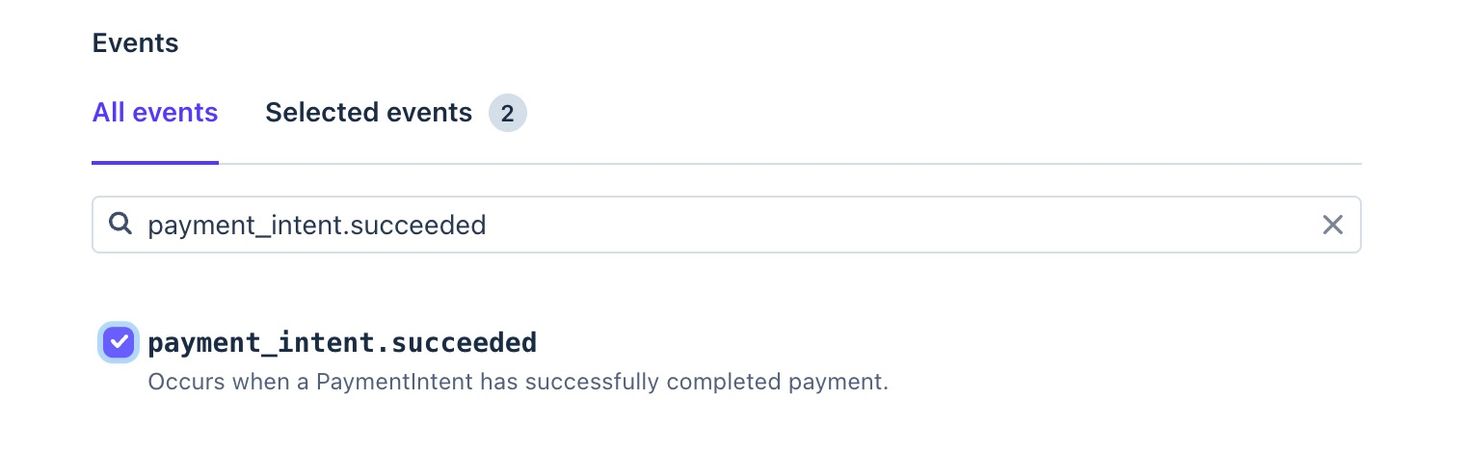
5. Switch to the Selected events tab to make sure that both events are added and click on Continue button.

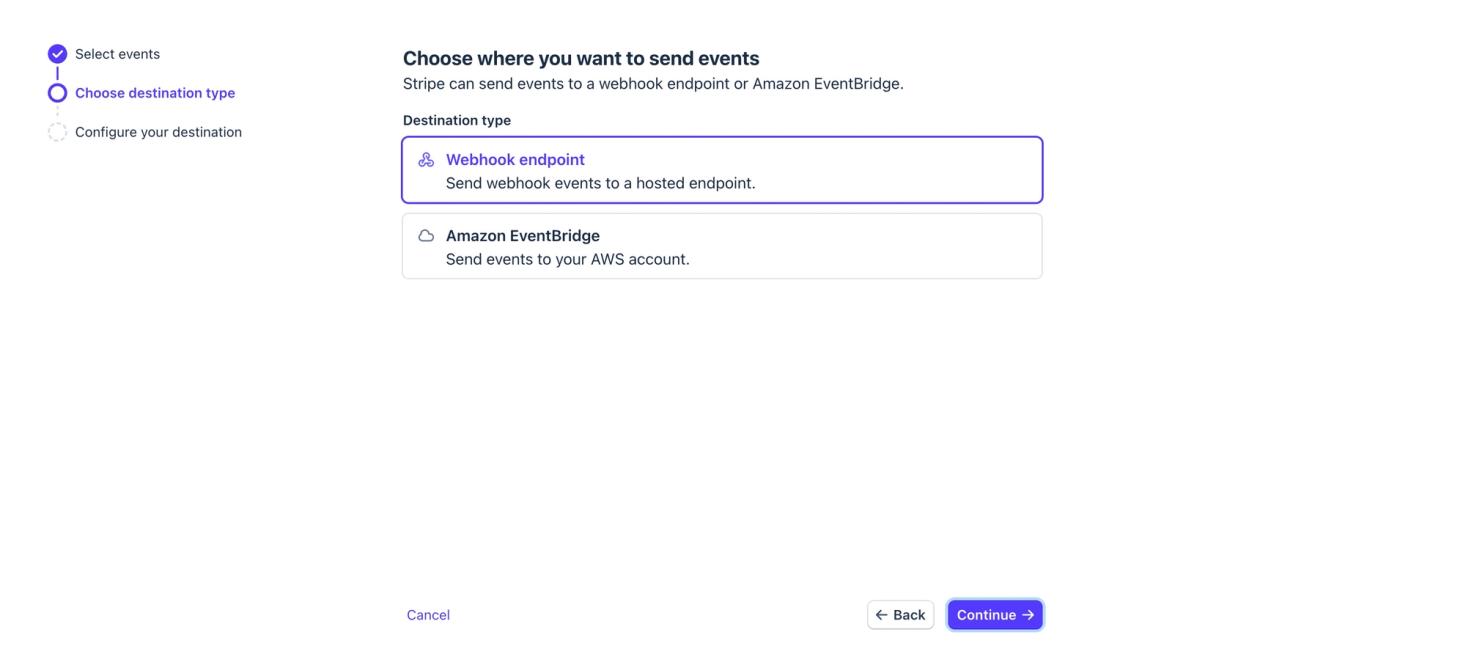
6. Select Webhook endpoint as destination type and click Continue
7. Add kvitly as the name of your destination (you can use any name).
8. Enter the URL for notifications from your 🌱kvitly Stripe integration setup section (for the US region it will most likely be https://us.kvitly.com/api/payments/notification/stripe/ ) as Endpoint URL.
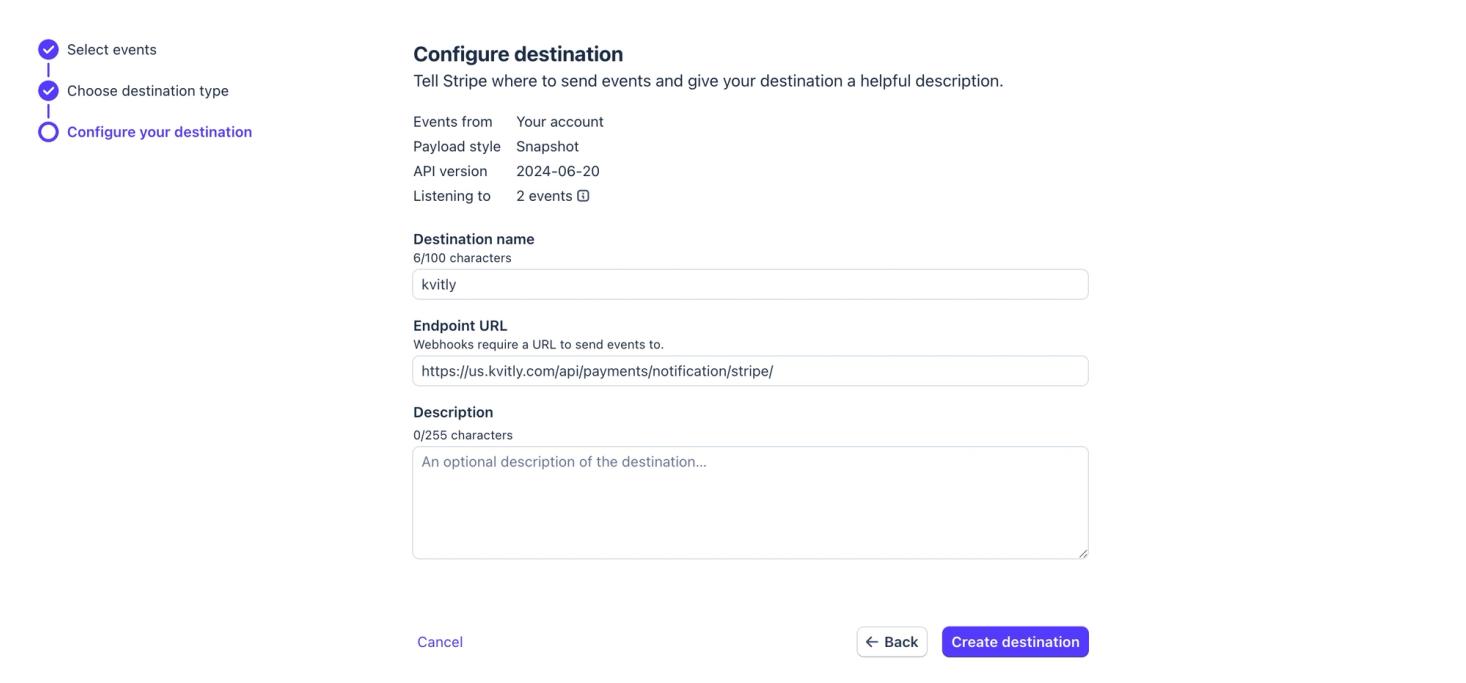
5. Click on Create destination button at the bottom of the screen.
6. Done! You can close the developer section in Stripe now. Webhooks setup is now complete.
Please rememebr about Live and Test modes. If you want to test integration before going live, configure them in Test mode and don't forget to replicate the setup in Live mode once you're ready to go live.
Once you’ve enabled the integration, you need to turn on online payments on the form where you want to use it. To do it, follow these steps:
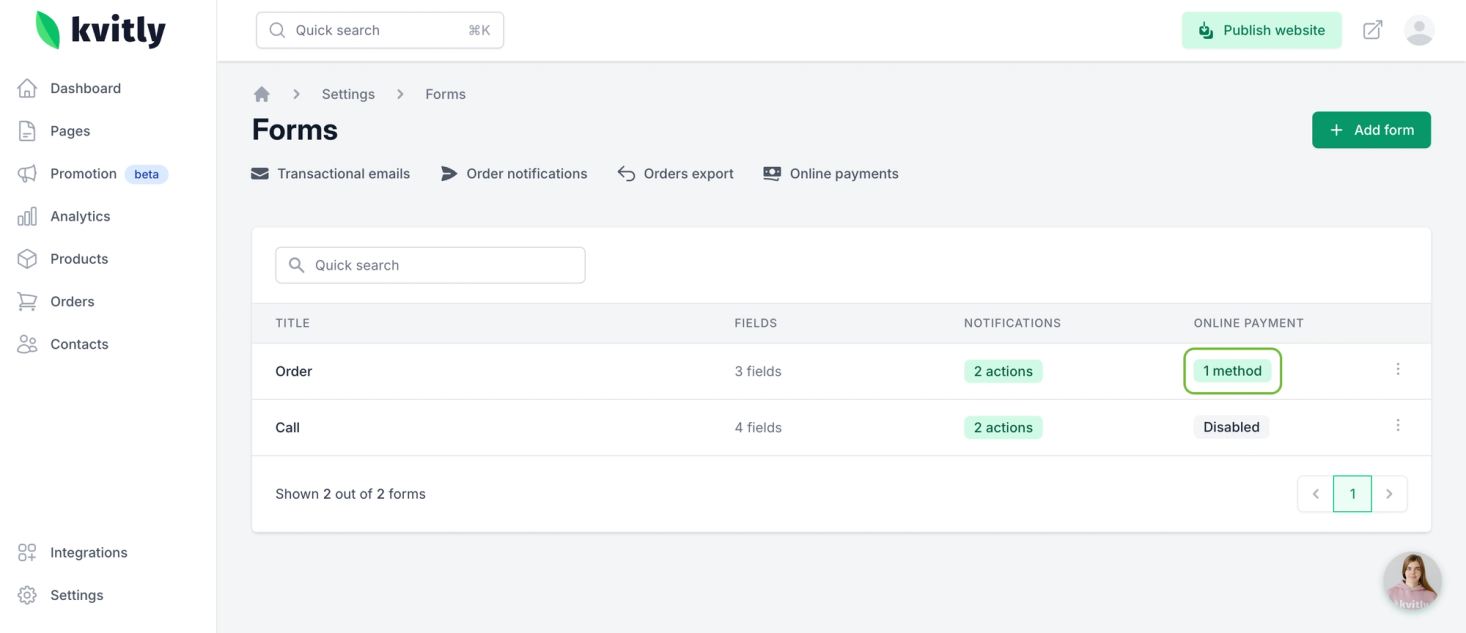
1. In your 🌱kvitly Dashboard navigate to Settings → Forms.
2. Select the form where you want to turn on online payments. Make sure one of the fields of this form has type Email, it is required for payment systems.
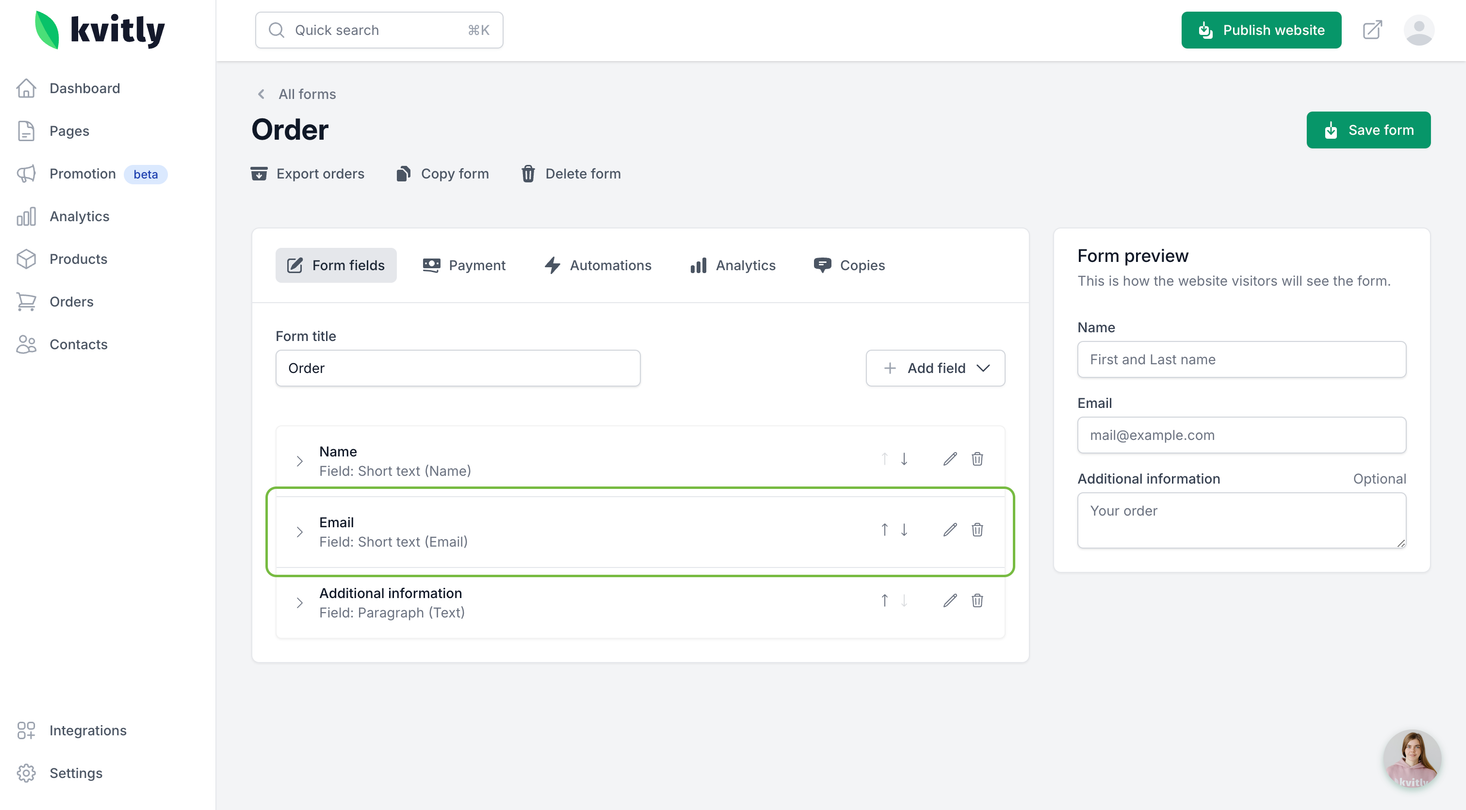
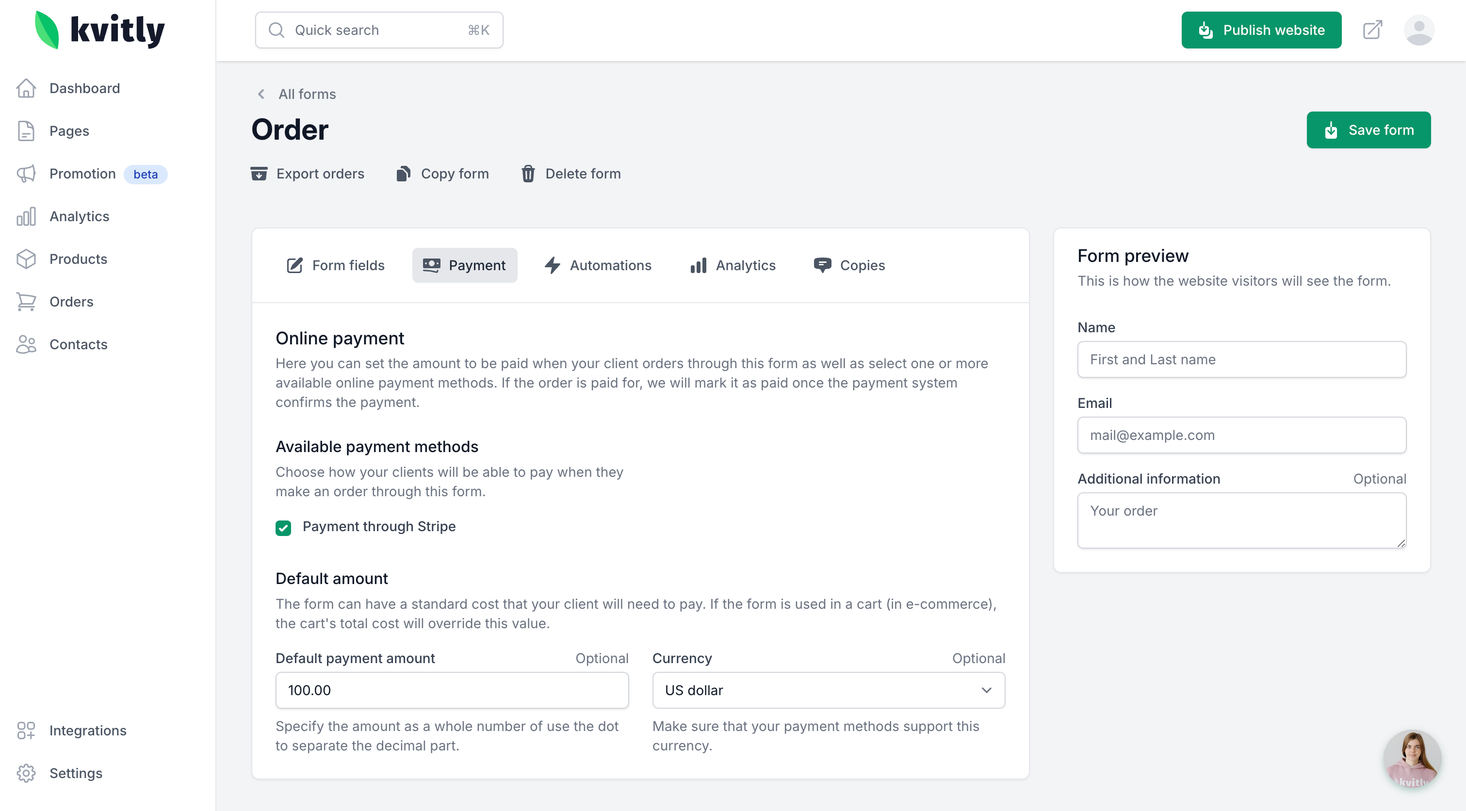
3. Go to Payment tab in the form settings.
4. If you have configured the payment integration, you will see the list of available payment methods there. Select the payment methods you want to enable for this form. If the form is not used for the cart in e-commerce setup, also add:
- Default payment amount: amount to be paid once someone fills in this form.
- Currency: select the payment currency (should be supported by your payment gateway).
5. Save your form and publish the website. Once the payment method is enabled, you will see it indicated in the list of forms.
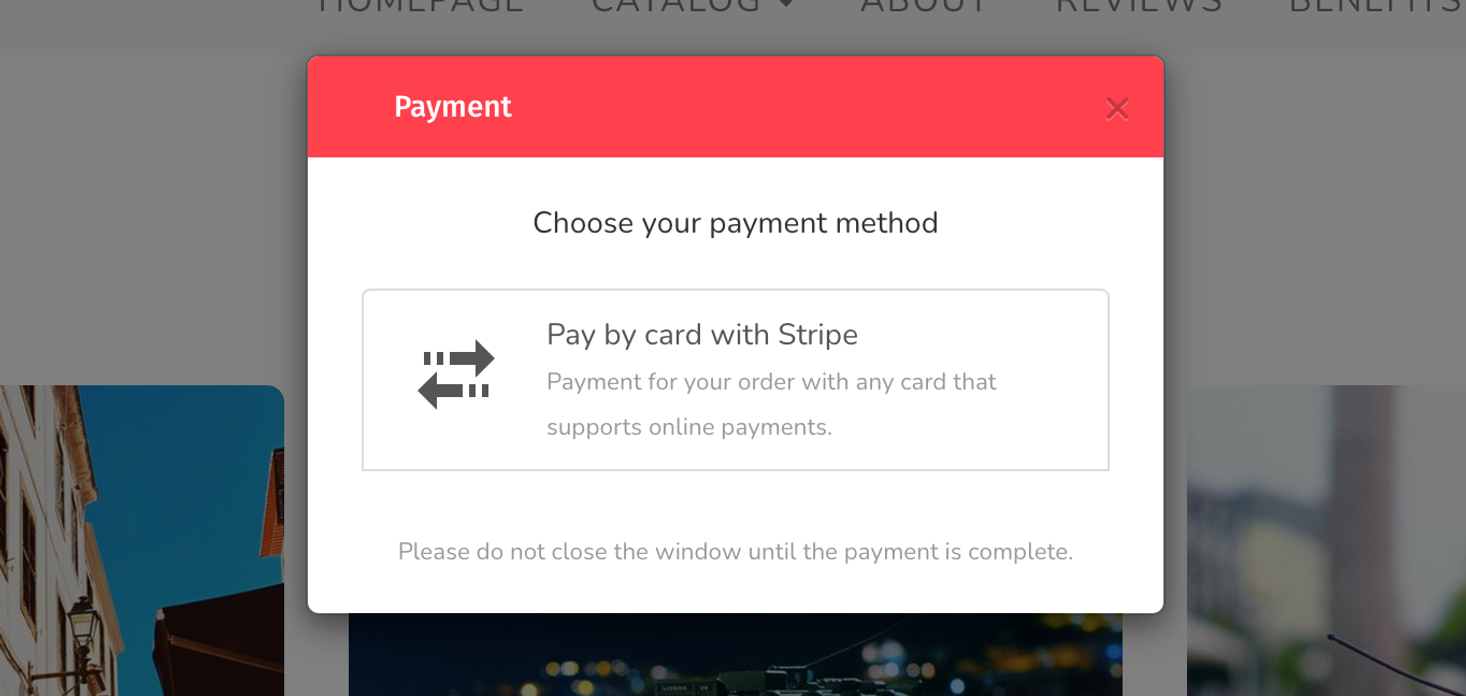
Once everything is saved and published, you will see the checkbox Pay online on your website form.
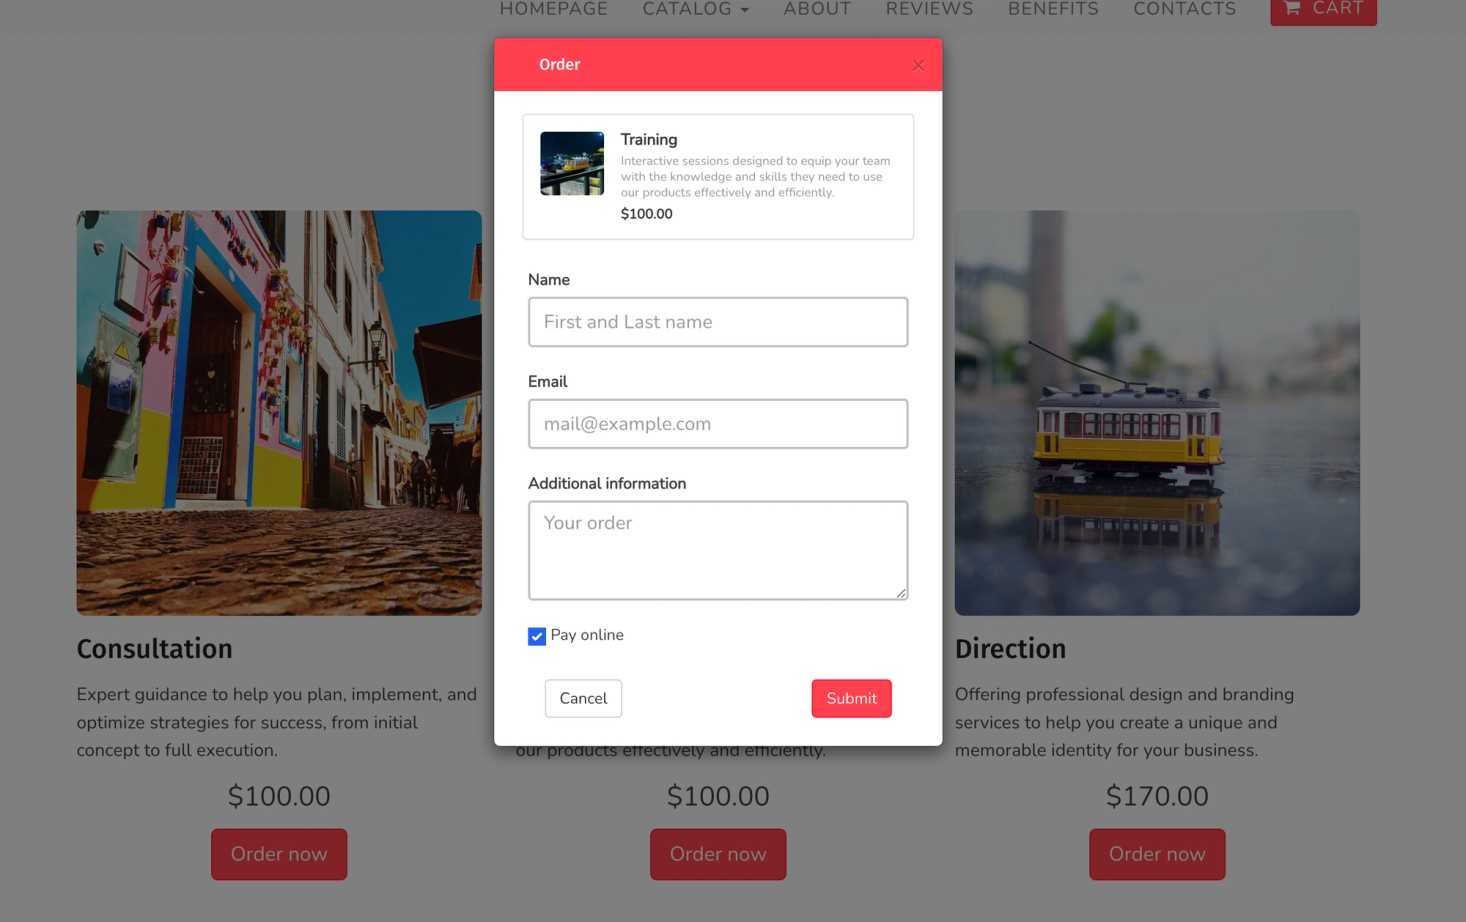
Once your client submits this form and has it clicked, they will be redirected to the secure payment page to complete their payment.
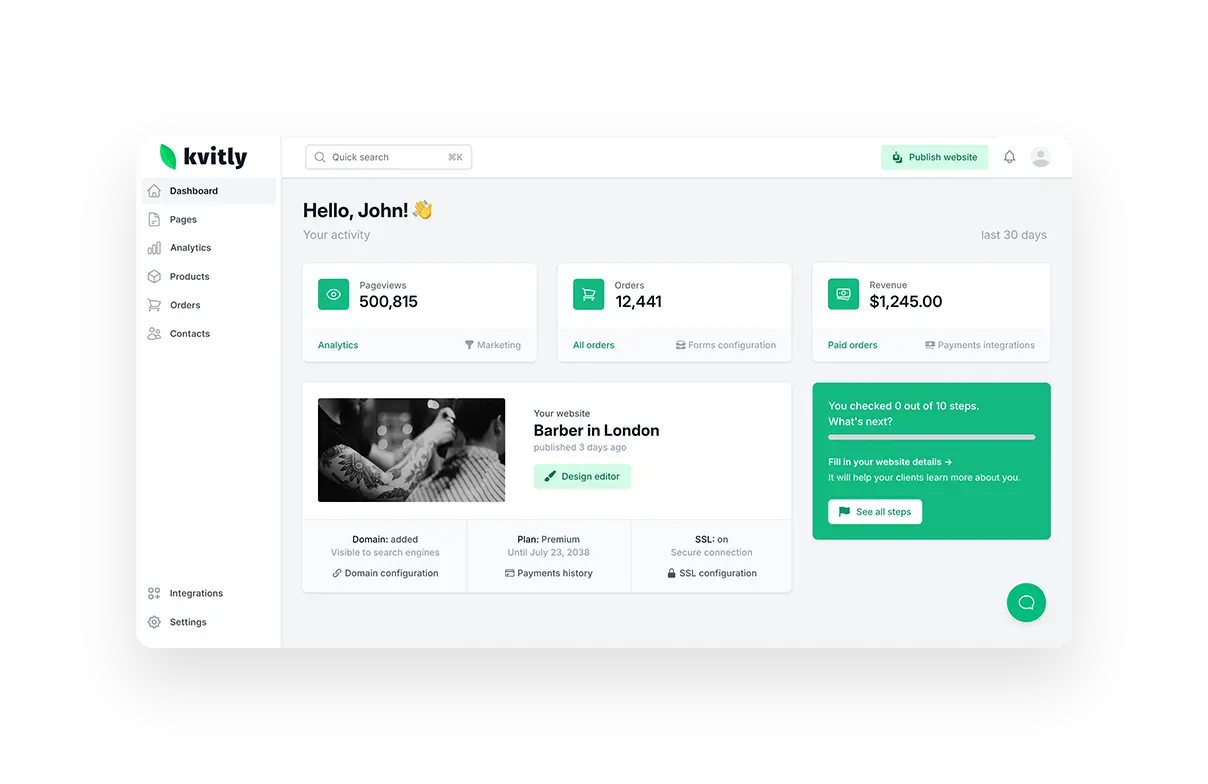
Once the order is paid online, you will see it as Paid in the list of orders in your Orders section. Paid orders together will build Revenue card value on your 🌱kvitly Dashboard.
Still have questions?
Feel free to contact us via chat on our website. We’re online weekdays from 10 AM to 6 PM CET.
Wanna talk to a person?