Knowledge base
Setting up conversion goals for analytics systems
Using the goals settings, you can track user actions on your website, such as form submissions or payments, in analytics and retargeting systems like Google Analytics, Meta Pixel, or Yandex.Metrika. This is particularly useful for measuring advertising effectiveness, analyzing your sales funnel, and setting up remarketing campaigns.
Step-by-step instructions
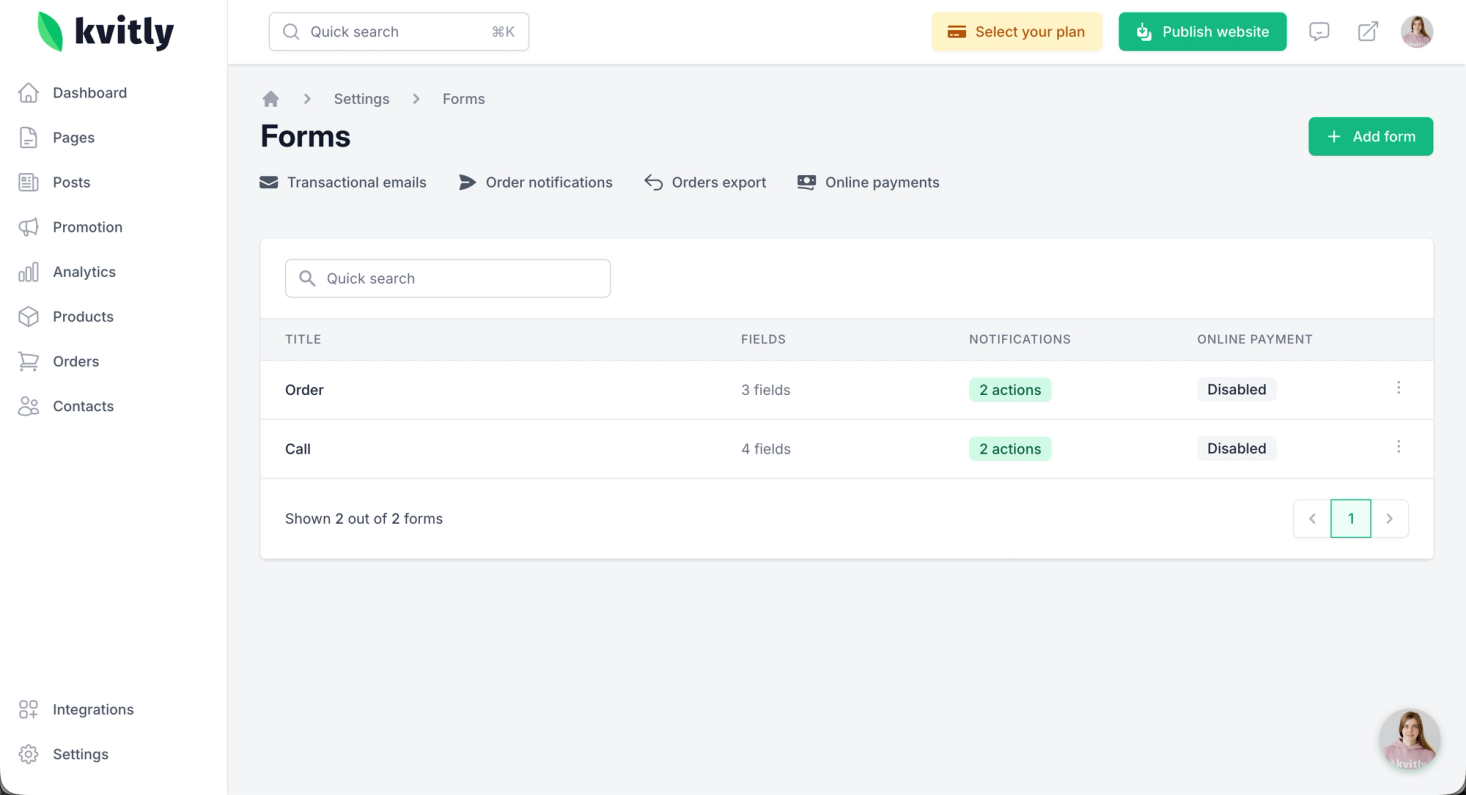
1. Navigate to the form goals settings
From your 🌱kvitly dashboard, go to the Dashboard → Forms configuration section
And select the form for which you want to configure events.
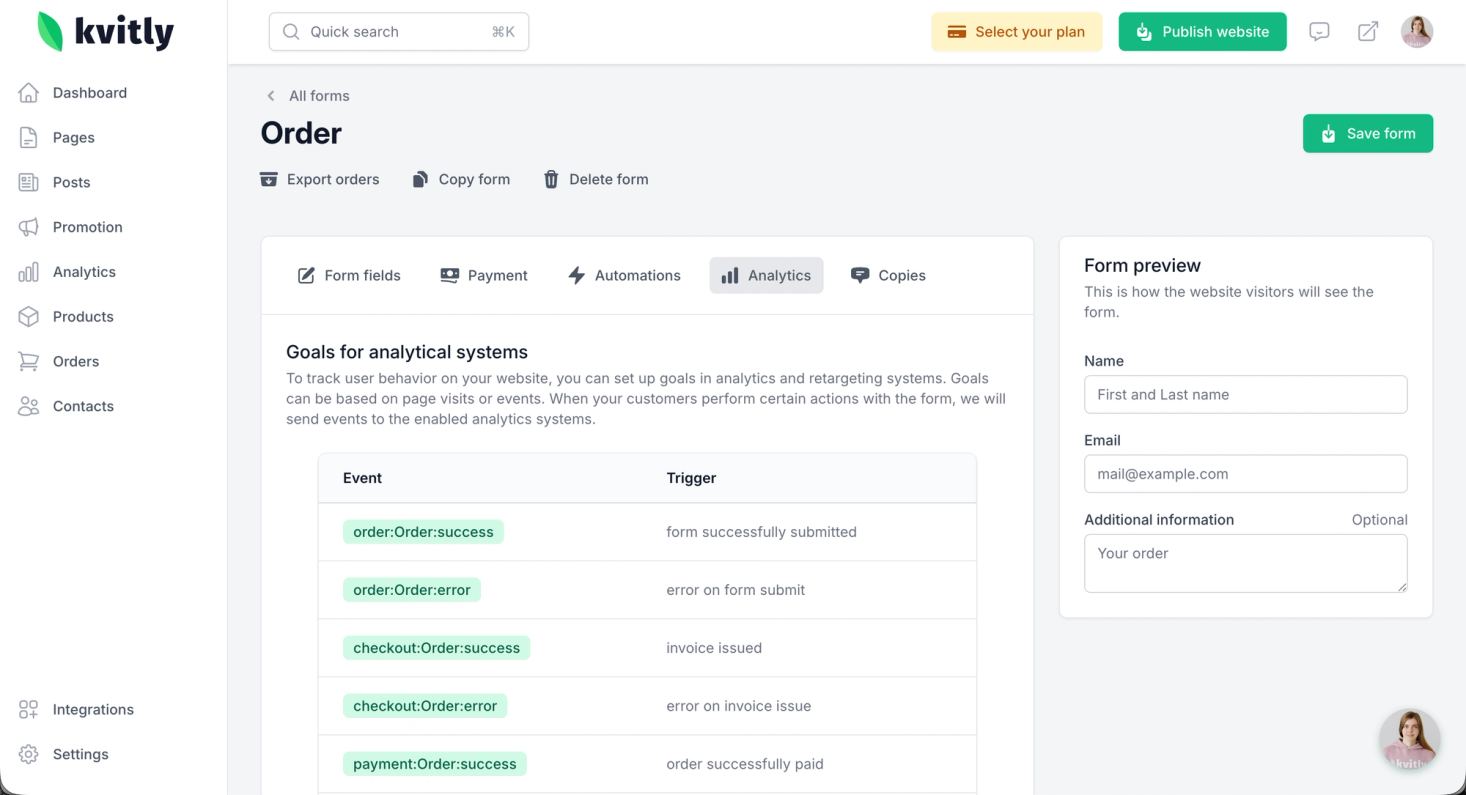
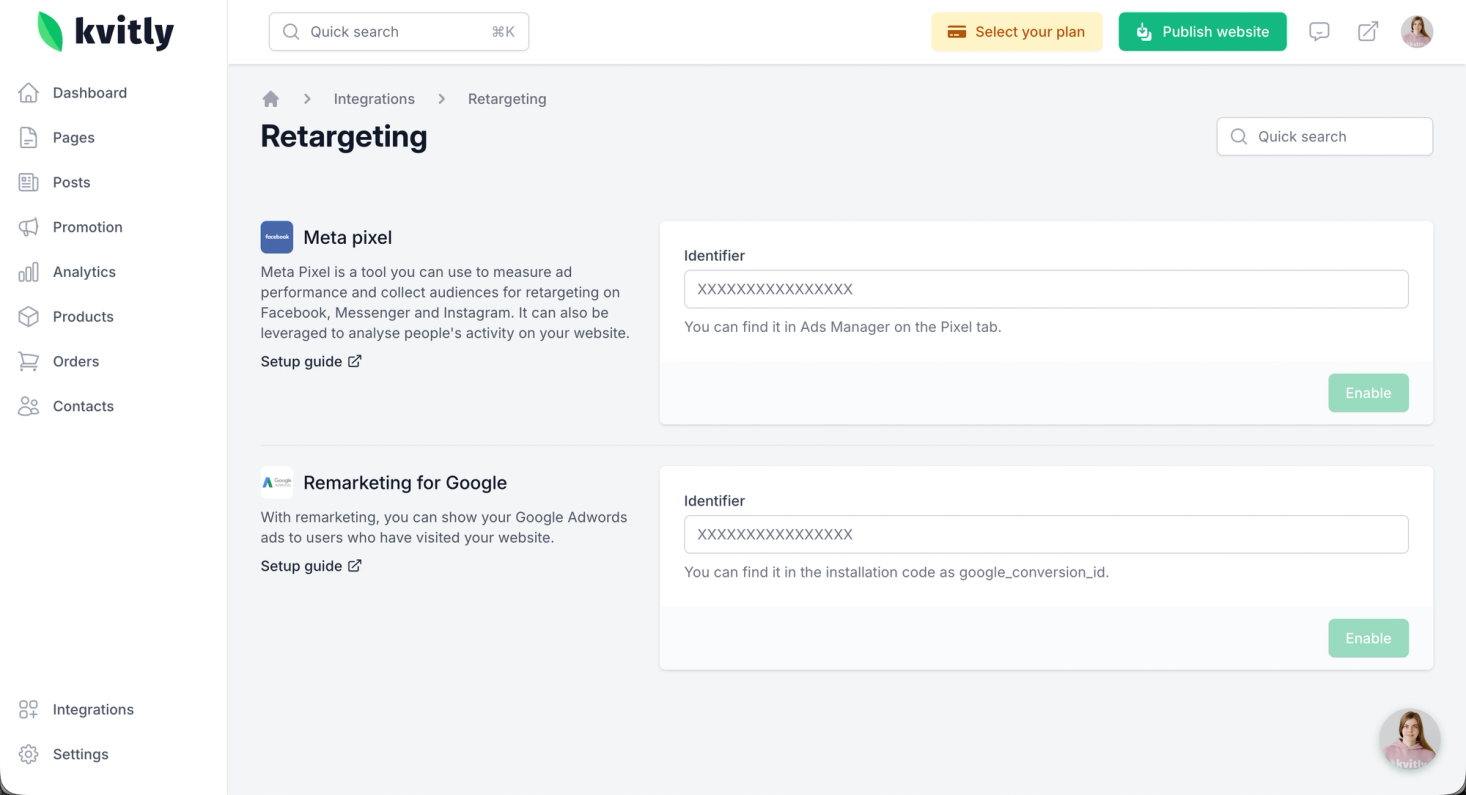
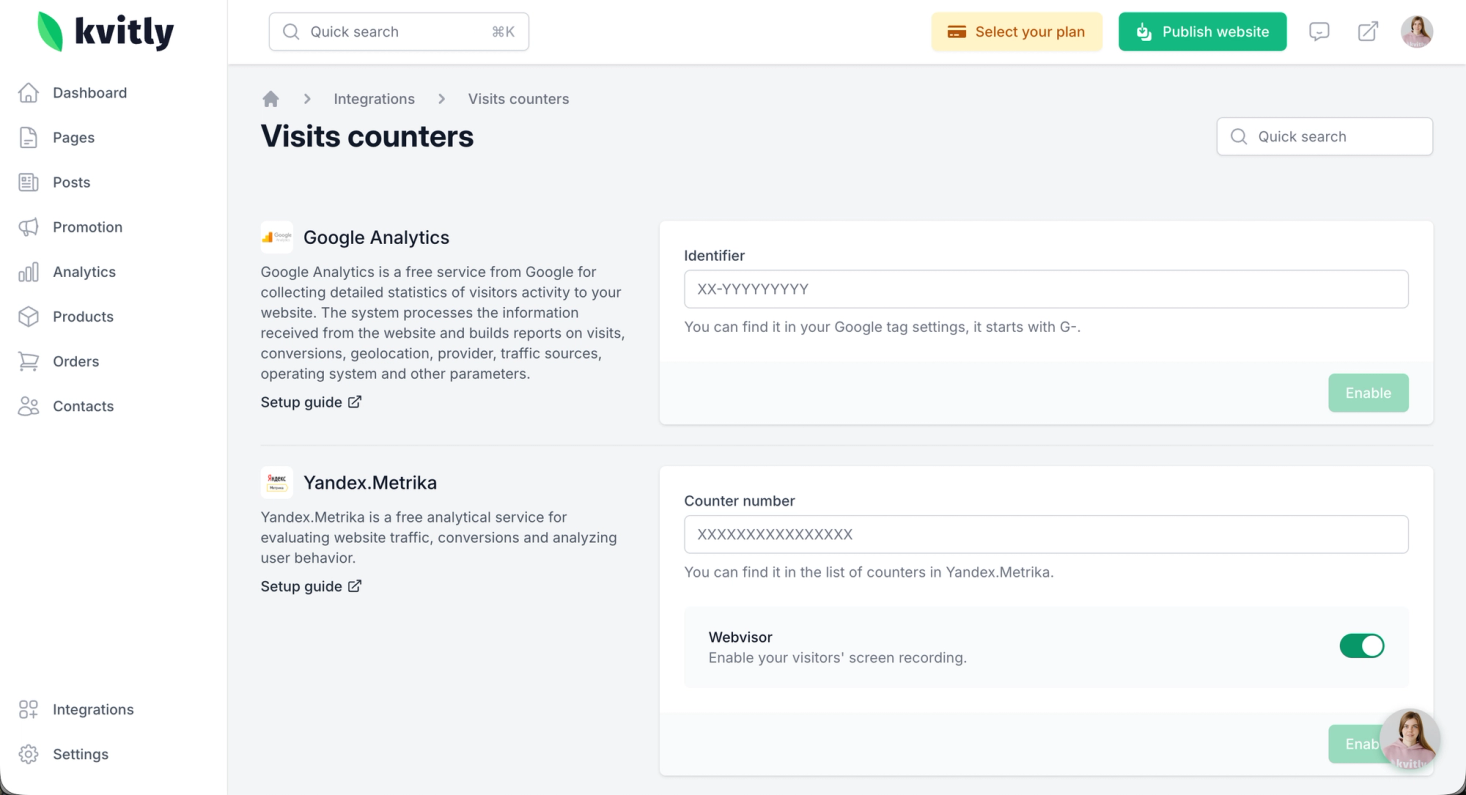
Switch to the Analytics tab and find the Available analytical systems block.
2. Enable the required analytical services
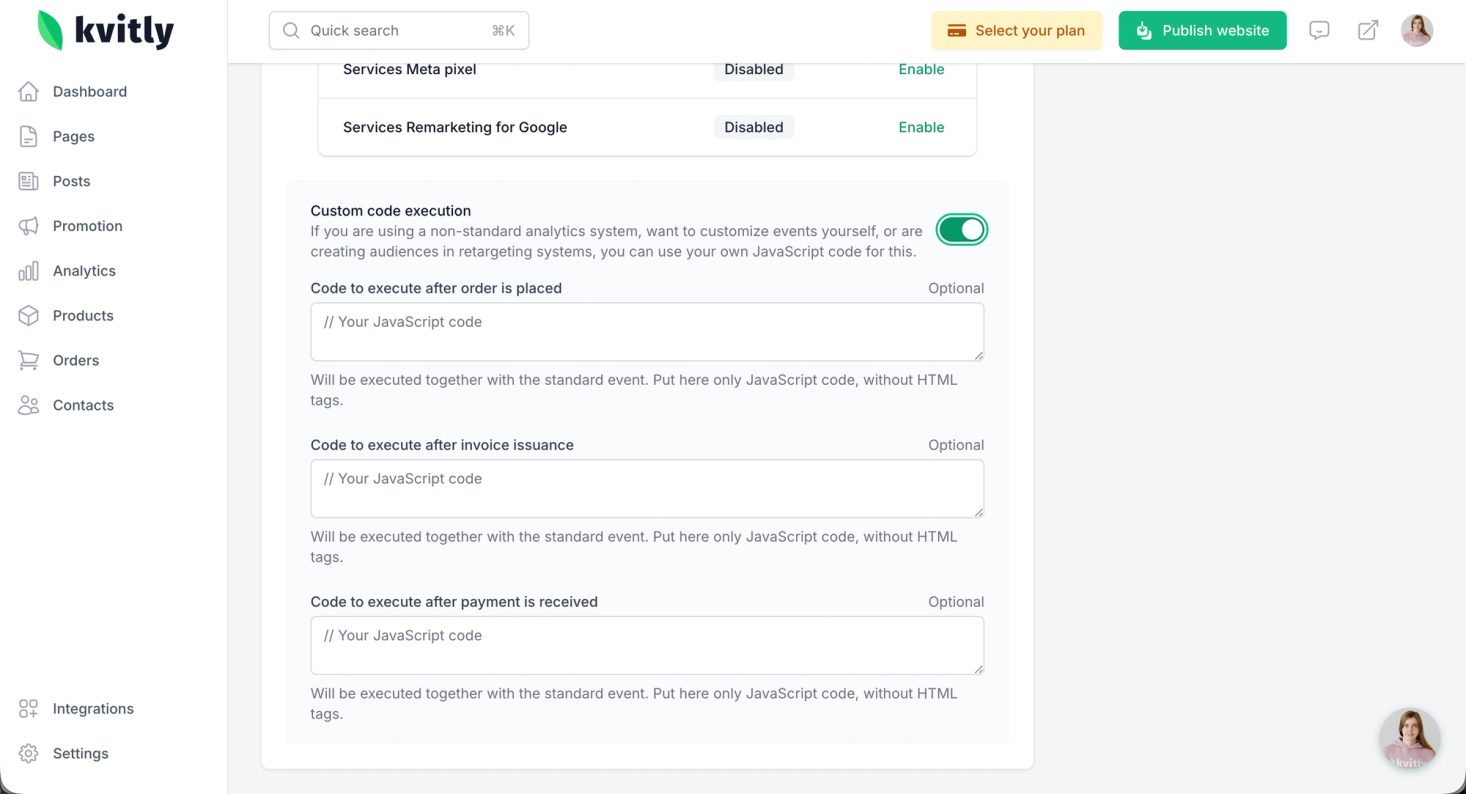
In the settings block, you will see a list of supported services. To start sending events to a service, click the Enable button next to it.

- Services Google Analytics –> for tracking in Google Analytics.
- Services Yandex.Metrika –> for tracking in Yandex.Metrika.
- Services Meta pixel –> for tracking in Facebook and Instagram Ads.
- Services Remarketing for Google –> for creating audiences in Google Ads.
Important: For events to be delivered correctly, you need to add Integrations from the Visits counters page and Retargeting page.
3. Understand available events and triggers
Once enabled, 🌱kvitly will automatically send the following events to the selected systems when users interact with your form:
EventTrigger (When it is sent)
order:Order:success Form is successfully
submitted.order:Order:error An error occurred during form
submission.checkout:Order:success An invoice (bill) has been successfully issued to the
customer.checkout:Order:error An error occurred while issuing the
invoice.payment:Order:success The order has been successfully
paid.payment:Order:error An error occurred during order payment.
Nuances of payment-related events:
Events related to payments (payment:Order:success / payment:Order:error) will only be sent after you have configured an integration with a payment service (e.g., CloudPayments, PayPal and so on) in 🌱kvitly.
Note: Some payment gateways may not correctly redirect the user back to your website after a successful payment. This may cause some successful payment events to not be recorded in your analytics.
4. Configure goals in your analytics systems
After enabling the integration in 🌱kvitly, events will be sent to your analytics. To track them as Conversions or Goals, they often need to be set up on the side of the analytics service.
5. Save and test your setup
After making changes, test them
To test if events are being sent:
1. Open your website in a private/incognito browser window.
2. Submit a test form or complete a test payment (if configured).
3. Check the real-time reports in your analytics service (e.g., GA4 Realtime, Facebook Events Manager Test Events) to see if the event appears.
Your form is now configured to send valuable conversion data to your analytics systems!
If you are using a service not listed:
If you need to send events to another analytics or retargeting system, you can set up your own code execution. Use the "Custom Code" section in your form or website settings to add a JavaScript snippet that will fire when the form events are triggered.
Still have questions?
Feel free to contact us via chat on our website. We’re online weekdays from 10 AM to 6 PM CET.
Wanna talk to a person?